


Vinyl Siding Keeps Coming Loose? (We Have a Fix!)
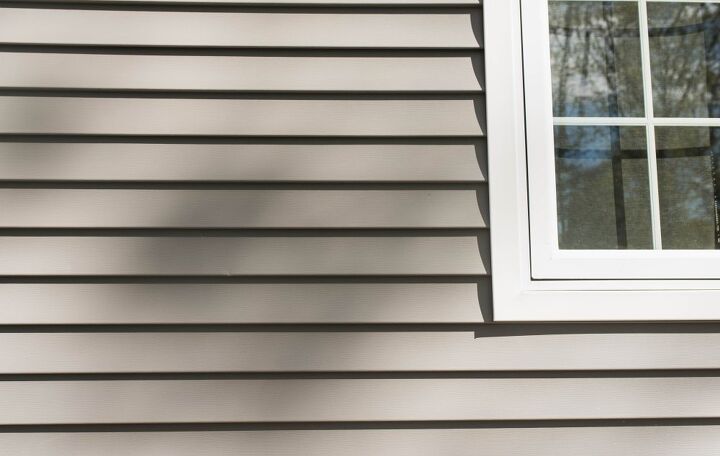
Vinyl siding is a popular exterior cladding option known for being lightweight yet highly durable. Although vinyl siding is damage resistant for the most part, it doesn’t mean that you might never face maintenance concerns over its lifetime.
One issue that might arise is that your vinyl siding keeps coming loose. The wind is more likely to blame for slowly working a piece of your vinyl siding loose. Thankfully, fixing loose vinyl siding on your own is a relatively simple process.
Vinyl siding can be shaken loose due to poor installation or highly windy weather conditions. If your siding is unattached or dangling, take your siding snips, or a pair of needle-nose pliers. Grab ahold of the bottom track and give it a twist with your snips every couple of feet. Squeeze caulking into the track before clipping it back together for extra insurance.
Do You Need Vinyl Siding Repair or Replacement?
Get free, zero-commitment quotes from pro contractors near you.

How to Fix Loose Vinyl Siding
If your vinyl siding keeps coming loose, it’s time to take matters into your own hands to avoid any severe damage to your home. Handling simple repairs on your own is easy enough, and more than likely, you’ll need to reconnect the J-shaped buttock with the top locking ridge. But let’s take an in-depth look at how to fix loose vinyl siding.
Step 1: Gather the Proper Tools and Materials
Before you start fixing your loose vinyl siding, you’ll want to gather the proper tools and materials to do so. You can easily find siding removal tools at your local home supply or hardware store. If not, you can order one online. These kits are relatively inexpensive and come in handy when it comes time to handle your vinyl siding.
Here is a list of the tools and materials you will need to fix your loose vinyl siding:
- Siding removal tool
- Work gloves
- Ladder, if needed
- Hammer, optional
- Galvanized steel or aluminum roofing nails, optional
- Caulking gun, optional
Step 2: Prepare Your Work Area
With any home repair, you want to make sure everything has been appropriately prepared in your area. Even if it is a simple task, you’ll want to ensure your space has been set up and ready to go should you encounter any surprises once you get started.
You’ll want to start by cleaning the area, removing any built-up debris or dust that has accumulated due to the loose vinyl siding. Taking the time to clear out this area ensures a tighter fit and reduces the chances of you having to do the whole process over again soon.
If you are using a ladder to access the area with the loose vinyl siding, make sure it is positioned in a way that is safe and secure. In some instances, you might have to access your rooftop to handle your repair, in which case you’ll want to make sure you can get up and down quickly with the help of your ladder.
Step 3: Consider Your Safety
In addition to making sure your ladder is in a safe position, you’ll want to take necessary precautions to protect your body, as needed. Always use working gloves to protect your hands while handling your vinyl siding. If required, you can always use protective glasses to prevent debris from falling into your eyes, especially when working from a ladder.
Always remember that your safety comes first, so don’t be afraid to incorporate any personal protective equipment as you see fit.
Step 4: Locate the Disconnect Between Pieces
More than likely, if your vinyl siding keeps coming loose, it is because of a disconnect between two pieces. Using your siding removal tool, you can quickly identify where the disconnect is and how severe it is.
With the lower edge of the loose siding piece in hand, use the other hand to fit your siding removal tool underneath. As you maneuver under the loose siding piece, begin gently pulling with the device. This simple process will help you identify the full extent of your disconnect between the loose vinyl pieces.
Step 5: Snap Loose Edges Back Into Place
Once you have discovered all of the areas of looseness, you can start to snap the loose edge back into its proper place alongside the locking ridge. While this process should do the trick, if you have addressed this concern before in the same areas, you might want to consider additional tools to help prevent your vinyl siding from coming loose again in the future.
Using your silicone caulking, place a small bead along the groove to help the siding connection stick together and form an even stronger bond. If you decide to use caulking, be mindful of wiping off any excess as it can become visible from a distance if you’re not too careful.
Step 6: Addressing the Nail Hem
If you notice that you need new nails in your nail hem while inspecting your loose vinyl siding pieces, you will thankfully have the necessary tools to do so. Your siding removal tool will help you to expose any nail hem in need of new nails.
Remember that if you are replacing nails, you need to be particular about your purchase nails. Galvanized steel or aluminum roofing nails are required for your nail hem, and they must be at least 3/8 inch in size to function correctly.
Using your hammer, drive your new nails into the center slots on your siding nail hem. Once finished, snap the bottom edge of your vinyl siding back into the locking ridge. Again, if you feel it is necessary, you can use caulking for a more secure fit for this portion.
Other Quick Loose Vinyl Siding Fixes
If you notice that you have loose vinyl siding and want to try alternatives to removing the whole pieces and reinstalling, there are a few quick fixes you might want to consider.
Crimping the Siding Board
If the piece of your siding is completely detached or dangling, you can take siding snips or any other needle nose pliers you might have around the home to crimp it. Grab ahold of the bottom of your siding with the pliers and twist it every couple of feet to create resistance. For added security, you can add calking into the track before putting your siding back together.
Depending on how much crimping you create on the bottom edge of the siding, you will have to use a good amount of force to squeeze it in until it clicks, but it should still click into place. Any missing areas that aren’t fully secured will show as a bump if you look down the line of your board.
Once you’ve done this process, you should never have to worry about that siding coming apart ever again. It may become loose again, but the crimping and the caulking combination will prevent it from separating altogether.
Screwing Up From the Bottom
Find a drain hole at the bottom of your vinyl siding board. Then, using a 1/2 or 3/4 inch long screw, drill a screw up from the bottom of your siding. This method will lock your loose board secure onto the panel below it. As a rule of thumb, you can screw every 2 feet or so to make sure the board holds tight.
Check at your local hardware store or online for color-matching screws that will match the color of your siding. That way, you won’t have to worry about any unsightly screws showing from a distance.
Much like the other methods of holding your siding together, use caulking for the second layer of security.
Caulking It
Lastly, you can rely on caulking alone to secure any loose vinyl siding boards, although it’s not the most recommended option for the simple fact that it’s not the most reliable. Using caulking, drop dabs into the bottom track of your loose siding board.
Be careful not to use too much caulking in the process because the excess can squeeze out when you click the boards together. If that does happen, use mineral spirits to wipe it clean as quickly as possible.
Do You Need Vinyl Siding Repair or Replacement?
Get free, zero-commitment quotes from pro contractors near you.
Can You Fix Loose Vinyl Siding on Your Own?
If your vinyl siding keeps coming loose and you want to take matters into your own hands, luckily, you should be able to relatively quickly. Depending on how loose the board is, you could take several different approaches to secure it back together.
Common occurrences might mean there is a deeper issue with installing your vinyl siding and might be worth calling in the pros to take a second look. Otherwise, try out these tips and tricks, and hopefully, you shouldn’t have any more issues with your siding again in the future.
Are you interested in taking a look at other DIY projects for your vinyl siding? Take a look at how to cut exterior vinyl siding or how to install an outside light on vinyl siding to see if either of these helpful tools might be looking for for the exterior of your home.

We are a team of passionate homeowners, home improvement pros, and DIY enthusiasts who enjoy sharing home improvement, housekeeping, decorating, and more with other homeowners! Whether you're looking for a step-by-step guide on fixing an appliance or the cost of installing a fence, we've here to help.
More by Upgraded Home Team


![10 Best Electric Pressure Washers – [2022 Reviews & Guide]](https://cdn-fastly.upgradedhome.com/media/2023/07/31/9070600/10-best-electric-pressure-washers-2022-reviews-guide.jpg?size=350x220)


