How To Install A Drip Edge On An Existing Roof
The roof of a home is perhaps the most important thing. Doing all that we can to provide proper maintenance can mean the difference between a roof that works appropriately and requires costly repairs. This is why it’s essential to have a drip edge. Except, how exactly do you install a drip edge on a roof that already exists?
First, you will need to put the wide flat flange under the first course of shingles. Then, make sure you apply the roofing cement to secure it into place. You’ll have to put some adhesive over the top of the drip edge as well and add some pressure. After it stays in place, secure it even further using roofing nails.
But for the amateur roofer, it can seem daunting to install your drip edge. This guide will tell you why you need the drip edge and how to install it properly. That way, you’re not at a loss of what to do.
Do You Need Tile Roofing Installation or Replacement?
Get free, zero-commitment quotes from pro contractors near you.

How Far Should The Drip Edge Be From The Fascia?
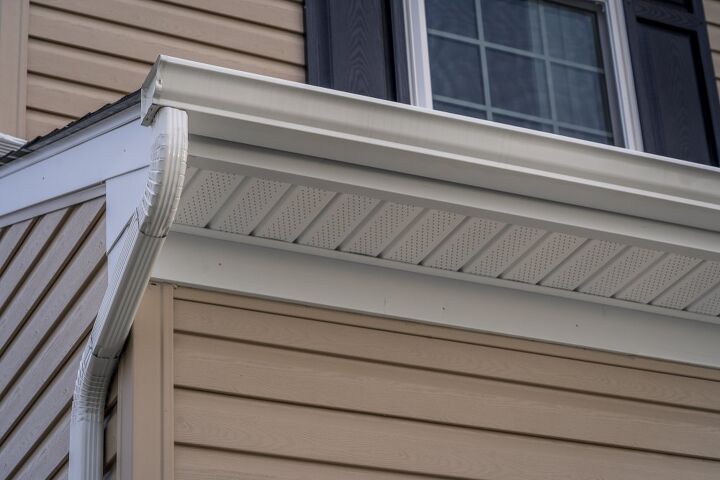
Generally speaking, you want the lower edge of your roof to extend past the fascia board by around ¾ inch. This is to allow runoff to drain into the gutters. Should the overhang be too short, the water will wind up dripping behind your gutters. This can lead to rotting of the fascia and the roof sheathing, stained siding, and even a flooded basement or eroded soil.
By installing the drip edge, you can remove the excess runoff that can be damaging to both the roof, the exterior of the home, and even the basement. Be careful to properly install because improper installation can lead to just as many water-related problems as having no drip edge.
How To Install The Drip Edge
Step 1: Fit The Flange
First, you will need to put the flat, wide flange under the first course of shingles. When doing this, make sure that none of the outer edges are sticking out past the gutter. If the edges don’t stick out, then pull your drip edge out just a little bit to compensate.
Step 2: Apply Roofing Cement
Next, you will need to secure this in place with some roofing cement. To do that, you need to add just a little bead of adhesive over the top of your drip edge. After you did that, apply some pressure to the shingle.
Step 3: Use Roofing Nails
It’s optional to step up the security by using some short roofing nails. You can position some roofing nails high on the shingle so that it helps to hold the drip edge in place.
Why A Drip Edge Is Needed
There are plenty of reasons why a drip edge is needed. First, it is meant to direct water away from the roofing fascias. This helps to prevent excess water from eventually rotting the fascia as time passes. Not only that, it helps to protect the edge of the roof decking from potential water penetration.
Drip edges will also seal any gaps that will be at the bottom of your roof. This will most likely be a gap between the fascia and the decking that can allow smaller animals like mice from getting into your attic. The last thing you want to deal with is a nasty pest problem.
The drip edge will also protect the bottom of your roof from a buildup of ice, like ice dams, that can happen in the colder months of the year. Most of all, though, it directs water away from your house, preventing flooding and promoting longevity in your roof.
Drip Edge Material Types
Like just about any other type of building or roofing material, there are several different options available. Drip edges can be made of a wide array of metals and plastics. Both will be acceptable under just about any roofing or building code. This is so long as the metals being used are galvanized or corrosion-resistant.
Aluminum Drip Edge
This is perhaps the most commonly used material when it comes to drip edges. Though it isn’t as strong as steel, it also doesn’t corrode. The most attractive factor when using aluminum for drip edges is that they come in a wide range of colors so that you can match it to the color scheme of your house or to the color of the roof.
Galvanized Steel Drip Edge
Keep in mind that drip edges were created to come into frequent and constant contact with water. If you pick one that is made of steel, it is imperative that they be galvanized. This will prevent rust from occurring, damaging, and destroying the drip edge and contaminating the overflow water.
Make sure that you get a 24-gauge steel drip edge at a minimum. This will not only allow it to stand up to constant water flow but will make it formidable against stronger winds as well. There is nothing worse than installing a drip edge and having it ripped up by a high wind.
Copper Drip Edge
Copper is very durable and sturdy as far as metal options go. In addition, copper drip edges can give your home a truly unique look that stands out. If you do use a copper drip edge, make sure that you get a minimum of 20 ounces or 0.69mm.
Using Non-Metal Materials
There are also drip edges available in fiberglass, plastic, and vinyl. Just because these are available, though, does not mean that you should use them in the roofing area. Use them for non-roofing areas of the home. This includes places like the windows or above your doors.
Non-metal materials may not be able to hold up to the pressure of high water exposure or could be damaged by high winds.
Drip Edge Profile Type C
While there are different materials that a drip edge can be made of, there are also different drip edge profiles as well. The type C is your L-shaped type of drip edge. It is also known as “L style.” This is because this drip edge is usually bent at a 90-degree angle. It also tends to have a lower flange located at the bottom of the drip edge.
Drip Edge Profile Type D
Despite it being called “type D,” this drip edge is in the shape of an uppercase T and has a lower flange that is at the bottom. It is also referred to as “T style,” drip metal, or “D-metal.” There is an association for asphalt roofing that prefers this profile because it keeps water even further away from the fascia.
Despite that fact, Type C is still quite common and will be acceptable when it comes to most roofing and building codes and guidelines.
Drip Edge Profile Type F
This type of drip edge profile is an extended drip edge. This type tends to be more useful when installing new drip edges on rake edges or on existing roofing shingles with a leading-edge that is longer. Also known as “gutter apron” or “F style,” this would be the way to go if your current home does not have drip edges installed, and it is something you want to get done.
Because edge drips are meant to be installed on roofs that have yet to be finished, a type F can be the only option available for existing roofs.
Related Questions
Can you put drip edge on after shingles?
Should you use drip edge touch fascia?
What is the correct placement of a roof drip edge?
Do You Need Tile Roofing Installation or Replacement?
Get free, zero-commitment quotes from pro contractors near you.
Wrapping It Up
While the drip edge is usually installed when the roof is installed, this is not always the case. But, the good news is that you can install a drip edge on an existing roof! Even better, you’re able to do this on your own just by simply wedging it under the first row of shingles and cementing it in.
However, you want to make sure that the drip edge doesn’t touch the fascia itself, or you’ll run the risk of having water run underneath your soffit. Other than that, the job is pretty easy and can be done by anyone in the DIY world, whether you’re a beginner or an expert.
Related Guides

We are a team of passionate homeowners, home improvement pros, and DIY enthusiasts who enjoy sharing home improvement, housekeeping, decorating, and more with other homeowners! Whether you're looking for a step-by-step guide on fixing an appliance or the cost of installing a fence, we've here to help.
More by Upgraded Home Team


![10 Best Cordless Leaf Blowers – [2022 Reviews & Ultimate Guide]](https://cdn-fastly.upgradedhome.com/media/2023/07/31/9070789/10-best-cordless-leaf-blowers-2022-reviews-ultimate-guide.jpg?size=350x220)