How To Install Vent Pipe Flashing On An Existing Roof
The last thing you want to deal with is a leaky roof. Your life is busy and hectic enough already that you don’t need another thing to fix. Remaining proactive and putting in things to prevent leaks in the first place is the best way to stop a leaky roof before it starts.
If not, it can cost you thousands of dollars to fix. If you decide to add a fireplace or stove to your home, you’ll want to add vent pipe flashing to prevent leaks. The process is easy, and you don’t need any special skills to get the job done.
The DIY project consists of loosening shingles, putting on the flashing, and nailing it down. It’s really that simple! It’s always a good idea to finish with a roofing cement to seal any cracks or crevices.
This article is going to teach you everything you need to know about installing a vent pipe flashing on an existing roof. We’ll go over step-by-step instructions, the different types of flashing, and more.
Do You Need Ducts or Vents Installation or Replacement?
Get free, zero-commitment quotes from pro contractors near you.

Why It’s a Good Idea to Have New Vent Pipe Flashing
The main reason to add in flashing anywhere on your roof is to prevent leaking. When you stop leaks before they start, you create a positive domino effect, including extending the lifespan of your roof. Over the years, the flashing can get out and deteriorate.
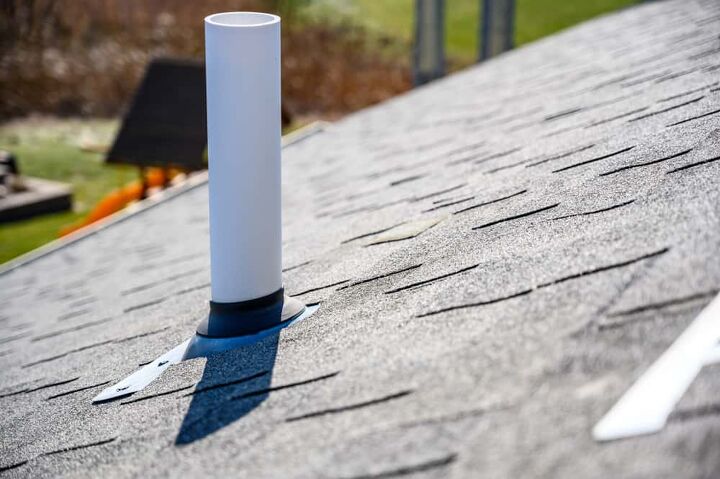
It’s always important to know the state of the flashing on your roof to help reduce water damage. Installing vent pipe flashing is simple because it has a big, flanged base that can quickly be lapped into shingles. It’s inexpensive and doesn’t require hiring a roofing contractor or any professional to get the job done.
On average, roof flashing should last 15 to 20 years when applied correctly. This can range, depending on where you live. If the weather in your area is often wet, snowy, or rainy, the lifespan could be less.
Tools and Materials You’ll Need
Before you head up to your roof, you might need to run to the hardware store. Finding these materials is easy, and you don’t need too many. Here are the tools and materials you’ll need to install a vent pipe flashing onto your roof.
- Vent flashing
- Caulk
- Roofing nails
- Roofing cement
- Putty knife
- Pry bar
- Caulk gun
- Ladder
- Rope (optional)
- Hammer
- 4-in-1 screwdriver
Safely bring all of these items up to the roof with you. If you plan on wearing any safety gear, be sure to have it on before heading up. Whenever you’re working in rainy weather, have a rope around you to prevent falls.
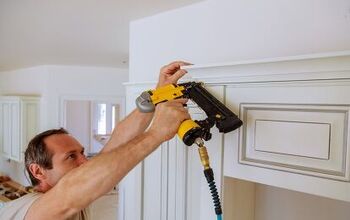
How to Install Vent Pipe Flashing on an Existing Roof
After you’ve gathered all of the tools you’ll need to get the job done, it’s time to start! This is a simple DIY project that you can do without hiring a professional. It will save you a ton of money and keep the vent pipe area free of possible leaks.
Step One: Loosen the Shingles
Once you’re up on the roof, the first thing you’ll want to do is loosen the shingles. Take a pry bar and pry back the shingles that are above and on the sides of where you’re installing the flashing. There’s no need to do this to the shingles that are at the bottom of the vent pipe.
If you don’t have a pry bar or are short on space, a putty knife will work perfectly fine. Slip it under the bottom of each shingle and break the seal.
Step Two: Install the Flashing
Next, take the new flashing and put it over the vent in the proper position. It should be installed under the shingles you pried back but above the bottom ones you haven’t touched. It can be easiest to turn the flashing into place as you’re lowering down until it’s snug around the pipe.
Step Three: Hammer Away
After you’ve installed the flashing, you’ll want to ensure that the top and side shingles are bent back. Also, you want to double-check that the metal of the nails matches the metal of the flashing. If not, there can be a chemical reaction that leads to corrosion and erosion over time.
Speaking of double-checking, look at the bottom of the flashing and make sure it’s OVER the shingles on the bottom. Take the nails and hammer into the tops, sides, and bottom edge of the flashing.
Step Four: Applying Sealant
Use roofing cement to seal in the nail heads and also put it around the flashing’s edges. Anywhere around the area where you see exposed cracks or crevices should be sealed. This ensures there’s no chance of moisture or water getting into an area that could cause leaks.
Other Types of Roof Flashing
There are several different types of flashing available. Some homes need multiple vents and flashings on their roof. Any expert or professional contract will be able to let you know what your specific home needs.
Here are a few of the pre-formed styles that are relatively inexpensive and easy to install yourself.
Valley Flashing
This style is easy to remember because valley flashing is usually formed in a “V” or “W” shape. You’d use this type of flashing when two different planes on one roof meet and form a valley.
Step Flashing
Step flashing is designed to protect any joints between the roofs and other things such as chimneys, antennas, or skylights. It gets its name because when you install this type of flashing, it steps up above the shingles. This helps to protect everything on your roof from water damage.
Drip Flashing
Drip flashing is really common and gets installed on the roof’s edge. It helps to guide water off of your roof and into the gutters. There are two types, including T-shaped and L-shaped flashing.
L-shaped gets applied on areas of the roof where it meets the wall. T-shaped can be put onto the edges of your roof to help water stream down off the edge. It’s a good idea to have both styles installed if you live in a wet climate.
Roof Leak Repair Costs
Since flashing helps to stop leaks before they start, I wanted to go over what it can cost to repair a leaky roof. It tends to be anywhere between $10 to $120 for a simple fix. Because this is such a wide range, I’ve included a cost comparison chart to narrow down what you can expect to pay.
| Task at hand | Average cost |
| Cracked flashing | $20 |
| Broken or missing shingles | $35 |
| Ice dams | $50 to $120 |
| Cracked vent booting | $10 to $25 |
| Clogged gutters | Free/easily done yourself |
| Skylight leaks | $20 to $80 |
Do You Need Ducts or Vents Installation or Replacement?
Get free, zero-commitment quotes from pro contractors near you.
Related Questions
Is roof flashing necessary?
Flashing on a roof and on a vent pipe is absolutely necessary. When the roof plane meets a vertical wall, if there’s no flashing, it poses a leak risk. Leaky roofs can cost you thousands of dollars to repair or replace. It can be hard to remove old flashing on split-level roofs or chimneys. The difficulty also depends on the type of material you’re working with. If you’re struggling to get it off, it’s best to hire someone to avoid further damaging your roof.
Does flashing go over or under tar paper?
When applying flashing on your roof, it can be confusing to know what order things do in. I like to think of it similarly to building a sandwich. You’ll have the drip edge along the eaves before putting the ice and water barrier on. After that, you’ll apply the tar or felt paper over the drip edge.
Is roof venting required by code?
Ventilation is a must if you’re working with a chimney or stove to keep toxins out of your home. The majority of homeowners also believe that attics should be vented to help create a natural airflow throughout the house. When a roof doesn’t have any ridge vents or just soffit vents, most codes require more.To get a direct answer, you’ll have to look up the codes for your specific city or state. It can vary quite a bit from one place to another. This is a good thing to do whenever you move to a new city or build your own home.

Kirstin is a passionate writer who loves helping people learn new things when it comes to home improvement. When she's not behind a keyboard, she enjoys DIY projects, crafts, spending time with her pets, and making videos. She hopes that with all she writes, someone is finding a solution to their home improvement needs.
More by Kirstin Harrington


![10 Best Scroll Saws for 2022 [Ultimate Reviews & Buyer's Guide]](https://cdn-fastly.upgradedhome.com/media/2023/07/31/9070684/10-best-scroll-saws-for-2022-ultimate-reviews-buyer-s-guide.jpg?size=350x220)