


Why is My Milwaukee Charger Blinking Red and Green?
Milwaukee is a manufacturer of power tools of a wide variety. From drills to saws and everything in between, Milwaukee has been providing quality tools for decades now. And like any modern tool, they come equipped with batteries and battery chargers.
You may have noticed that your charger is bling both red and green. The flashing red and green light means one of two things. The first is that the battery may not be seated in the charger port properly. The second, though, is that your battery may be defective.
We will take a look into all of the different blinking lights, what they mean, and how you can potentially jump-start your battery if that comes to be the case.
About Milwaukee Chargers
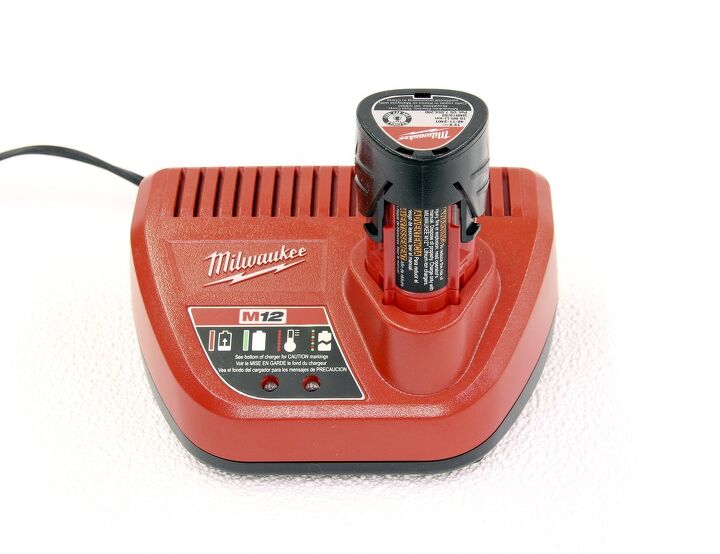
While there are some power tool manufacturers that create versatile battery chargers that can fit different voltage batteries, that is not the case with Milwaukee. Whatever your voltage is, that is only compatible with the according charger.
So, if you have an 18V battery, it will go with the 18V charger. If you have a 12V battery, it goes with the 12V charger and so on. Also, your Milwaukee charger will not be able to accommodate batteries from other brands.
The charger has a bay for both the stem and clip-on batteries. Normally, you click in the battery for charging and a red LED light will come on and stay on until the battery is fully charged. When the charge is finished, a green light will come on to signify as such.
Video: Quick Way to Troubleshoot The Problem
Flashing Lights: Flashing Red
There are two kinds of flashing lights. There is the red/green simultaneous flashing which we will cover in the next section. The other kind of flashing light is a flashing red light. These warnings are meant to indicate that something isn’t right, and the charge won’t happen properly.
When you have a flashing red light, this is an indication that the battery is too hot for it to charge. When you see a flashing red light, take the battery out and give it a chance to cool down. When it ha properly cooled, then you can charge your battery as you normally would.
Red and Green Flashing Lights
The second warning that you may come across is the red and green flashing light. This can feel like a contradiction because red is supposed to mean “charging” while green signifies “charged”. So, what does it mean when you see both at the same time?
It can mean one of two things. When you see red and green flashing lights, it could signify that you have inserted your battery improperly. If this is the case, the first thing to do is pop it out and try it again.
If you are certain that the battery is seated properly, there is only one more explanation: your battery is defective. Try replacing the battery a few times before coming to this conclusion; no one wants to have to replace a battery.
When Your Battery May be Defective
So, you’re confident that your battery is seated properly but you’re still getting the red and green flashing lights. What do you do now? The first thing to do is take the battery out and clean off the terminals of the battery with some alcohol.
Next, unplug the charging port and clean the terminals of the port the same way. This will ensure that your battery is seating properly inside the charging port. If there is still an issue, there is definitely something wrong with the battery.
You Can Jump-Start an 18V Lithium-Ion Battery
So, you are confident that your battery is seated properly, that the connections are absolutely clean, and you’re still getting those red and green flashing lights. This is a good indication that your battery is dead. The good news is that you may be able to shock it back to life.
Keep in mind that the manufacturer isn’t going to recommend this. Milwaukee will recommend calling a customer service representative to have a new battery sent to you. This is, of course, an option but not everyone wants to go through the process of getting a new battery.
How to Jump-Start Your Battery
If you aren’t looking to have the battery replaced, there is a way to jump-start it back to life. Put the battery down on a table next to a battery that you know is good and fully charge. Connect the terminals from each battery to the corresponding terminal using a 14-gauge copper wire.
Tap the wire to each of the terminals and wait for a minute or two. When you take the wires away and insert your battery into the charger, it should start to charge. Keep in mind that the battery is still likely damaged and isn’t the same as a brand-new battery.
The charge might not las as long a fully functional battery, but you can still likely get plenty of cycles out of it before calling it quits and throwing it away.
Nickel-Cadmium Battery
There are also chargers for Milwaukee nickel-cadmium batteries (these are a bit older). Generally, the charger has just one red LED light to it. When you put the battery into the charging port, a solid LED light will tell you that the battery is charging normally; a flashing light lets you know that there’s a problem.
The flashing light generally means that the battery is too hot for it to charge properly. Give it time to cool before trying to charge it again. If the light still persists, there’s a good chance that your battery is defective.
Resetting the Memory of the Nickel-Cadmium Battery
Good news if your battery is possibly defective: you may be able to reset the memory. This will allow the battery to hold a charge again. The downside is that you are going to need a bigger power source, something like a 12V car battery.
To do this, you would attach jump cables to your 12V battery. Remember that black is your negative terminal and red is your positive. Then, touch the end of your red cable to the positive terminal of the nickel-cadmium battery. Likewise, touch the black cable up to the negative one. Do this for a second or two.
If done properly (and if the battery is salvageable), that power surge will clear the sulfates out of the inside of the battery. These can accumulate over time and make your battery defective. When you clear those sulfates out, that should restore the battery back into working order.
Take Caution
Whenever dealing with batteries and electrical chargers, it is important to exercise caution. Haphazardly handling them can result in serious injury. Treat them with respect and a little bit of common sense and you should do just fine.
Extending the life of potentially damaged batteries can be quite helpful. Replacement batteries will cost you – even cheaper ones tend to run in the $25-$50 range. Getting extra life can save you money, at least for a little while longer.
If you are putting your handyman skills to use on a regular basis, it is important to have fully charged batteries at the ready.
See How Milwaukee Brand Tools Compare To Other Well-Known Brands

Ryan Womeldorf has more than a decade of experience writing. He loves to blog about construction, plumbing, and other home topics. Ryan also loves hockey and a lifelong Buffalo sports fan.
More by Ryan Womeldorf


![10 Best Electric Pressure Washers – [2022 Reviews & Guide]](https://cdn-fastly.upgradedhome.com/media/2023/07/31/9070600/10-best-electric-pressure-washers-2022-reviews-guide.jpg?size=350x220)


