How To Fix A Large Hole In A Leather Couch
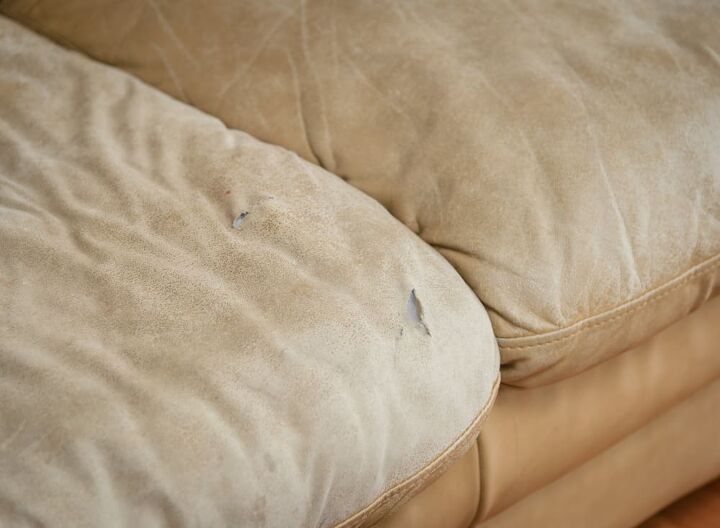
Leather couches are beautiful additions to living rooms and give a classic touch to the aesthetic. If proper maintenance isn’t carried out routinely, leather can wear and tear quite quickly. This material is often prone to large holes and cracks when it’s not regularly conditioned.
Apply a sub-patch and top-patch to the hole in the couch with upholstery glue. You can also apply soft filler and smooth it out with a putty knife to make it even. Sand down the upholstery glue with sandpaper so that it is smooth and consistent with the rest of the couch.
I don’t know about you, but I don’t want to spend the money on another leather sofa. This is why I wanted to share with you how you can fix anything from a small nick to a large hole. Below there are step-by-step instructions, along with helpful tips and tricks.
Do You Need Furniture Reupholstery Services?
Get free, zero-commitment quotes from pro contractors near you.

How to Fix Large Holes in a Leather Couch
The majority of holes in leather furniture can be fixed using a leather filler and a sub-patch. If you’re dealing with a hole that is more than two inches long or wide, there are other ways to fix it. Using a top-patch will give a more cohesive final look and feel.
Here are a handful of steps to help you seal bigger holes in leather couches. This can be applied to any area of the sofa, including torn up arms, sides, or cushions.
Step One: Repairing Damage to the Substrate Foam
This might not be necessary for everyone, but you’ll want to repair any damage that’s been done to the substrate foam. You can do this by plugging it with a new piece. You can buy high-quality and durable upholstery foam from more craft stores.
Sometimes to make the fix easier, you’ll need to cut away more of the original foam. It can make the new material fit in more seamlessly. It’s important that you are patient during this process, as it can take a while to place the new foam perfectly.
Doing this repair will help to hide minor variations within the foam. To make it stick, use a fabric glue that won’t melt the foam. If you’re handy with a needle and thread, you could do a couple of large whip stitches.
Step Two: Preparing the Sub-Patch
Get a piece of twill or denim that’s bigger than the hole you’re repairing. Place the patch on top of the hole, making sure it’s covering any curves. Once that patch can lay flat around the hole without wrinkling, you’ve got the right size.
Round any corners to make the insertion as easy as possible. Take the piece of fabric and put it under the leather. Use a strong, flexible, and waterproof fabric glue to keep it in place. It doesn’t have to be waterproof, but I think it’s best to use it on furniture.
Step Three: Apply the Top-Patch
For the third step, you’ll want to prepare the top-patch. Try to access excess of the original material. If this isn’t possible, you can source a similar piece that will blend in with your existing couch.
Avoid using polyurethane leather when making a top-patch. Take the material and cut it just small enough to fit inside the hole. Make sure there is no overlap and use the same glue you used in step two to apply the top-patch to the sub-patch.
It’s important that the glue is totally dry before moving onto step four. Drying time can vary and is always listed on the glue’s packaging.
Step Four: Apply a Soft Filler
A soft filler is a water-based material that is applied incredibly easily. It air-dries over time but can be cured faster by using direct light. You can sand it when it’s cured to make it blend easier or use rubbing alcohol.
Using a filler is perfect for larger holes because it allows for flexibility that super glue doesn’t. Apply the filler generously, and be sure you work it into any edges or corners around the hole. Take a putty knife or old business card and swipe gently in the direction of the tear to even out the filler.
Feather out the edges to make sure the product is covering the entire area it needs to be covering. You can sand the edges later on after it’s cured if you don’t want to feather it. Soft filler usually takes 30 to 60 minutes to fully cure.
Step Five: Applying a Water-Based Finish
It’s hard to get an exact match just by looking at your leather couch. Some hardware stores that have color matching kits you can purchase, or you can bring in a sample of your sofa. There are a few things you’ll want to consider when finding a water-based finish to match the leather.
Never think that just because the name is the same, it’s the same shade. One brand’s “Oak” shade may be much darker than others. It’s also important to keep in mind that colors look different on a screen, and it’s important to see a real-life sample of the stain.
Apply the finish according to the directions on the packaging; account for things like fading and wear that your couch has. If you do all this work and add a finish that’s the color of your original couch, it may look off if the piece is faded.
How to Repair Minor Nicks in a Leather Couch
I also wanted to add in a helpful guide for smaller nicks you might have on your couch. Here are the step-by-step instructions to tackle the job with ease!
Step One: Prepare the Area
Take rubbing alcohol and a soft clean towel and rub it over any scratches or nicks. This helps to get rid of any debris, dirt, or grease that’s on the surface. Make sure you get rid of any excess alcohol as it can damage the surface if it sits too long.
Step Two: Reattach the Flap
Take glue and gently press the tear back into place. Make sure that the flap is aligned so that none of the insides of the couch is visible. Take a towel and get rid of any excess glue before it tries.
Step Three: Sandpaper
Take a piece of 320-grit sandpaper and very lightly sand down the glued area. The wet super glue and act of sanding creates a filler. If you’re working with delicate leather, use 500-grit.
Skip this step completely if you used leather-specific glue instead of super glue.
Step Four: Color the Fabric
If you’re working with an area that’s damaged and a different color than the rest of your couch, it’s time to dye it. Get a leather stain and apply it according to the directions on the package.
Step Five: Apply Leather Finish
Next, you can apply a clear finish over the nicks to give a luster look. It also protects the dye and stops it from transferring to other materials. This is a crucial step if you’re working on a couch that’s relatively new.
Step Six: Allow the Glue to Set
Lastly, let everything set and cure before using the couch again. This should take around one hour. Avoid using any heat source like a lamp or hairdryer. Heat can damage leather, and you’ll wind up with more work than you started with.
Do You Need Furniture Reupholstery Services?
Get free, zero-commitment quotes from pro contractors near you.
Related Questions
How do you fix claw holes in leather?
Whether you have a cute new kitty or an all-too-excited puppy, claw holes happen. These small punctures can quickly make your leather furniture look old and worn out. You can push the raised leather around the hole back into it with something small like a toothpick.Take a little bit of a leather repair solution that has a tint and add it to the clawed area. While this won’t erase the marks, it helps them to blend it and appear less obvious.
Can faux leather be repaired?
It’s possible to fix faux leather, depending on the damage. Areas that have been frayed or cracked are much easier to repair than giant holes. Simply wipe over the area using a leather repair kit to fix any smaller issues.
Is Gorilla Glue good for leather?
There are several different options for upholstery glue on the market. The original Gorilla Glue is great for leather since it’s a water-activated polyurethane formula. It creates a strong bond that is waterproof and temperature-resistant.
Related Guides

Kirstin is a passionate writer who loves helping people learn new things when it comes to home improvement. When she's not behind a keyboard, she enjoys DIY projects, crafts, spending time with her pets, and making videos. She hopes that with all she writes, someone is finding a solution to their home improvement needs.
More by Kirstin Harrington