


What Is the Right Grout Line Size for 3"x6" Subway Tile?
Whether used in a tub surround or as a kitchen backsplash, subway tile is a popular choice. Its classic, yet modern look is pleasing to the eye and helps it blend well with a variety of styles. It’s even started making more of an appearance on feature walls and on floors.
The most popular grout line sizing for 3” x 6” subway tiles is 1/16” and 1/8”. This is especially the case for walls but will depend on the look you are aiming for with your tiling. When using thinner grout lines, unsanded grout is recommended and works better with more delicate tile surfaces like ceramic and glass.
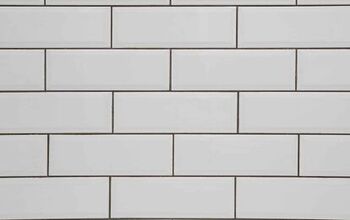
There are a number of options available for both subway tile and grout, offering almost endless combinations. One of the most popular sizes of subway tile is 3” x 6”, usually laid in an appealing offset pattern. However, if you choose the wrong size grout line, you could end up with a messy, unprofessional look.
How Does the Grout Line Influence the Overall Design?
Using a thinner grout line will usually deliver a subtle look, sometimes even monochromatic. On the other hand, if you want a more dramatic design, a wider grout line is the better option. Wider grout lines also give a space a more retro feel.
You also can create a variety of different styles through color choices. Nowadays, grout goes far beyond the basic whites or grays. You can also find varying shades of blue, brown, green, and even grout that contains glitter.
Whatever type of grout you choose, it will be a big factor in the finished look of your design. Therefore, weigh your options carefully before installing your tile.
How Do You Create the Perfect Grout Line?
Tools You Need for Your Grout Job
When it comes to the grouting portion of your tile job, you will need the following:
- Tile spacers in the correct size for your grout line
- A rubber float
- A sponge
- Unsanded grout (for thin grout lines 1/8” or less)
- Grout sealer
To achieve your desired grout line, spacers are essential for keeping lines aligned and even. Tile spacers typically come in the following sizes:
- 1/16”
- 1/8”
- 3/16”
- 1/4”
- 3/8”
Step 1
Place a pair of spacers into the thin-set (adhesive) along the edge of the tile. Make sure to use two spacers, as only using one will make it hard to keep your tiles and grout lines even.
Start on the edge where you intend to lay the next tile, and do not put spacers at the corners. Place spacers as you go, making sure to not jam the next tile into place. This way your spacers will be easier to remove.
Step 2
Allow the spacers to remain until the adhesive sets, roughly 20 to 30 minutes, then remove with your fingers. If it is difficult to grasp the spacers, you can also use a pair of needle-nose pliers. Make sure to never grout over your spacers, and if you’re careful you can even reuse them.
Step 3
Let your thin-set completely dry for 24 hours, then mix your grout according to the directions on the packaging.
Step 4
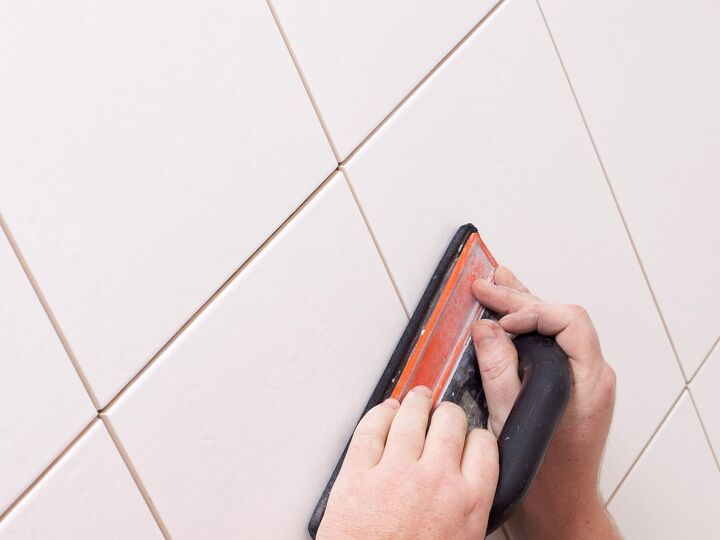
Using a diagonal motion, hold a rubber float at a 45-degree angle and spread the grout over your tiles. As you float your tiles, wipe off excess grout with a damp sponge, using the same diagonal motion. Rinse your sponge often, and don’t worry if your tiles appear hazy, you can clean this later.
Step 5
Let your grout dry for the amount of time specified in the directions, then apply a grout sealer. Follow the directions on the container, as the application process can vary between brands. A grout sealer is important for protection against moisture, mold, and mildew, so don’t skip this step.
How Much Does Subway Tile Cost?
Subway tile varies in price depending on its qualities, but the average cost of the tile ranges from $1 to $15 per square foot. You can expect to pay about another $1.50 per square foot for additional materials like grout, caulk, and mortar.
Then, you must consider if you will install the tile yourself, or if you will pay a pro. If you have the tile installed, plan to add at least another $4 per square foot for labor. If your job includes any unique elements or challenges, this can raise the cost substantially.
Where Are the Most Popular Places To Use Subway Tile?
Although this popular tile has started appearing in a variety of rooms, it is still most commonly used in kitchens and baths. It is a great option for shower and tub surrounds or for the classic subway tile backsplash.
Is Subway Tile a Good Addition To a Home Remodeling Project?
When renovating your home, mid-range remodels often bring a higher return than a full renovation. According to the recent 2020 Cost vs. Value Report, a minor kitchen upgrade can get you a 76% return.
If you tackle a mid-range bathroom remodel, you can gain a return of almost 64%. Changing your old tile out for a beautiful subway tile is a great addition that can add value to these small renovation projects.
Related Questions
Why is it called subway tile?
As you might have guessed, subway tile gets its name from where it was first used – Manhattan. It first appeared on the walls of the New York City subway system, which was built in 1904. Officials wanted a material that was pleasing to the eye and easy to clean.
What are the available sizes of subway tile?
Subway tiles come in a variety of sizes, the most common is the 3” x 6”. You can also find the following sizes:
- 1” x 3”
- 1” x 4”
- 1” x 6”
- 2” x 4”
- 2” x 6”
- 2” x 8”
- 2” x 12”
- 3” x 8”
- 3” x 12”
- 4” x 8”
- 4” x 12”
- 4” x 16”
If your tile job ends mid-wall, then you’ll probably definitely want to use border tiles. Of course, ultimately, it’s up to your personal preference, but border tiles will give your job a finished look.
Note: Make sure to measure in linear feet when determining how many border tiles you need so you don’t over-purchase.
Wrapping Up
When it comes to a stunning tile job, as you can see, there are a lot of things to consider. Besides the actual tile, the decisions you make regarding your grout will have a big impact on your final design.
Knowing what to do with additional components like grout, spacing, and caulk helps give you the professional look you desire.
Related Guides

We are a team of passionate homeowners, home improvement pros, and DIY enthusiasts who enjoy sharing home improvement, housekeeping, decorating, and more with other homeowners! Whether you're looking for a step-by-step guide on fixing an appliance or the cost of installing a fence, we've here to help.
More by Upgraded Home Team


![12 Washing Machine Brands to Avoid [with Recall Data]](https://cdn-fastly.upgradedhome.com/media/2023/07/31/9075781/12-washing-machine-brands-to-avoid-with-recall-data.jpg?size=350x220)


