The Best Way To Insulate An Exposed Garage Ceiling

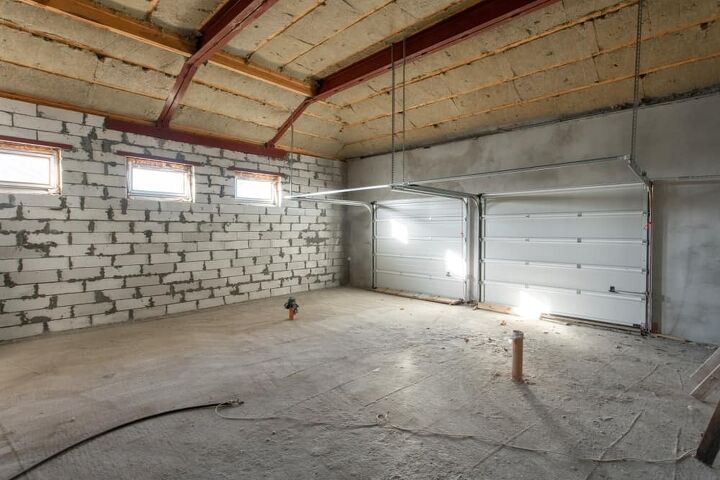
It is important to feel warm in your garage. It makes all of those cold nights working on cars a lot more bearable. But what is the best way to insulate an exposed garage ceiling?
Purchase a series of fiberglass batts that cover the height and width between your ceiling joists. Using the stapling flange, staple the fiberglass batts in such a way that there are no gaps. Leave a bit of room on your paper to account for this. Finally, install drywall over the fiberglass batts to prevent a fire hazard.
Below, we are going to break down these steps in a more detailed manner. Using this step-by-step process, you will easily be able to handle insulating your exposed garage.
Do You Need Blown-In Insulatio Installation or Replacement?
Get free, zero-commitment quotes from pro contractors near you.

Insulating A Garage Ceiling: A Step-By-Step Process
- Purchase the supplies you need
- Inspect your ceiling, measure between joists
- Purchase insulation based on the R-value of your location.
- Use a combination of friction and staples to install fiberglass batts
- Cover the fiberglass batts with drywall
Step 1: Purchase The Supplies You Need
Be sure that you have all of the supplies you need before starting this project. Below is our list of required suggestions for this guide:
- Ladder high enough to reach garage ceiling
- Measuring tape
- Utility knife
- Drywall lift
- Fiberglass batts
- Nails
- Nail gun
- Drywall
- Staples
- Staple gun
Hold on purchasing the fiberglass batts right away, as you need to perform some tests before buying.
Step 2: Inspect Your Ceiling And Measure Between The Joists
Your first step in any insulation project is to ensure that you have an ample amount of Insulation. It can be done with a ladder and measuring tape
Measure out the height, width, and depth of your joists. Typically speaking, hardware stores will have fiberglass batts that fit those standard measurements.
If you have some unusual ceiling joists, be prepared to make cuts to compensate for those. If you find any damage to your ceiling, you will need to repair it before beginning.
Step 3: Purchase Insulation Based On R-Value Needed For Your Location
When purchasing Insulation, be sure that it is appropriate for your needs. Those needs come from a combination of the depth of the joists and your geographical location. If you live in a location like Florida, you don’t need thicker insulation. Keep that in mind as you are asking around Home Depot about this issue.
The highest you should be shooting for is R30 when you are in colder locations. The lowest you can shoot for will likely be around R13. Garages can have pretty thick joists, be sure you cover up for any potential gaps.
Do not apply the same rules as you would to your attic. The attic releases the heat from inside your home, which has a much higher risk of losing heat.
Step 4: Use A Combination Of Friction And Staples To Install
Once you made your purchase selections, you can move on to the installation process.
Provided that you have a ladder that reaches the top of the ceiling, this part can be pretty straightforward. If you don’t like the idea of moving a ladder around every couple of seconds, you can rent a scaffold at some hardware stores. Just be sure that you have a friend who is willing to move it around.
Thankfully, fiberglass batts are some of the easiest methods of Insulation. The biggest mistake people make with these is not consistency stapling the flange. Some people suggest that you need every six inches, but your goal is to do it consistently enough that there is no sag.
For the most part, friction will be holding these fiberglass batts in place. Stapling is just there to fill in any gaps. If you have any unusual ceiling joists above, you can cut your batts to match your ceiling’s needs. However, unusual joists are not too standard.
Step 5: Cover The Fiberglass Batts With Drywall
Fiberglass batts are a significant fire hazard if left exposed. Regardless of how low the risk you believe your garage to be, drywall will be necessary to fill in all of the gaps on your ceiling.
You will need to use a friend, a drywall lift, and the measurements you took before to find the amount of height and width you need to fill in the gap. Don’t be afraid to cut through the drywall with your utility knife should some spaces not precisely fit.
You will start in one corner of the room and wrap your way around, allowing yourself to keep track of where you began. Be sure that the outside edges of your drywall connect to each stud. Nails typically need six to eight inches of distance to ensure that the drywall will stay in place.
If you have a friend, this step can put much less strain on your body.
Can I Use Spray Foam Insulation On A Garage Ceiling?
If you are willing to trade some cost for quickness, adding spray foam to your garage ceiling is a good option. Keep in mind that most spray foam brands expand, so try and limit the amount you install in your roof.
Also, you will want to be sure that you use closed-cell spray foam. If your roof leaks when you have open-cell spray foam, this foam will absorb water with greater ease. It will cause your foam to deform and loosen above your head potentially.
You should still cover your spray foam insulation with drywall. Insulation is not something you should leave exposed. This type of insulation is also known as cellulose insulation.
What Other Kinds Of Insulation Can I Use For My Garage Ceiling?
Below is a table that includes other options for insulation:
| Type Of Insulation | Advantages | Disadvantages |
| Foam Board | Firm and relatively easy to install | More expensive than fiberglass batts |
| Cellulose | Incredibly comfortable, you can fill your wall with one hole | More expensive, has negative issues with water (in some cases) |
| Radiant barrier insulation | Simple, easy, reflects heat | Not effective by itself |
| Structural insulated panels (SIPs) | Great if you are building a home from scratch | Typically not for garages, reasonably expensive |
Do You Need Blown-In Insulatio Installation or Replacement?
Get free, zero-commitment quotes from pro contractors near you.

Related Questions
What Is The Cheapest Way To Insulate A Garage?
Fiberglass roll insulation is easily the cheapest method to insulate any building. Our guide above references that you purchased insulated batts, but they are always the most inexpensive and most straightforward to install.
Should I Insulate My Garage Door?
Yes. If your garage is already insulated to the highest standard, having an uninsulated garage door will be as if you did something. You do not need the same level of R-Value that you expect from everywhere else. Be sure that the garage door’s R-value is a bit lower than everywhere else.
How Do I Keep My Garage Warm In The Winter?
Despite your best efforts, an insulated garage may not be enough to keep things entirely warm. Because of this, it may be a good idea to invest in a heater alongside this. The same logic applies to your house. You are less willing to leave your blanket if your home isn’t very comfortable.Once your garage is insulated correctly, you can install a space heater with confidence. It ensures that any heat that you put into this room is less likely to escape.Don’t expect it to be entirely as secure as your home. The R-values inside of your home are almost always higher.
Do I Need A Vapor Barrier?
Drywall does not typically require a vapor barrier behind it. Oil and latex-based paints act as a natural vapor barrier, which covers a wide variety of colors. Adding a vapor barrier on top of that can be overkill.In a garage, you don’t typically need to install a vapor barrier for those reasons. In this case, it would not be necessary given the pre-existing temperature controls.If you feel the need to do so, be prepared to remove the vapor barrier each time you want to install any new electrical component. Vapor barriers always go over the studs and insulation.
Related Guides

I'm a guy who becomes the expert of whatever I stumble upon, writing-wise. I've written tons about cool home products, home improvement, and smart technology in the home. I'm also the proud father of a kiddo born on new years, making my holidays very busy.
More by Eli Smith


