


How To Remove A Stuck Bathroom Sink Drain Flange
Every once in awhile, sink drain flanges become stuck. This is not the most convenient thing in the world to deal with but is manageable. The important thing to remember is that it’s not very difficult if the correct steps are followed.
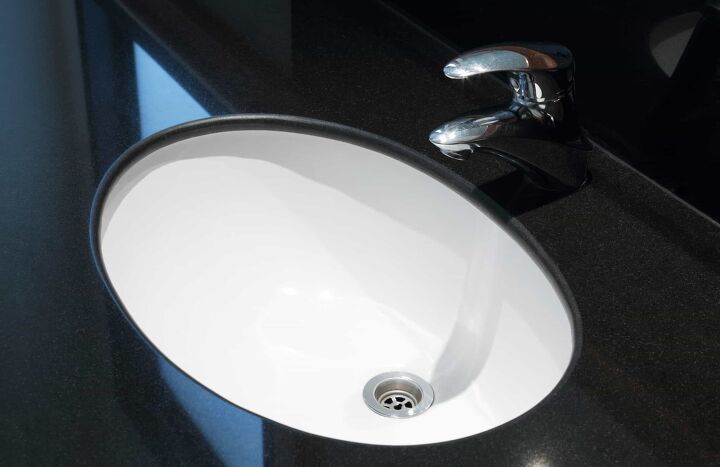
The sink drain flange is the rubber seal that can be found on the sink bowl. They can become stuck for a number of reasons.
To remove the flange, you’ll have to access the drain pipe from the bottom. Using the correct equipment, you will push the flange up from the bottom. The final step is using a putty knife to lift the flange from the hole.
This may sound simple enough to someone that is experienced, but not so much to a newcomer. No problem! If you’re ready to learn about how to remove a flange, you are in the right place. We can help you learn more about this process and walk you through step-by-step to solve it.
Follow along this guide to learn how to remove a stuck bathroom sink drain flange and other important information you will need to know.
Do You Need to Hire a Plumber?
Get free, zero-commitment quotes from pro contractors near you.

Removing the Flange: Step By Step
If you are a bit lost on how to remove the flange from your bathroom sink, don’t worry. This step by step instruction will show you exactly how to remove the flange. It will also show you what to expect during each step and how to handle it. If you follow this guide, you should be able to remove your flange in no time.
Step One
The first step is to look under your sink. In order to perform the removal of the flange, you will need to access the sink from the bottom. To start, make sure that the retaining nut is off. This is in the sink drain basket.
To proceed, you’ll need to use a pair of pliers to remove the securing nut from the basket. One thing that may happen during this step is that the sink drain could spin while removing the nut. If this occurs, simply secure the sink basket or have a helper secure it.
Step Two
For the second step, you will likely need some assistance from another person. You will have to ask them to hold the pliers inside the drain basket. This is to keep the basket there while you go to work on removing the retaining nut. This nut may be rusted on and hard to remove. If it is, spray oil on the threads of the nut and come back in about an hour or two. This should make it easier to remove the nut and complete this step.
Step Three
Now that the nut is removed, you can start the process of removing the flange. This is done by cutting around the edge of the flange. You should use a utility knife to do this. This should free the flange from the putty that holds it into place partially.
Step Four
In this step, you will finally remove the flange from the putty that binds it to the sink. To do this, use a board and place it against the bottom of the sink drain basket. Pound on it lightly with a hammer. This should result in the putty breaking free.
Step Five
For any remnants of the putty that remain, use a putty knife to free the flange around the perimeter of the flange. This should result in the flange being completely free from the sink drain.
Installing a New Sink Drain Flange: Step By Step
Now that you have the sink drain flange removed, you might be wondering what the next step is. You obviously need to replace it. However, many people are unfamiliar with this process. This detailed guide will show you
Step One
The first step to install a new flange is to prepare the new unit. This includes removing the mourning nut and putting in the plastic washer. The steps you will have to take here will depend on the unit that you purchase.
Step Two
The next thing that you will want to do is use a pipe joint compound. This will bind the unit to the sink. Put it on the top side of the washer that you placed in the first step. This will create a tight seal and prevent water from leaking through.
Step Three
Next, you will use plumbers putty to the bottom side of the flange. This also helps to create a seal. Plumber’s putty is a commonly used substance for jobs related to sinks and draining.
Step Four
In this step, you will connect the various components of the drain for installation. Push the flange through the opening in the sink as high as possible. Hand screw in the fixture until ready for final tightening.
Step Five
Once you have the flange in place, you will need to tighten the entire assembly. This will hold it in place and it is now ready to be there for the long-term. Tighten the nut while holding the unit with pliers or by hand. This is done to reduce spinning.
Step Six
The next step is to put the drain stopper in. Push it down into the opening in the sink, where it will rest in place.
Step Seven
This step is to install the lever that will be used to raise and lower the flange. This will be specific to your unit.
Step Eight
Once the lever is in place, the only step that remains is to connect it to the drain. Do this using the designated clip provided with your unit.
Reasons for Flange Becoming Stuck
There are a number of reasons that you could find that your flange becomes stuck. However, the most common is simply age. As the drain and flange age, they are more susceptible to rust holding them in place. If your flange has become rusted and is not moving as a result, the best thing to do is simply get a new one.
There are things that you can do to loosen up rusted components. However, most of the time it is an issue that will continue to happen if you don’t replace the flange.
Be Prepared
If you’re going to remove a stuck bathroom sink flange, the best thing you can do is be prepared. There are a number of pieces of equipment that you will need for this process. They include:
- Lubricant
- Pliers
- Screwdriver
- Putty Knife
- Utility Knife
- Tongue and Groove Pliers
Before you start on your project, you should ensure that you prepare all of these supplies. Doing so will help your project go much more smoothly.
Do You Need to Hire a Plumber?
Get free, zero-commitment quotes from pro contractors near you.
Related Questions
What if my bathroom sink drain is rusted?
If your sink drain is rusted, you will need to take extra steps to remove the sink drain flange. This could include spraying it with lubricate and firmly tapping on it with a hammer to get it to release.
How long does it take to remove a bathroom sink drain flange?
For someone that is experienced, this can be done in 30 minutes to an hour. For someone that is not experienced, it can take an hour or more.

We are a team of passionate homeowners, home improvement pros, and DIY enthusiasts who enjoy sharing home improvement, housekeeping, decorating, and more with other homeowners! Whether you're looking for a step-by-step guide on fixing an appliance or the cost of installing a fence, we've here to help.
More by Upgraded Home Team


![How To Reset A Whirlpool Cabrio Washer [In 5 Easy Steps!]](https://cdn-fastly.upgradedhome.com/media/2023/07/31/9076531/how-to-reset-a-whirlpool-cabrio-washer-in-5-easy-steps.jpg?size=350x220)


