How To Remove A Bathroom Vanity That Uses Floor Plumbing

Bathroom vanities can prove very useful as a versatile piece of furniture. Use them to stay organized in the bathroom while also touching up your appearance. They even work as a functional piece of bathroom décor.
Over time though, your bathroom vanity may get worn down and fall into disrepair, thus necessitating its replacement. Replacing a vanity also becomes a necessity if you want to redesign your bathroom. Before focusing on replacement though, you first have to work on removing your bathroom vanity.
Begin removing a bathroom vanity with floor plumbing by turning off the water supply. Next, remove the P-trap and supply lines before cutting away the sealant along the backsplash. Detach the sink from the vanity using either a screwdriver or hammer, then unscrew the vanity from the wall.
Removing a bathroom vanity is a job most homeowners can take on. That remains true even if the bathroom vanity in question uses floor plumbing. Read on to learn more about bathroom vanity removal and other relevant topics.
Do You Need to Hire a Plumber?
Get free, zero-commitment quotes from pro contractors near you.

How to Remove a Bathroom Vanity with Floor Plumbing
The process of removing a bathroom vanity is surprisingly easy even if it relies on floor plumbing. Follow the steps below to pull it off successfully.
Step 1: Protect Your Bathroom
You cannot be sure that no pieces of debris or wastewater will scatter about when you start removing the bathroom vanity. Make sure you prevent creating an unnecessary mess by prepping your bathroom first.
Start by moving everything that isn’t nailed down outside of your bathroom. Next, cover up all the fixtures like the lights, glass shower doors, or anything else that can shatter. You should also cover the shower, toilet, and bathtub to keep them safe.
Step 2: Gather the Tools for the Job
To remove the bathroom vanity with plumbing, you’ll need a basin wrench, screwdriver, pliers, utility knife, some rags, and some buckets. You may also need a hammer and chisel depending on what kind of bathroom vanity you have. A putty knife will also come in handy once you’ve removed the vanity.
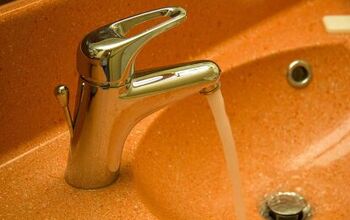
Step 3: Shut Off the Water Supply
Look under the sink of your bathroom vanity and see if you can find the shutoff valves there. After locating the valves, turn them counterclockwise to shut them off. If you didn’t find the valves underneath the sink, you’ll have to turn off your home’s main water supply.
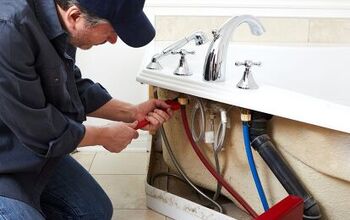
Step 4: Dislodge the P-trap
Grab one of your buckets and place it underneath the P-trap. You need it there to catch any wastewater that may spill out.
You can probably loosen the slip nuts securing the P-trap by hand if the setup itself is made from plastic. If that’s not the case, get your pliers and use it to turn the slip nuts counterclockwise. Once you’ve removed the P-trap, place a rag inside the opening to keep the noxious vapors from filling your bathroom.
Step 5: Take Out the Water Supply Tubes
Place more buckets under the supply tubes now so they can catch additional water. Reach for your basin wrench and use that to loosen the compression nut. Loosening up the compression nut should allow you to eventually free up the supply tubes.
Step 6: Check on the Mirror
Examine your vanity’s mirror and see how it is mounted. If the mirror is mounted on to your bathroom wall, you can leave it alone.
However, a mirror connected to the vanity needs to be removed. The connected mirror could break after you move the vanity. Check where the screws are along the perimeter of the mirror and remove them.
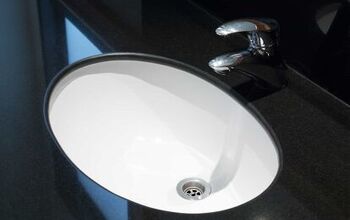
Step 7: Detach the Vanity Sink
You now have to work on removing the sink from the bathroom vanity. Start by reaching for your utility knife and use that to cut the sealant along the backsplash. After you finish cutting away the sealant, pry the sink loose from its position near the wall.
Now that the sink is free from the wall, you have to remove it from the vanity itself. Inspect how the sink is mounted on to the vanity. It will either be screwed on to the top of the vanity or glued into position.
Sinks that are screwed into place are relatively easy to remove because you just have to take out the fasteners. The sinks that are glued into position will have to be removed with a hammer and chisel. Chip away at the underside of the sink’s perimeter to lift it out of its spot.
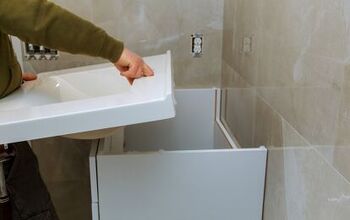
Step 8: Remove the Bathroom Vanity
For this next step, look at the back of the vanity’s base and try to find the screws there. Once you’ve removed those screws, you can pull out the bathroom vanity.
From there, you can move it out of your bathroom in any way you see fit. You can cut the vanity into smaller pieces if you’re having a hard time getting it out of your bathroom.
Step 9: Clean Up Your Bathroom Wall
There is no need to do this step now, but cleaning up the spot the vanity occupied is a good idea. Doing so will make things easier once you decide to install a new bathroom vanity.
Go ahead and get your putty knife and then use it to scrape the wall clean. Sweep or vacuum away any debris on the ground to clean the spot further.
What Should You Do with Your Old Bathroom Vanity?
Old bathroom vanities take up a lot of space. Keeping them at home would not be ideal unless you intend to turn them into a bedroom fixture next. So, how do you get rid of an old bathroom vanity? There are a few options to consider.
You can obviously opt to sell your bathroom vanity. Assuming you were able to remove it properly, you can probably sell it for a decent price.
Homeowners can also consider giving the vanity to someone they know or donating it to a charitable organization. Recycling is also a wise move because you don’t want something that big taking up space in a landfill.
How Should You Prepare Your Bathroom for a New Vanity?
Did you remove your old bathroom vanity with the intention of replacing it eventually? If that is indeed your plan, you should make use of this time to prepare your bathroom for the new addition.
Examine your pipes closely and see if they are still clear enough to be reused. This may be the right time for you to replace them with new connections. You should also double-check how the vanity will fit into your bathroom.
Is it the right height or type? Will it fit with your plumbing? Those are just some of the questions you need to ask before making a purchase. You should also take the time to find the best spot for the new bathroom vanity. Think carefully before you start installation.
Issues that previously emerged with your old bathroom vanity should not be a problem anymore if you shop carefully. You’ll be happier with your new bathroom addition by first taking note of those considerations.
Do You Need to Hire a Plumber?
Get free, zero-commitment quotes from pro contractors near you.
Related Questions
Do All Bathroom Vanities Need to Be Set Up against a Wall?
No, placing your bathroom vanity against a wall is not a requirement all the time. Whether or not you need to do that depends on which type of bathroom vanity you ultimately decided to purchase.Wall-mounted vanities obviously need to be located next to a bathroom wall. Meanwhile, freestanding vanities give you a bit more freedom when it comes to their placement.
What Are the Other Dissimilarities between Wall-Mounted and Freestanding Bathroom Vanities?
Apart from where you can place them inside your bathroom, there are other notable differences between wall-mounted and freestanding vanities. Those dissimilarities can help you decide which one is a better fit for your home.Wall-mounted vanities don’t take up a lot of space and often feature a more modern look. On the other hand, freestanding vanities provide more storage space and are generally easier to install. There is no clear superior option here, but there may be one that makes more sense to add to your bathroom.
Can You Revitalize the Appearance of an Old Bathroom Vanity?
Removing and replacing an old bathroom vanity is not always an option. Perhaps you don’t have the money right now to purchase a new vanity. It’s also possible that the one you have right now is an heirloom you’d like to keep.The good news is you don’t have to replace an old vanity just to improve your bathroom’s overall appearance. As long as your old vanity remains in working condition, you can sand it then paint it to revitalize its appearance.
How Much Will It Cost to Replace an Old Bathroom Vanity?
A pre-made bathroom vanity will cost somewhere in the range of $200 to $2800 depending on the size and materials used. If you’re planning to have it professionally installed, you’ll have to tack on an additional $700 to $3000 to your bill. By removing the old vanity on your own, you can trim your final bill by about $200 to $400.

We are a team of passionate homeowners, home improvement pros, and DIY enthusiasts who enjoy sharing home improvement, housekeeping, decorating, and more with other homeowners! Whether you're looking for a step-by-step guide on fixing an appliance or the cost of installing a fence, we've here to help.
More by Upgraded Home Team