


How To Make Fire Bricks (Step-by-Step Guide)
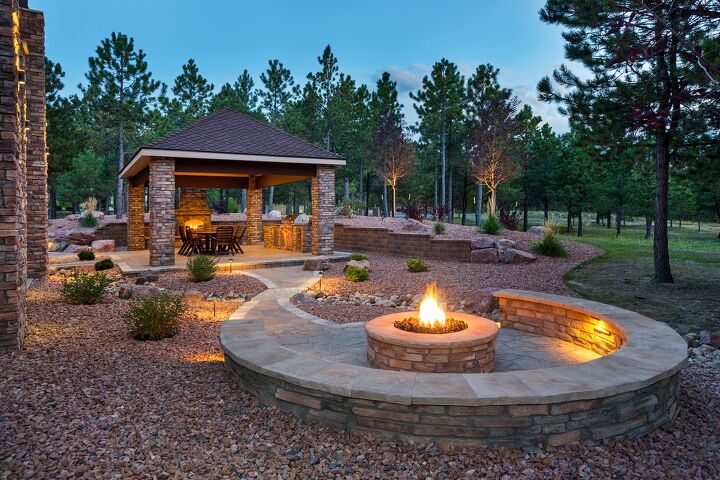
For many, Winter approaching means spending time with family, snuggled around a warm fire outdoors. Fire pits are becoming a popular outdoor fixture for new homes. The best part is, you can make fire bricks and a fire pit with a little skill and some tools.
To make fire bricks, you mix refractory cement and pack as much as possible into a brick mold. Vibrate the mold to release any air bubbles, cover with a plastic sheet, and tape to secure. After two days, remove the plastic and let the cement cure for two more days before releasing the brick.
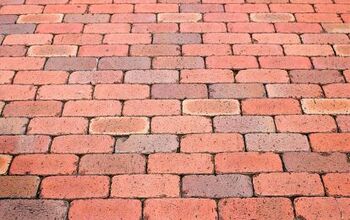
Fire bricks, or refractory bricks, are bricks designed to withstand high heat and cooling at various temperatures. Fire bricks are made of fire clay, which primarily contains alumina and silica. These are two elements that can handle high temperatures, perfect for fire pits.
Types of Fire Bricks
There are two types of fire bricks – hard brick and soft brick.
Soft Brick
Soft bricks’ primary use is to insulate. These bricks are made of refractory clay made with combustible materials. When the bricks heat up, the combustible materials disintegrate, leaving air holes throughout the brick. People use this brick as the structure for electric kilns or a liner for reduction kilns.
Hard Brick
Hard brick is durable and used to create structure. This brick can withstand direct flame. Large kilns, chimneys, and fire pits typically use hard brick. Hard bricks are a great choice to use with your fire pit.
Step-by-Step Guide to Making Fire Bricks
You can make fire bricks with just a little time, skill, and tools. A particular type of cement called refractory cement is used to make fire bricks. You can purchase refractory cement at your local hardware store or make your own. A 25-pound pail will cost about $50.
You can make fire bricks in just nine easy steps.
Items you’ll need to tackle the task:
- Drill
- Screws
- Masonry cement
- Perlite
- Fire clay
- Sand
- 2-inch by 4-inch studs
- Plywood
- Caulk
- Polyurethane
- Bucket
- Shovel
- Duct tape
Step 1: Determine the Fire Brick Size
First, decide the size of the bricks you want to make. An average fire brick is typically 4.5 inches x 9 inches x 1.5 inches. This is a good size for fire pits 36 – 44 inches wide.
Step 2: Create the Fire Brick Mold
After you have determined the size of the fire bricks, it is time to create the mold. Cut the 2-inch by 4-inch studs to the desired size of the fire brick.
Attach the studs using screws and an electric drill. If it is attached correctly, it should look like a box.
Step 3: Attach Plywood to the Box
Lay the box on a flat service. Measure the plywood to the specifications of the box and attach it with screws.
The screws securing the plywood to the box should be placed every five inches. This will become the bottom of the box. Flip the box over and set it on a flat, smooth service.
Step 4: Caulking the Seams
Caulk each seam of the box where the plywood meets the studs and each corner where they meet. Use polyurethane to seal the wood. Lay the box facing down on another piece of plywood, but do not attach it.
Note: You can use vegetable shortening in place of polyurethane as a low-cost alternative.
Step 5: Mix Refractory Cement
While the mold is setting, mix the refractory cement on a smooth, concrete surface. In a bucket, mix one-and-a-half parts masonry cement and one-and-a-half parts perlite. Next, incorporate two parts fire-clay and two parts sand.
Combine the dry mixture using a shovel until it is thoroughly mixed.
Step 6: Add Water to the Mixture
Create a hole in the center of the mixture. Add half part water and slowly fold the dry mixture into the center. The mixture should now have a granulated look.
To be sure that the mixture is the right consistency, pack a small amount into a ball and toss it into the air. If the ball stays together, the mixture is good to go. If the ball does not stay together, add more water until it is the right consistency.
Step 7: Fill the Mold
Fill the mold with the refractory cement. Use a piece of plywood to scrape the excess cement off the top of the mold.
Tap the mold onto a hard surface several times to release any air bubbles. Do this until the top of the mold is smooth and all air bubbles are gone.
Step 8: Set the Mold
Cover the refractory cement-filled mold with a piece of plastic sheeting. Tape the plastic to the mold and leave it for two days. After 48 hours, remove the plastic and let the mold set for an additional 2 days.
Since you have to wait a while before the brick is done, you might want to consider making multiple molds. This can significantly cut down on your overall timeline to finish all of your bricks.
Step 9: Release the Fire Brick
After the fire brick has set, release it from the mold by removing the screws from the studs.
Building a Fire Pit
Before you build a fire pit in your backyard, make sure that this is acceptable in your neighborhood. If it follows local codes and ordinances, there should be no problem installing a new fire pit.
Some people prefer to build a fire pit with cinder blocks. However, now that you know how to make fire bricks, you can put them to work.
Tools to build your fire pit:
- String or yarn
- Spray paint
- Shovel
- Concrete
- Fire bricks
- Fire pit stones
- Mortar
- Rebar stakes
- Flat stone (optional)
Step 1: Create a Space for the Fire Pit
When you find the perfect place in your backyard for a fire pit, place a stake in the ground. Attach a string half the size of the circumference of the fire pit to the stake. Using the string as a guide, spray paint a circle.
Dig around the circle about a half an inch deep. Then, following the method above, paint another circle one foot from the outside of the original circle.
Step 2: Build the Foundation
Mix the concrete until it is the consistency of peanut butter. Lay the concrete in the 12-inch space between the two circles. This will be a foundation for the stones.
The concrete should be one-inch to one-and-a-half-inches high. Before the concrete sets, place rebar stakes into the concrete for extra support.
Step 3: Build the Outer Wall
Mix the mortar and shovel two-inches on top of the concrete foundation. Working in small sections, place stones onto the mortar.
Next is where your homemade fire bricks come into the picture. After you have laid a few stone levels, start laying your fire bricks to form the inner fire pit wall structure.
Step 4: Build the Inner Fire Brick Wall
As you lay more stone levels, continue to lay the fire bricks on the inner part of the fire pit. Use mortar to fill in any gaps between the fire bricks and stone. Stagger the seams of the stones and fire bricks to create a sturdier structure.
Step 5: Finish the Fire Pit
Once you have completed the structure, it is time to lay your optional flat stones on top of the fire pit. Attach these stones using mortar to give the fire pit a polished look.
Related Questions
What is the difference between fire bricks and regular bricks?
The biggest difference between fire bricks and regular bricks is that a fire brick can withstand high heat. Regular bricks are more porous and have the ability to shatter.
How do I clean my fire pit?
Cleaning your fire pit is easy and can be done using everyday items from around the house. Typically, the most effective way to clean outdoor fire pits is a mixture of bleach and water. Add a tablespoon of bleach to a gallon of water, and spray down the fire pit. The bleach will kill any bacteria and clean the bricks or stone. Note: Do not wash it with bleach too often as it can harm the fire pit.Making fire bricks and building your own fire pit can be time-consuming. However, spending time with family around your fire pit will make it all worthwhile!

Stacy Randall is a wife, mother, and freelance writer from NOLA that has always had a love for DIY projects, home organization, and making spaces beautiful. Together with her husband, she has been spending the last several years lovingly renovating her grandparent's former home, making it their own and learning a lot about life along the way.
More by Stacy Randall


![Standard Dining Room Table Dimensions [for 4, 6, 8, 10 and 12 People]](https://cdn-fastly.upgradedhome.com/media/2023/07/31/9074335/standard-dining-room-table-dimensions-for-4-6-8-10-and-12-people.jpg?size=350x220)


