


How To Make Kitchen Cabinets Shine (Step-by-Step Guide)
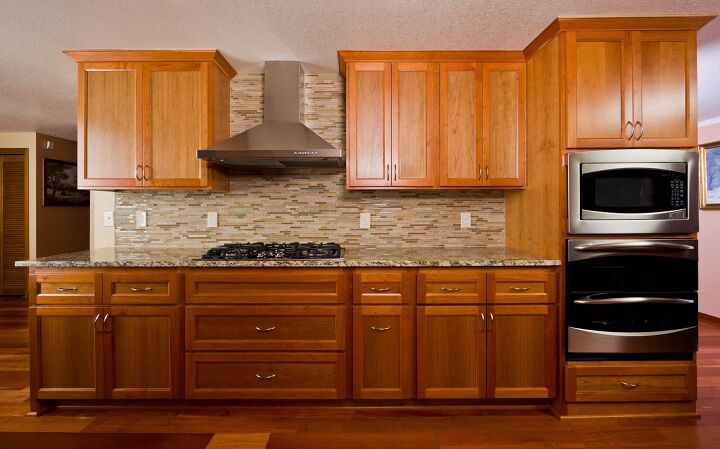
No matter how hard we try, wood kitchen cabinets can take a major beating over time. Nicks, dings, spills, and drips can build up over time to really wear down the once bright and shining cabinets. When that happens, it can make the entire kitchen feel worn and outdated.
To make your kitchen cabinets shine you can use a homemade product using white vinegar and water. Put these in a spray bottle, spray your cabinets, and then wipe them to clean. If you need something stronger you can use an oil or furniture polish and that will do the trick as well.
Do You Need to Hire a Cabinet Refinishing Contractor?
Get free, zero-commitment quotes from pro contractors near you.

Use a Natural Cleaning Product
Before you start scrubbing, it is important to note that the best solution to use is a natural one. This is because a deep clean using a chemical cleaning product can result in the varnish coming off of the cabinets.
Thankfully, there are a wide range of natural cleaning products that can help your cabinets shine while protecting their integrity. Of course, it also helps that you polish the cabinets when you’re done cleaning them to give them that extra level of shine.
Step 1: Make the Solution
In most “how-to” tips involving cleaning agents, you’re bound to see white vinegar. White vinegar is one of the most effective household cleaners out there and is great o use on just about anything you can think of.
Start by mixing a cup of white vinegar together with a cup of water in a spray bottle. This is mild enough to get a thorough cleaning without the acid from the vinegar eating away at the finish or warping the wood. Not to mention the fact that you don’t want that strong vinegar smell permeating your kitchen, either.
Another reason that you would want to go with a vinegar solution over a household cleaner is that the latter can seriously warp and distort the wood of the cabinets. The last thing that you want to do is attempt to seriously clean the cabinets only to leave them majorly damaged.
Step 2: Give the Cabinets a Wipe
Before starting your deep clean, it is a good idea to give the cabinets a preemptive wipe down. The idea here is that food and grease particles can accumulate on the surfaces of the cabinets every time that you cook.
Use the cleaning solution that you just made with a rage and wipe down all of the cabinet doors. Ensure that you get under the cabinets, too; you have no idea the kind of things that can live underneath there over time. A good rule is to make sure that your rag is just damp enough to be effective without being so wet that it is dripping everywhere.
Step 3: Clean Out the Insides
It is a good idea to wipe down any areas that you store spices or unsealed containers on a regular basis. This is because they are the most prone to spilling and when those spices or other textures get in the inside of your cabinets, it can lead to a major buildup of grime and funk.
Use your vinegar solution or a mild soap to wipe out the interior of the cabinets. Make sure that you dry everything down completely before you return anything back into the shelving area as the water can have an adverse effect on any of the spices that may be left open.
It’s also a good idea to dust out your cabinets on a regular basis. When dust is allowed to accumulate over time, wiping it with any level of moisture can cause the dust to clump up, making it that much more difficult to remove. Even worse, the steam and grease that gets produced during a cooking session can get caked into the dust, making it that much harder to completely and thoroughly clean.
Step 4: Use an Oil Soap Wood Cleaner
Having an oil soap wood cleaner is a good idea for areas with caked-on grease and dust. This will get the surface completely clean without doing any damage to the surfaces. It’s quite a bit stronger than a vinegar or soap solution that you would make at home and is a good product to have on hand whenever you want to give the cabinets a deeper clean.
Even if you wipe down the cabinets with your vinegar solution, having an oil soap wood cleaner is a good idea. Go back over all the areas once again to remove any excess debris and dirt that may have built up; it should give your surfaces a little bit of a shine, too.
Step 5: For Thicker Substances
Sometimes, far too much time will pass in between cleanings and you’ll be left with some seriously caked-on dust, dirt, and foodstuffs. Instead of scrubbing for hours on end, use baking soda to break up the gunk.
Baking soda is actually a mild abrasive that can take off those dried-on substances without doing damage to the wood. Just mix it in with enough water that it creates a thick paste. Dip a cloth into the paste and use it in the same way that you would use a polish or varnish.
For the really bad areas, you can try applying the paste and letting it soak into the caked-on areas for 15 minutes or so. This will allow the baking soda to break down the spot before you ultimately wipe it away.
Step 6: Apply the Furniture Wax or Polish
Getting your cabinets nice and clean is one thing. But if you want them to truly shine and sparkle, there is one final thing that you’ll need to do. After ensuring that the cabinets have been thoroughly wiped down and dried off completely, apply the polish or wax.
Doing this will give the cabinets are warmer, more lustrous look by bringing out the wood’s true character. Most of the polishes that you will find will leave either a low luster or a high shine, so make sure to choose the one that best fits the aesthetic of your kitchen.
Start by rubbing in a small area of the exterior portion of the cabinet. Continue working in four to five-inch sections to make certain that the entirety of the cabinet gets polished in consistent, even strokes. Make sure that you rub the polish in gently, going in a circular motion as you go.
Do You Need to Hire a Cabinet Refinishing Contractor?
Get free, zero-commitment quotes from pro contractors near you.
Cleaning and Polishing Can Help Save Old Cabinets
Even if your current wood cabinets look chipped, beat up, damaged, or stained, it may not be the end of the road for them quite yet. With a light refinish and some serious cleaning/polishing, you can bring new life to your cabinets.
By providing a slight refurbishing to the cabinets, not only will you make them look better, but you’ll save a lot of money instead of having to replace them. Best of all, the process of stripping and refinishing the cabinets is a relatively easy one that will ultimately save you time, effort, and money in the long run.
Don’t give up on those cabinets too early. Give them a little bit of the TLC that they deserve and they will stand out for years to come.

Ryan Womeldorf has more than a decade of experience writing. He loves to blog about construction, plumbing, and other home topics. Ryan also loves hockey and a lifelong Buffalo sports fan.
More by Ryan Womeldorf


![Cost To Drill A Well [Pricing Per Foot & Cost By State]](https://cdn-fastly.upgradedhome.com/media/2023/07/31/9074980/cost-to-drill-a-well-pricing-per-foot-cost-by-state.jpg?size=350x220)


