How To Install Recessed Lighting Without Attic Access
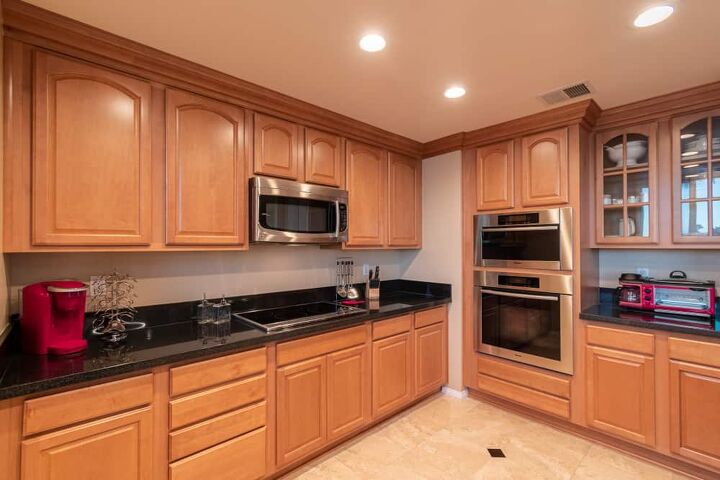
Changing the lighting fixtures in any room can make it look new and modern. Especially with recessed lighting, also known as can lighting. Recessed lighting can open up the space to make even the smallest rooms seem larger. And a few nicely placed recessed lights can add ambiance to a dark corner or show off a piece of art.
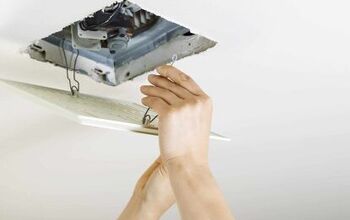
Adding recessed lighting without an attic does not have to be complicated. In fact, you can do it just as easily as if you did have an attic. The process is the same: turn off the electric, cut some holes in the ceiling, and install the lights. If you already have lighting there, you may not even have to cut holes.
Do You Need to Hire an Electrician?
Get free, zero-commitment quotes from pro contractors near you.

Get Your Tools Ready
You will need a few tools to get this project done. Depending on your lighting situation, you will need:
- Insulation compatible (IC) can lights
- Non-metallic insulated (NM-B) wire
- A ladder
- An ohmmeter or voltage tester
- A stud finder
- Eye protection
- A face mask
- Drill with various drill bits
- Pliers
- Drywall or keyhole saw
- Wire pulling tape
- Wire stripper
- Wire connectors
How to Replace Existing Lights with Recessed Lighting
- The first thing to do anytime you work with electricity is to turn it off at the breaker or fuse box.
- Just to be certain, check the wires with your ohmmeter or voltage tester.
- Turn off the wall switch that is linked to the lighting fixture you are replacing.
- Since you are replacing an existing light fixture, you will not have to worry too much about rafters or other electrical issues in the ceiling. Remove the light fixture and disconnect the wires.
- Use the template that came with the can light to make an outline for your new fixture.
- Put on a mask, and work gloves because drywall can be messy. Use a drywall or keyhole saw to cut the hole where you drew the outline. Keep the blade at an angle so you do not accidentally cut into something you shouldn’t.
- You can usually use the wiring that was used for your previous lighting. So, you do not have to worry about running any new cable or wire.
- Connect the colored wires together matching black to black, white to white, and the ground wire to the ground wire. The ground may be green, or it could be bare wire.
- You should only use UL-approved wire connectors.
- Push the light housing into the hole you made, making sure the clips are not sticking out from the sides of the can.
- Then push the light fixture into the housing until it is secure. Snap each of the clips into place to hold it in position. Push each clip up and out until you hear it click.
- Install the trim for the lighting, hooking the springs to the trim inside the light.
- Screw-in a bulb, making sure it is the correct size. Turn the electricity back on and check your work.
How to Install New Recessed Lighting Without Attic Access
- Turn off the electricity to the circuit you are working on. You can do this at your fuse box or circuit box.
- Even though you just turned off the breaker, test the wires with a voltage tester or ohmmeter to be on the safe side.
- Draw outlines for each light using the template that came with it.
- You will be using tools and cutting into the drywall so make sure you put on work gloves, a mask, and eye protection. Drill a hole in the middle of each outline to start your cut.
- Using a keyhole saw or Sawzall, start at the center hole you just made and cut the hole where you drew the outline. Keep the blade at an angle to make sure you do not hit anything that may be up there.
- Do the same for all the other holes you outlined for your lights. It is best to cut all of the holes before you start working on the wiring.
- Find the closest electrical outlet or junction box that you can use for the on/off switch to your lights.
- Take off the faceplate and pull the outlet from the electrical box to expose the wires.
- Make an outline of the electrical box 52 inches above the floor.
- Drill a hole in the middle of the outline you drew and use your saw to cut along the outline.
- From each light hole, run an electrical cable through the ceiling over to the hole you made for the switch.
- Use an electrician’s wire-pulling tape (also known as a fish tape) to pull the cable out of the hole about six inches.
- Insert the cable into the electrical box and tuck the box back into the hole, pushing it up so the clamps snap into place.
- Strip about three inches off each end of the cable. Then strip another ½-inch off each wire using wire strippers.
- Attach the new black wire to the black wire from the junction box and twist them together using a UL-approved wire cap. Wrap the wire around the brass terminal screw. Do the same with the white wires.
- Twist the bare ground wires together with the other bare ground wires. Use UL-approved wire caps only.
- Connect the two copper ground wires together to the bare metal end of insulated pigtail wires. Secure it with a green wire connecter. Insert the pigtail screw into the screw hole on the junction box.
- Repeat all these steps in the light switch wires.
- Wrap the white wire to the silver terminal screw on the light switch and the black wire to the brass terminal screw.
- Attach the white wire from the light fixture to the white wire that leads to the light switch. Do the same with the black wires. Then wrap the green wire to the bare copper ground wire in the light switch to the green ground screw in the light fixture.
- Push each of the can lights into the holes you made for them and attach the trim with the screws or spring clips until the tabs click.
- Fasten the light switch to the electric box with screws and attach the faceplate. Put bulbs in the lights and turn the power back on to check your work.
Important Note About Watts
You must make sure that your electrical circuits can handle the amount of electrical output your new lights will be using. Each light fixture can run from 5 to 100 watts. But you need to know how much each circuit can handle before putting in any bulbs.
For example, if you installed five lights in a circuit that can accommodate up to 120 watts, you just divide 120 by five and that is how many watts each light can use. However, it is best to use a little bit less than the allotted amount just in case. So, in this case, you would use a 20-watt bulb in each light fixture.
Do You Need to Hire an Electrician?
Get free, zero-commitment quotes from pro contractors near you.
Related Questions
Does it matter what kind of wire connectors I use?
Wire connectors come in many different colors and sizes. Each color indicates a different size and the type of wires that it can handle. If you use one that is too large or too small, the connections may not be safe. The cap may fall off if it is too loose and it may cut through the wire strands if it is too small. Either way, it is dangerous and can start a fire.
Is recessed lighting going out of style?
There are many reasons why recessed lighting will never go out of style. For example, it saves on space, making even your small rooms look big. You can also change the finish or trim anytime you want to. Recessed lighting also provides an even distribution of light. Another benefit is that you can put the focus of each light on something like a painting, sculpture, or workspace.

I am a DIYer who loves writing about anything home-related. When I am not writing, you can find me studying for my PhD in Psychology, photographing nature, and swimming at the lake with my grandkids.
More by Patricia Oelze