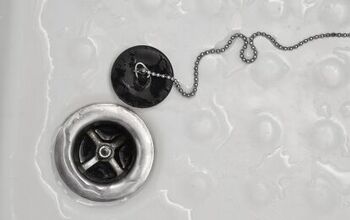
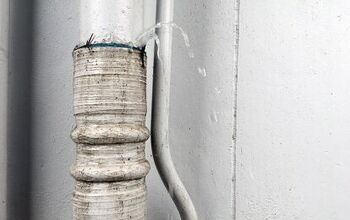
How To Remove A Tub Drain With Broken Crosshairs
Practically every bathtub strainer was originally screwed into place. If you’ve used an antique tub, you’ll notice there weren’t any threads. This is because they plugged with a rubber stopper.
Modern bathtubs have been upgraded with threaded strainers. Some of these are made with crosshairs. If these are broken, it can make removing a tub drain an entire task to add to your list of things to do.
If you find yourself in this situation, the easiest way of removable is by using a drain key. With a little bit of elbow grease, determination, and a few spare minutes, you’ll be able to get the job done.
There are several other methods that we’ll discuss below. This issue seems a lot more daunting than it actually is. Let’s take a look at what you can do to fix it.
Do You Need a Faucet, Fixture, or Pipe Repair or Replacement?
Get free, zero-commitment quotes from pro contractors near you.

DIY vs. Professional
The first question with most home improvement tasks is to ask whether you need a professional. For something as simple as removing a tub drain, I think most people can do it themselves. Plumbers can be incredibly expensive. It’s often cheaper to do the work yourself.
Fixing a tub drain with broken crosshairs takes a relatively short amount of time too. You don’t need any special training or knowledge to get the job done. By the time you’re finished reading this post, you’ll be ready to rock ‘n roll.
Getting the Job Done
Now that you’ve got the tools you need, it’s time to get the job done. Below are three different methods that will help you tackle the task at hand.
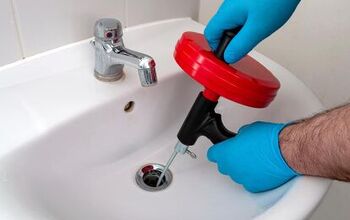
Method 1: Drain Key
The first way you can remove a tub drain with broken crosshairs is by using a drain key. This is by far the easiest avenue to take. If you don’t have a lot of plumbing experience, consider using this method.
Tools Needed
- Drain Key
- 2 Adjustable wrenches
- Lubricant
Step 1
Put the drain key into the tub strainer.
Step 2
Turn the drive screw counterclockwise until it’s noticeably tight inside the strainer. You’ll see that the drive screw has four equally flat sides. This is to work with the jaws of an adjustable wrench.
As you continue to turn the drive screw, the key’s bottom flaps will begin to open. The flaps will then clamp onto the sides of the tub strainer.
Step 3
Now, take your other adjustable wrench and place it on the hex nut on the drain key. This is right below the drive screw. Use this when you aren’t able to turn the drive screw anymore with just your fingers.
Step 4
Attach an adjustable wrench onto the drive screw. Holding the wrench on the hex nut so that it stays in place, turn the drive screw counterclockwise with the other adjustable wrench.
Step 5
Take the wrench attached to the hex nut and press down firming. Continue turning the drive screw until the strainer breaks free. Keep doing this until the strainer is completely out of the drain.
Step 6
Lastly, turn the hex nut counterclockwise one last time to release the tub strainer. You did it! Time to pour yourself a drink and take a break.
Method 2: Tub Drain Extractor Tool
If you don’t have a drain key, some folks opt for using a tub drain extractor tool. They’re relatively inexpensive and are easy to work with.
Tub drain extractor tools are tapered with a helical-pattern knurled finish on the bottom. It takes just a few steps for this method to work.
Tools Needed
- Tub Drain Extractor Tool
- Hammer
- Extension bar OR ½” size ratchet
- Breaker bar (optional)
Step 1
Place the extractor onto the tub strainer.
Step 2
Taking your hammer, give a few hard taps on top of the extractor. This allows the tool to grip to the drain.
Step 3
Apply enough torque using the extension bar, ratchet, breaker bar, or a combination of the three. You’ll know enough torque has been used when the drain begins to rotate.
Step 4
Simply rotate the drain until it’s out of place, and you’re ready to insert a new one.
Method 3: Basic Tools
The last method is the most “old fashioned” option. You’re essentially using the tools you already own to get the job done.
Tools Needed
- Hammer
- Screwdriver
- Cutting wheel
Step 1
Using a cutting wheel, make a notch into the drain collar. This should be big enough to fit a screwdriver tip under.
Step 2
Next, take a screwdriver and hammer it under where you made a cut. This will cause the drain to rotate.
Step 3
Spin the drain until it comes out of place, and you’ll be finished.
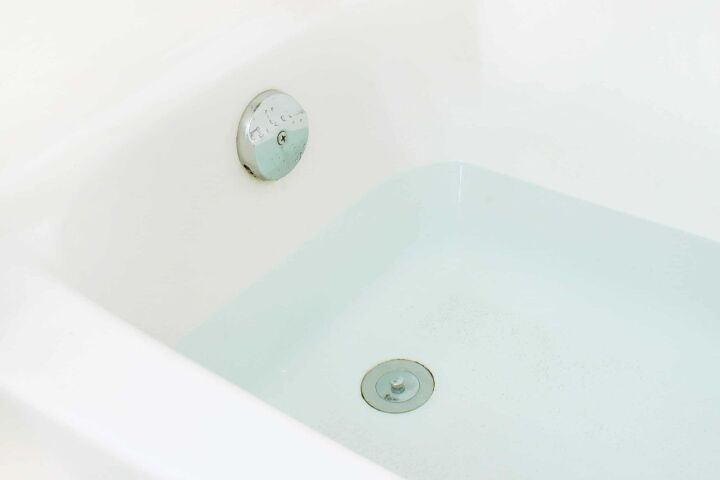
Replacing Tub Drain
Now that you’ve removed the old drain, it’s time to replace it. This is a pretty easy task as well that doesn’t require any expertise.
Step 1
Clean up the area from leftover debris from the removal process. Then follow that up with some fresh plumbers putty. Make a snake, or ring, with the putty and place it around the drain hole.
Step 2
Carefully screw in the new drain going clockwise. There’s no need to use a rubber gasket, so you can set that aside or toss it.
Step 3
Remove the excess plumbers putty and install the drain plug.
Step 4
Test it out! Turn on the water, twist done the plug, and take ‘er for a spin. You’ll be all set to enjoy a much-deserved bubble bath after all of your hard work.
Related Questions
How much does a plumber charge to replace a bathtub drain?
Having a professional install a tub drain averages around $96. There’s a range of about $86 to $106.If you add on the labor and materials cost, you’re looking at spending around $346. There’s an average range of $313 to $379. That’s a lot for just one drain.
Why is my bathtub leaking underneath?
There are a handful of reasons your bathtub may be leaking underneath. It may be from something as complicated as a plumbing issue in the line.It could also be a quick-fix like a faulty seal around the drain assembly. If I were you, I’d check the seal and go from there.
Why won’t my tub drain stay open?
When your tub drain doesn’t stay open, it can become a real nuisance. The main reason this tends to happen is having a linkage that’s too long. As soon as you fit the drain with the proper length link chain, the problem will be solved.
Do You Need a Faucet, Fixture, or Pipe Repair or Replacement?
Get free, zero-commitment quotes from pro contractors near you.
What We’ve Learned
Removing a tub drain with broken crosshairs is much easier than other home improvement tasks. Using just a handful of tools, you’ll be able to get the job done.
With the three methods above, you’ll have options if you find that one isn’t working for you. While you can hire a plumber to do the work, it’s much cheaper to do it yourself.
I hope this guide helped you and that you’re able to check something off of your to-do list. Good luck with all of your future home repairs and improvements.

We are a team of passionate homeowners, home improvement pros, and DIY enthusiasts who enjoy sharing home improvement, housekeeping, decorating, and more with other homeowners! Whether you're looking for a step-by-step guide on fixing an appliance or the cost of installing a fence, we've here to help.
More by Upgraded Home Team