How To Remove A Shower Drain Cover (Step-by-Step Guide)
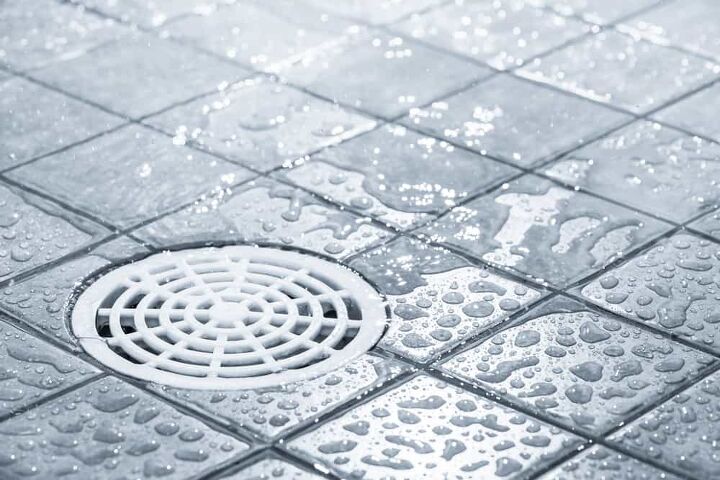
While in the middle of cleaning your bathroom, don’t forget to look down. The shower drain cover you’re stepping on could cause problems in the near future if you don’t clear it out.
Thankfully, removing a shower drain cover is one of the easiest bathroom maintenance tasks. You should be able to pull it off on your own even if you’re not handy with tools.
Start by identifying the type of drain cover installed and see if it features knobs or screws. Drain covers with screws can be removed easily with a screwdriver. Meanwhile, the drain covers with knobs or no visible handles can be removed by hand or by using some pliers.
Once you learn how to remove drain covers, cleaning up inside the bathroom becomes way easier. Learn how to complete this simple yet essential household task by reading on.
Do You Need a Faucet, Fixture, or Pipe Repair or Replacement?
Get free, zero-commitment quotes from pro contractors near you.

Why Regularly Removing and Cleaning the Shower Drain Cover Is Important
Clogging is an issue you never want to deal with. Clogs are unpleasant, unsightly, and they can be hard to get rid of too if they’ve been neglected.
The threat of clogging is the number one reason why you should regularly check on your shower drain covers. Hairs obviously get lodged in the drain and over time, enough of them may accumulate to form a big clump. You may find yourself constantly standing in water before, during, and after showering if you don’t clear the hair clumps.
Residue from soaps and shampoos used inside the shower can also accumulate on top of the drain. You need to clean that up right away or else someone could slip and get injured while showering.
Removing the shower drain cover may also become a necessity in some emergency cases. You may have dropped your earrings while removing them, leading to them falling into the drain. Though it’s a longshot, you could still fish out your earrings if you remove the drain cover quickly enough.
How to Remove the Shower Drain Cover
Shower drain cover removal is simple, but you may have to switch things up depending on what you have installed. The tips below will help you tackle the different kinds of drain covers.
Step 1: Determine What Kind of Shower Drain Cover You Have
The difficulty of removing the shower drain cover will largely depend on what kind you have installed. If you have a newer shower, you may have one of those easy-to-remove covers.
The easiest ones to remove are the pop-up and flip-it drain covers. They have small tabs that you can pull on for easy removal. You may also have a toe-touch drain cover in your shower. Those drain covers can be removed by first pushing on the cover to open it. With the cap raised, you can twist it counterclockwise to unscrew it and open up your drain.
Standard and screw-in drain covers are slightly harder to remove. You’ll need some tools to extract them properly from the shower floor.
Step 2: Prepare the Tools for the Shower Drain Removal
The following tools will help in the removal of standard and screw-in drain covers. Prepare a drain lubricant and a dry rag for this job. You’ll also need a screwdriver and some needle-nose pliers if you have a standard cover.
We’ll also be doing some cleaning. For that, you’ll need some vinegar, water, scouring powder, and an old toothbrush.
Step 3: Lubricate the Edges of the Shower Drain Cover
If it’s been a long time since you last removed the drain cover, it’s likely not coming off without a fight. You’ll have to soften it up first. Get a dry rag and use it to remove the moisture surrounding the drain cover. Soak up any pools of water and make sure that the area around the drain cover is completely dry.
After drying up the area around the drain, take your lubricant and start applying it to the edges of the cover. Using a spray bottle to apply the lubricant would be ideal, but you can use the rag if needed.
Go ahead and apply some lubricant on the surface of the drain cover itself. That should help in loosening it up later. Allow that lubricant to work its magic for at least 20 minutes before you proceed to the next step.
Step 4: Pry the Drain Cover Loose with the Screwdriver
Get your screwdriver now and position it under one side of the drain cover. Doing this is not possible for all drain covers, but if there is room for the screwdriver, place it there.
With the head of the screwdriver parallel to the ground, use it to push the drain cover-up. You don’t have to push the drain cover all the way out of position. Simply nudging it up a bit will be enough.
Continue working on the other sides of the drain cover until all of them are pushed up. This step is particularly helpful if you’re dealing with a grouted drain cover.
Step 5A: Unscrew the Drain Cover
The next step if you have a screw-in drain cover is to remove that fixture. Pick up your screwdriver again and loosen the screw. Remember to place the screw in a container or at least keep it away from the open drain. Returning the drain cover to its original position will be very difficult without that screw.
Step 5B: Pull Out the Drain Cover
Standard covers are best removed with the help of some needle-nose pliers. Stick the slim tips of the pliers into the holes of the drain cover and grab on to them. You can also place a thin rag over the holes before using the pliers to keep the surface from getting scratched.
Now, lift the drain cover using the pliers. If the cover appears stuck, try to loosen it up further by using more lubricant. Moving the drain cover from side to side can also help in dislodging it.
There are also some standard drain covers that have their edges screwed into place. To remove that, simply move the pliers in the direction that allows the cover to be lifted.
Step 6: Clean Your Drain Cover
This isn’t an essential step per se, but it’s worth doing anyway to make clogging less of an issue moving forward. While the drain cover is out of position, take this opportunity to clean it.
Use some vinegar mixed with water to loosen any debris on the surface and underside of the drain cover. After that, sprinkle some scouring powder on to the cover. Use an old toothbrush or a rag to scrub the drain cover with the scouring powder.
Run the drain cover under some water and wipe it clean with a rag. You can now set it aside until the time comes for you to place it back over the shower drain.
How to Unclog the Shower Drain Cover
Unclogging your shower drain cover prior to removal is recommended if you want to make this job more pleasant. There are different methods you can employ for unclogging the drain too.
Use a Combination of Baking Soda, Vinegar, and Water
To get rid of nasty blockages, try flushing the drain clear using baking soda, vinegar, and water. Start by sprinkling some baking soda down the drain and follow that with water. Next, pour some vinegar into the drain and let it soften up the blockages.
You can finish by pouring hot down water into the drain. By following up the baking soda and vinegar with hot water, you can effectively dissolve the debris down in the pipe.
Use Your Preferred Plumbing Tool
Plungers and plumber’s snakes can also help clear out blockages. Consider using one of those tools after clearing out the drain with a cleaning solution to get better results.
Do You Need a Faucet, Fixture, or Pipe Repair or Replacement?
Get free, zero-commitment quotes from pro contractors near you.
Related Questions
Should You Unclog the Drain before Removing the Drain Cover?
You can remove a drain cover without unclogging it first and encounter no problems. Still, unclogging the drain beforehand can protect the cover from possible damage.You may not see right away that some hairs have clung to the drain cover while you’re pulling it out. If you pull too hard, you could snap the drain cover accidentally. Unclogging the drain before you remove the drain cover is certainly worth doing if you have the time.
How Can You Keep Your Shower Drain from Clogging?
One way to keep your shower drain clear is to use a hair catcher. Hair catchers are mesh screens that can be installed inside the drain. As their name suggests, they will catch hairs and other debris that may attempt to pass through your drain.Sadly, not all drain covers are compatible with hair catchers. You will have to take a different approach to keeping it clear. What you can do instead is to make a habit out of regularly flushing your drain. The combination of baking soda, vinegar, and boiling water is usually enough to clear small clogs.
When Should You Replace the Shower Drain Cover?
Shower drain covers won’t last forever. You should replace them as soon as they start rusting over. Failing to replace them in time could lead to an accident if the drain cover breaks open unexpectedly.

We are a team of passionate homeowners, home improvement pros, and DIY enthusiasts who enjoy sharing home improvement, housekeeping, decorating, and more with other homeowners! Whether you're looking for a step-by-step guide on fixing an appliance or the cost of installing a fence, we've here to help.
More by Upgraded Home Team