KitchenAid Mixer Leaking Oil? (Possible Causes & Fixes)

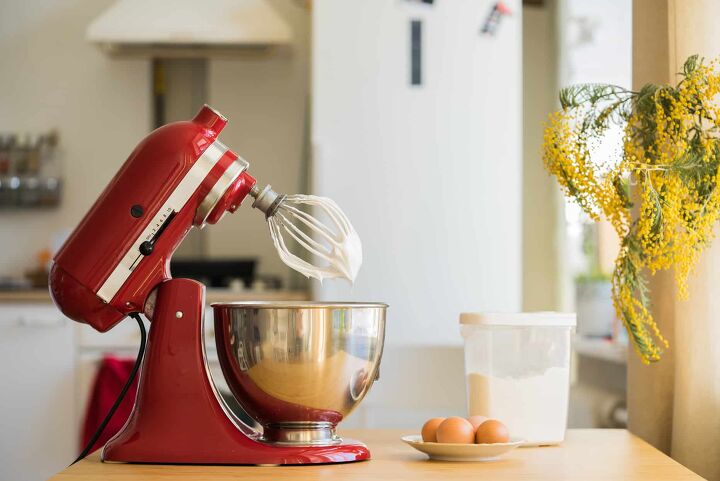
Oil leaking from your KitchenAid mixer is a lot more common than you think, and no cause for concern. However, over time, your mixer runs the risk of leaking all of its oil out of the appliance, which means that your gears will not be as lubricated.
The cause of the oil leak happens for one of two reasons:
- You don’t use your mixer enough, and therefore the oil separates, settles, and leaks.
- You use your mixer too often, and it overheats, warming up the oil so much that it begins to seep out of the appliance.
Regardless of the reason your mixer is leaking, the fix is relatively simple. In this guide, we explain the signs to look for and reasons your KitchenAid mixer is leaking oil. We also give you a step-by-step guide on how to replace your old oil with new, to stop the leaks, and get your mixer into optimal condition.
Do You Need Appliance Installation or Replacement?
Get free, zero-commitment quotes from pro contractors near you.

Signs That Your KitchenAid Mixer Is Leaking Oil
As you use your KitchenAid mixer over time, you may notice some oil leaking from it, but don’t panic! It’s a common occurrence, with a simple fix. But what exactly causes these leaks?
At some point during the lifespan of your KitchenAid mixer, you might notice the following things:
- Some oil in the bottom of the bowl
- Oil on the beater shaft
- If your mixer was on its side during storage or shipping, you might have oil coming from the lock lever or slots where the speed controls are
Usually, KitchenAid will pack your mixer with solid grease. However, there is so much of it that it is designed to last a lifetime.
Why Your Kitchen Aid Mixer Might Be Leaking
When you use your mixer, the grease is then distributed throughout the gears to keep them lubricated. The grease will settle at the motor head’s lowest point, which is right near these points you see the oil leaking from.
It’s a prevalent occurrence during the warmer weather months, especially if you do not often use your mixer. If you regularly use the mixer, it can prevent oil leaks from happening by preventing the grease from settling.
Preventing Oil Leaks From Your KitchenAid Mixer
If you happen to see some oil in your mixing bowl or coming from the beater, turn your machine on. This will help to distribute any oil that has separated. You should turn your device to speed ten without any ingredients, and let it run for two minutes. Any excess oil should be wiped away.
If you haven’t used your KitchenAid in a while, you should do this periodically. However, if you use your KitchenAid mixer frequently, make sure your machine is not overheating. An overheating mixer can also be a cause of oil leaks.
Does My KitchenAid Mixer Need Repairs?
The oil leak, although annoying, is relatively harmless. The leak will not cause any damage to your machine. The grease also happens to be food grade, so you do not need to worry about any contamination or toxic materials falling into your food.
If you’re worried about the oil leaking and you can’t fix the leak by running your mixer with no ingredients, then you might have to get it repaired. However, before you get a KitchenAid shipping kit and contact Kitchen aid, there are several things that you can do to try to fix this problem yourself.
How To Fix A KitchenAid Stand Mixer That Is Leaking Oil
To fix your oil leak, you will need to replace the old grease in the gearbox with new grease. This will take about 10 to 15 minutes to do. Although, if you are new to the world of DIY projects, allow at least 30 minutes for this project.
Note: These instructions are for the following KitchenAid mixer models:
- Mixers with KSM in the model number, except the KSMC50
- Any model numbers beginning with K45 or K5
If this does not pertain to you, you can still follow these instructions but keep in mind that the screws may be in different positions. You might have to tweak these instructions a bit to fit your particular model, but you can use these instructions as a basic walkthrough in any case.
Access The Gearbox
- Take off the power cord strain relief and cover for the rear housing. You will need to remove the motor’s power cord, which means removing the strain relief, which is located under the rear housing cover. Use a Philips head screwdriver for the cover. You can then pull out the power cord from the back of the mixer stand.
- Remove the beauty ring, aka planetary drip ring. This ring helps to seal the gearbox while decorating the mixer. It also catches leaking grease. Use a flathead screwdriver to tap the drip ring off the planetary gently.
- Detach the planetary pin. The last thing holding the planetary to the gearbox is the shaft pin. You can use a hammer and a pin punch to tap the pin from its place.
- Remove the planetary from the mixer. You can use a couple of flathead screwdrivers to pry the planetary at the edges. Afterward, you can pull the rest of it off by hand.
- Take out the screws to the gearbox. Five screws are connecting the motor housing and the stand. You need to remove these with a flathead screwdriver.
- Remove the housing screws. You will also need to remove the four screws that connect the motor housing and mixer stand with a flathead screwdriver. One of the screws will have a retaining washer connected to it. Pay attention to which screw has it and what position so you can return it to the right area.
- Pull off the motor housing from the mixer stand. The front of the motor housing will still be secured as it is part of the gearbox for the mixer. However, you can lift the motor to pull it from the gear shaft and remove it from the mixer.
Remove The Old Grease
The gearbox will have a lot of grease in it, and it’s normal for it to have a dark color if it hasn’t been separated. Ensure that it’s the cause of the leak before you remove it, by seeing if the grease has any signs of separation. If this isn’t the cause of the leak, you might need to bring it to KitchenAid for repair.
- Take the old grease out of the gearbox and motor housing. You will need a putty knife to get all the grease off of the gears. Make sure you put the old grease into a separate container.
- Turn the gears while cleaning. You might need to turn the gears to get all of the old grease. You can insert a pin punch on the bottom of the gear shaft so you can turn the gears while you clean. Also, get the old grease out of the motor housing. This can take several minutes.
Add New Grease
- Set new grease onto the gears. You will need a clean putty knife to begin piling on the new grease. Take little bits at a time to set the new grease into the mixer gears. Try to use the same amount of grease that you removed from the gearbox.
- Turn the gears as you set the new grease. Turning the gears while setting the new grease will help to give your gears appropriate coverage.
Reassemble Your Mixer
- Connect the motor housing to the mixer stand. When you get the motor housing back to its rightful position, look for a bearing in the gearbox portion of the housing. This bearing needs to line up to the gear spindle. You will see the gear spindle projecting out from the gears.
- Turn the gearbox gears. For the motor housing to get into the right position, you will need to turn the gearbox gears. The gears need to be lined up so that the motor housing can sit into its position. Use a pin punch and turn the motor shaft while you apply pressure on top of the motor housing. You will know when the motor housing is in position when the gap closes.
- Insert the fasteners for the mixer housing. You now need to return the five screws that were under the planetary and the other four screws at the back of the housing. Remember to place the housing screw with the washer on it back to the same position.
- Attach the planetary. Before putting the planetary back on, you can apply a little bit of fresh grease to the planetary gear. This doesn’t have to be a lot; just a thin coat will do the job. Make sure you align the planetary gears while you are pressing everything back into place. When you’re pressing the motor housing, it’s a good idea to turn the motor shaft to help the gears’ alignment.
- Install the planetary pin. First, you will need to make sure that the motor shaft and planetary holes are aligned before you hammer the pin into position. Wedge a small screwdriver through the holes to help line them up. When they are aligned, you can tap the pin back into place using a hammer.
- Replace the beauty ring. Tension holds the beauty ring in place, so you will need to clean the area around the planetary before reinstalling the ring. Once the area is nice and clean, the ring will press into position by hand.
- Put the rear housing cover back onto the mixer. You will need to make sure you re-engage the strain relief for the power cord before you put the rear cover back on. Use a Philips screwdriver to put the screw back in its original position, and you’re done!
Related Questions
Is there a lifetime warranty on KitchenAid mixers?
KitchenAid usually has a limited lifetime warranty. If there are any manufacturing or craft defects, the warranty will cover you. However, if your mixer has issues from:
- Normal wear and tear
- Abuse
- Accidents
Then the warranty will not cover your mixer.
What is the lifespan of a KitchenAid mixer?The company mentions that the life expectancy of their mixers is in or around about 15 years. However, you can make it last longer with the right maintenance and care.
Some people have made their mixers last more than 30 years. How long it lasts depends on how much you’re using it, as well as if it’s being taken care of properly.
Do KitchenAid mixers need maintenance?You will need to properly take care of your KitchenAid mixer to keep it working properly. It’s a good idea to do regular inspections and pay close attention when you are using it. This will help you catch any issues early on to take care of them and keep your mixer in tip-top shape.
Check Out Our Guide: Are KitchenAid Attachments Dishwasher Safe?
Do You Need Appliance Installation or Replacement?
Get free, zero-commitment quotes from pro contractors near you.

In Conclusion
Again, the oil leaking from your mixer is no cause for concern. However, it’s best to fix it as soon as you notice it happening. Simply turning your mixer on high for a couple of minutes should help to redistribute the oil. However, if this doesn’t work, you only need to replace the old grease with new.
If you’re one of those cooking enthusiasts who love to use their mixer, make sure your appliance is not overheating. If it is, let it cool down between uses, and you should have no problem!

Heather is a passionate writer who loves anything DIY. Growing up, she learned everything from home repairs to design, and wants to share her tips with you. When she's not writing, she's usually hiking or searching for her next DIY project.
More by Heather Robbins


