Water Softener Bypass Valve Leaking? (Possible Causes & Fixes)
Depending on the area in which you live, you may find that the water is a bit harder than normal. Water hardness encompasses the amount of minerals within the water. These are all common minerals, but the greater quantity of minerals, the “harder” the water.
A water softener is meant to combat water hardness, specifically to extend the life of your water-using appliances. From time to time, the bypass valve – a component of the water softener – can leak. The reason being that the O-rings within have failed to seal or have become cracked or damaged.
Do You Need Water Treatment and Purification Repair or Service?
Get free, zero-commitment quotes from pro contractors near you.

What Does a Water Softener Do?
As mentioned above, the hardness of water can vary depending on the area that you live in. There will be small deposits of magnesium, calcium, and a slew of other minerals no matter where you live. But the presence of said minerals can rise in some situations.
The water softener, also known as an ion exchange unit, removes much of the aforementioned minerals from your water. In addition to making your drinking water cleaner, it helps to extend the life of water-using appliances that would otherwise be worn down by those minerals.
How Can You Tell if Your Water Softener Has Sprung a Leak?
Unfortunately, your water softener can leak from time to time. The good news is that you won’t have to look all that hard to find a leak when it is happening. You should notice a puddle around the water softener where it has been installed.
Just because you can’t see the leak, however, doesn’t mean that the leak does not exist. Should regeneration take longer than it normally does, that means there is less water available because of a leak. The good news is that there are plenty of ways to diagnose leaks and solve them.
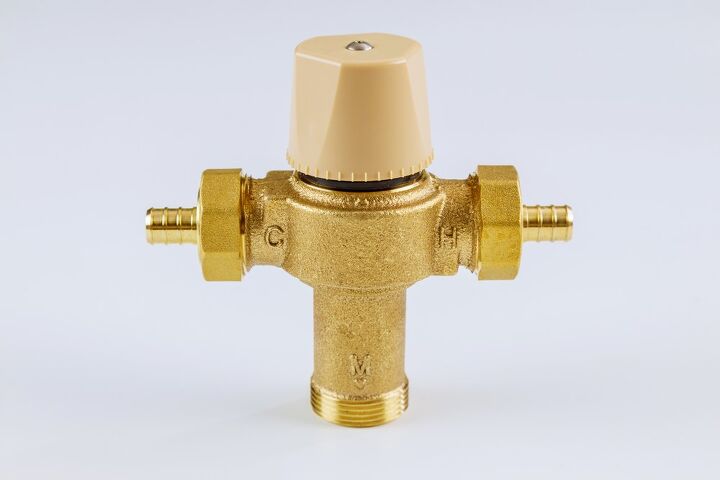
When the Bypass Valve is at Fault
The good news, at least when it comes to the bypass valve, is that there really is only one issue at play and that is the O-rings. Keep in mind that not every single water softener on the market has a bypass valve on it. If yours doesn’t, you can move on to one of the other potential issues.
The bypass valve allows water to bypass the system (hence the name). This valve is meant to be a convenience in the event that you need to repair or replace another component without cutting off the water supply to your home.
The bypass valve has a couple of O-rings that are used to seal the valve, preventing leaks. Over time, pressure can either unseat or wear down those O-rings. They can also become cracked or even split over time, facilitating the need for replacement.
Replacing the Bypass Valve O-Rings
There is good news and bad news when it comes to the bypass valve O-rings. The good news is that they can be fixed in relatively short order so that you can get back employing your water softener as normal.
The bad news is that replacing those O-rings requires special tools and a special skill set. That means getting a plumber involved, one with experience in fixing water softener systems. The fix should be quick, but you are probably looking at anywhere from $50-$100 depending on what plumber you go with.
It’s Not the Bypass Valve: What Else Could it Be?
So, you’ve done some troubleshooting on the bypass valve only to determine that it actually isn’t at fault. The O-rings are in fine condition and are sealing properly as they were meant to. So, what gives?
Well, if your water softener is still leaking, there are three other likely explanations. It could be a puncture to the brine tank, an issue with the rotor valve, or a simple loose hose connection. It just takes a little bit of troubleshooting to find the issue.
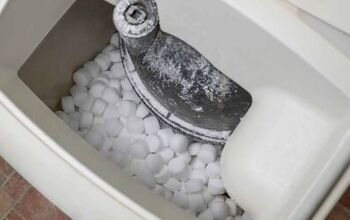
Issue #1: Brine Tank Puncture
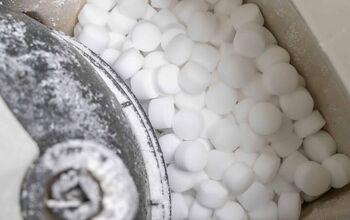
On your water softener, the brine tank is where the salt goes. Water softeners work by replacing the magnesium and calcium ions with sodium (salt) ions. Having a puncture in your brine tank means needing to replace it entirely.
You might be able to find a sealant to do the job but proceed with caution. The wrong sealant can actually damage your water softener system, leading to even further issues. It is probably better to just have the brine tank replaced entirely by a professional.
Issue #2: Rotor Valve
On your water softener, the rotor valve is located at the very top of the unit. Since the rotor valve is the source of the water coming into the unit, the rotor valve tends to be the most common leakage point. Over time, the rotor valve usually develops cracks and needs replacing.
Should you see leaking around the rotor valve but can’t find a breakage or crack, the issue is likely due to the seal on the inside. No matter what, if you notice a leak coming from the rotor valve, you will have to replace the component entirely.
Issue #3: Drain Line
The water softener drain line runs near the top of the unit. It depends on what brand of water softener that you have; it may take a few minutes of poking around to find the drain line.
The good news is that if you have a leak from the drain line, you shouldn’t miss it. The bad news is that a leak in the drain line needs professional intervention.
Issue #4 Loose Hose Connection
The final likely cause of a leak with your water softener has to do with the supply hose. This is probably the easiest fix, too, because most of the time it is due to the hose connection being loose.
Simply tighten down the connection to solve the leak. If that doesn’t do the job, then you may have a puncture in the hose, in which case you would have to replace the hose entirely.
How Much Does it Cost to Fix a Water Softener?
The first question is the type of repair that is needed. Depending on the problem, you may be able to fix the issue yourself for just a few bucks or it may cost a few hundred bucks. The first step is troubleshooting.
By troubleshooting, you can find out what the issue is and assess from there. From time to time, you may not be able to successfully troubleshoot the issue. Bringing in a professional means that you can get the issue resolved in just a short time as opposed to spending hours finding and resolving the issue.
That said, if you outsource it to a professional, you are probably looking at an hour or two of labor plus parts. Don’t be surprised if you spend a few hundred bucks depending on the issue.
DIY vs. a Professional
Now that we know about the costs of a professional, it might seem like you should try to go with a DIY fix. That can be true, depending on what the issue is. There is also another important factor to consider: the warranty.
If your water softener has a warranty, check that first. They may require that a professional repair technician service the softener. Performing a fix yourself may actually void the warranty, so be careful when attempting to fix the issue yourself.
Do You Need Water Treatment and Purification Repair or Service?
Get free, zero-commitment quotes from pro contractors near you.
How to Stop a Water Softener from Leaking
There are a few basic steps for stopping a leak in your water softener system. Before you start, make sure that you unplug the system. Electrical currents are nothing to mess around with.
Step 1: Turn Off the Water
Start by turning off the water supply to your water softener. This is especially important in the event of a leak as it will stop the water from leaking or flooding into your home. Not only that, you will be more easily able to work on the problem.
Step 2: Find the Bypass Valve
You should start with the bypass valve. These connections are usually made at the back of the unit and should be easily visible. The bypass valve is usually a white piece of plastic and has an outlet/inlet supply line connected to it.
You should see “push for bypass” printed on one end of the bypass valve. Push the bypass valve in as it allows water to eventually bypass the softener.
Step 3: No Bypass
Should your unit not have a bypass valve installed, you will have to find the water inlet supply line. If you are looking directly at the unit from the front, you will find the inlet supply line at the right. Follow the line to the shutoff valve, turning it clockwise until the water stops.
Step 4: Contact the Installer
Now that you have successfully stopped the flow of water into the softener, you can find an action plan. Whether this means calling the installer, having a professional look at the issue, or performing a DIY fix is up to you. For the most part, leaks with your water softener are due to issues with the installation.
Related Articles

Ryan Womeldorf has more than a decade of experience writing. He loves to blog about construction, plumbing, and other home topics. Ryan also loves hockey and a lifelong Buffalo sports fan.
More by Ryan Womeldorf