


Water Heater Leaking From Drain Pipe? (Possible Causes & Fixes)

Water heaters are a modern commodity, that is when they work properly. However, sometimes you walk by your water heater and find that it is leaking water, and that is a problem. So, why is it that your water heater is leaking from the drainpipe?
Your water heater could be leaking from the drainpipe because the pressure relief valve is damaged or has a weak seal. It could also be that your water supply lines are worn out and need to be replaced. Otherwise, there could be a buildup of sediment in the tank, or the tank itself could have burst.
You can find out the exact cause if you examine the water heater. Follow along as we explore the possible causes and solutions to water leaking from your drainpipe.
Do You Need to Hire a Plumber?
Get free, zero-commitment quotes from pro contractors near you.

Water Heater Leaking From Drain Valve
Possible Causes
1. Tank

Water may be leaking from the drainpipe and valve if the tank is defective. This is the easiest problem to detect because it usually occurs when the tank ruptures. You can’t miss a ruptured tank because you will spot the wet mess from a mile away.
There won’t be a small leak, and instead, you’ll find a minor or major flood. This flood can cause major water damage, electrical damage, and can lead to mold. Unfortunately, there is no solution other than replacing your water tank in this case.
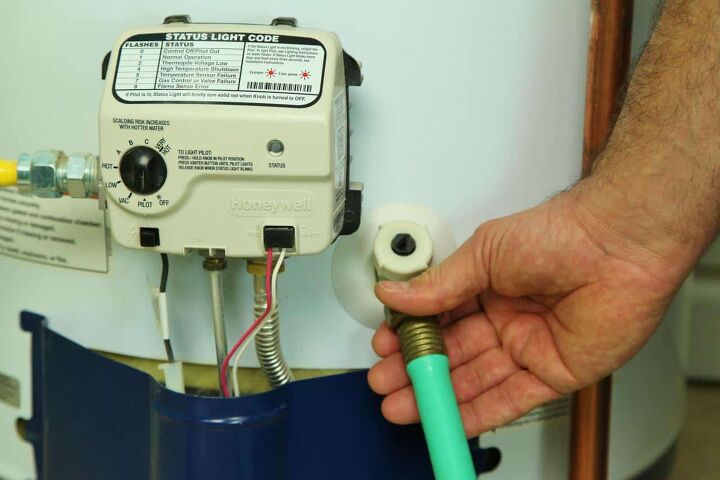
2. Pressure Relief Valve

All water heaters have temperature and pressure relief valves that are necessary for their function. Sometimes, these valves go bad and need to be replaced. These valves only drip or leak when there is a problem, and you need to fix it before it gets worse.
It could be because there isn’t a proper seal, but it could be something worse like a mechanical error. The valve may need to be replaced, but it can sometimes still leak after you replace it. That is because some homeowners fail to seal the new valve properly during installation allowing room for it to leak.
Solution
Turn off the water supply before you do anything to your temperature and pressure relief valve. Check the tank to make sure that there is no pressure before you try to fix or replace the valve. The temperature may be set too high which increases pressure in the water heater,
High pressure can cause water to leak from the drain valve, and you need to turn down the temperature. Lower the temperature by a small margin, turn the water back on and see if it leaks from the drainpipe. Otherwise, you may want to check around the pressure valve to see if there is a buildup of sediment.
You can install a water expansion tank to take on some of the extra pressure and avoid future leaks. The added space allows the water to alleviate some pressure without leaking any water. If they are the problem, you will need to replace them to avoid future leaks.
3. Water Supply Lines
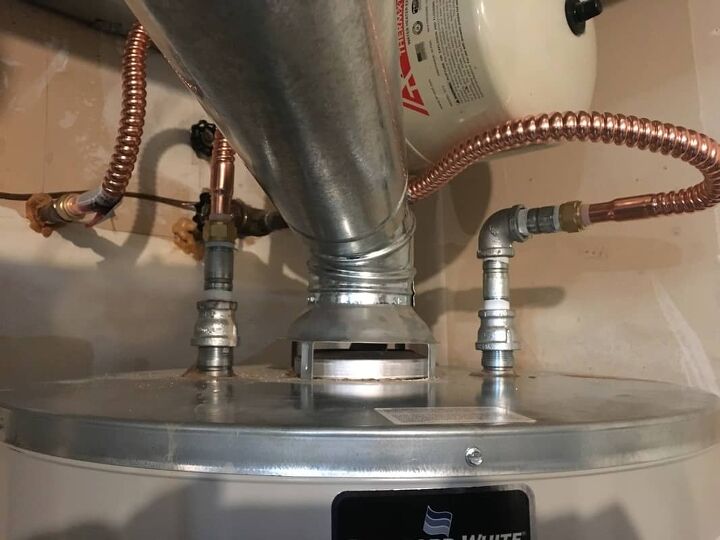
Water supply lines leak at times, and that causes water to spill and drip from the drainpipe. You can find the water supply lines directly above your water heater, and they’re hard to miss. The pipes can knock loose, or the insulation can wear out around the supply lines.
This leads to an improper connection that allows water to slip through and create a mess. It is a major inconvenience, but it is luckily one of the easiest problems to fix with your water heater. Some water supply lines are too flexible and that makes them more susceptible to leaks and cracks.
Don’t panic if your water supply lines are faulty and allow water to spill from your drainpipe. Thoroughly inspect them for gaps, cracks, and corrosion, and you’ll be able to see if they are the problem. If they are the problem, you will need to replace them to avoid future leaks.
Solution
Shut off your water supply and gas valve before you replace your water supply lines to work safely. Drain the remaining water from a nearby faucet so that you don’t make a wet mess. Use a wrench to loosen the nuts that hold the water supply lines in place.
You can easily pull out the defective lines after you remove the nuts, and you can throw them away. Clean the threads where the old lines were to ensure a proper fit for your new lines. Now, install your new lines directly into the pipes that protrude from the wall behind the water heater.
Screw your connection in tightly with your wrench and give it a shake test to make sure they’re firm. Now, grab the other end and connect them to the water heater itself. Tighten both ends once more, turn on the water supply, and check to make sure the new lines are a perfect fit.
4. Drain Valve
You can find the drain valve at the bottom of your water heater, and that’s the most common source for leaks. Drain valves don’t always shut properly when they drain water, and that causes excess water to spill. The good news is that defective drain valves are easy to identify because of how visible they are.
It’s common to find puddles of water at the base of your water heater if the drain valve is defective. Some homeowners simply attach a hose cap to the drain valve to solve the problem. That is effective to a certain degree, but it is more effective to replace the drain valve entirely.
Solution
First things first, you need to fully drain the tank before you replace the drain valve. Otherwise, water will rush from the tank when you remove the defective drain valve. Turn off the heater’s power and shut off the gas heater pilot knob.
Give yourself 3-5 hours for the water to cool off before you work any further. Now, connect a garden hose to the drain valve to drain it. Release the pressure relief valve and open the drain valve water to let the water out.
Turn the drain valve clockwise with a wrench to remove it and discard the old valve. Now, wrap the new valve with the plumber’s tape and put it in the place of the old drain valve. Turn your power and water supply back on, and your new drain valve is good to go.
5. Water Heater Nipples
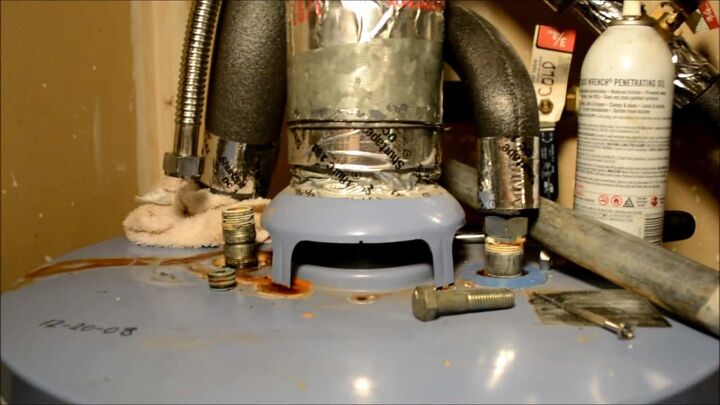
You will find water heater nipples between the cold water inlet and hot water outlet on your water heater. The nipples are at the top of the water heater near the supply lines, and they can cause major water leaks. It is easy for the threading on water heater nipples to wear out, and that causes problems.
Leaks occur when the threading wears out to the point that the connection is loose. This loose connection allows water to escape, leak, and create a mess around your water heater. Corrosion forms with water heater nipples if you have copper and galvanized steel nearby.
The combination of moisture, water, and electrical charges causes corrosion that makes the threading wear out. Because of that, many states require that you use dielectric union fittings to minimize the risk of corrosion. You will have to replace your water heater nipples if the threading is worn out and it is leaking.
Solution
This is one of the easiest solutions, and all that it requires is a wrench and some elbow grease. Granted, it can be difficult if the corrosion has set in and the threading is deeply damaged. Clasp onto the water heater nipples with a wrench and turn them until they’re loose.
You may need to use a lubricant to make them easier to grasp if they are deeply corroded. Once you get the water heater nipples off clean out the opening before you install the new ones. Carefully place the new water heater nipples and screw them into place.
Consider wrapping the threading in a thin layer of plumber’s tape to protect the threading from corrosion. Check to make sure if your state requires dielectric union fittings.
6. Sediment
Sediment can be a problem anytime that you deal with water. That is because water can contain many contaminants, heavy metals, minerals, and buildups of bacteria. This all combines to create a perfect storm that leads to sediment wreaking havoc on your water heater.
Sediment causes blockages that can force the water to leak out at various spots of the heater, including the drainpipe. Otherwise, sediment can cause corrosion that weakens several components of a water heater. Too much sediment causes your water heater to operate at a weaker capacity, and it can create a leaking mess.
Solution
The only solution is to flush your water heater to remove the sediment from it. First, turn off the water heater and shut off the cold water valve. Connect a garden hose to the drain valve to drain the water tank and let the other end into a bucket to let the water flow.
You can pour a solution like liquid scale remover to get rid of any sediment buildups in the tank. Some homeowners use vinegar because it can break down sediment as well. Otherwise, a simple flush and drain are often enough to get rid of sediment.
Do You Need to Hire a Plumber?
Get free, zero-commitment quotes from pro contractors near you.
Summing It Up
Water leaks from drainpipes when your supply lines are defective. You can fix this by replacing the water supply lines or water heater nipples. There could also be a sediment buildup that causes the water to leak, and you’ll need to flush the tank.
The pressure relief valve could also be damaged and corroded, and you’ll need to replace it. The worst scenario is that the tank has burst, and that can lead to flooding. Examine your water heater and see which of these problems and solutions best suit your situation.
Nick Durante is a professional writer with a primary focus on home improvement. When he is not writing about home improvement or taking on projects around the house, he likes to read and create art. He is always looking towards the newest trends in home improvement.
More by Nick Durante


![How Much Weight Can a 4×4 Support Horizontally? [It Depends!]](https://cdn-fastly.upgradedhome.com/media/2023/07/31/9070333/how-much-weight-can-a-44-support-horizontally-it-depends.jpg?size=350x220)


![Standard Dining Room Table Dimensions [for 4, 6, 8, 10 and 12 People]](https://cdn-fastly.upgradedhome.com/media/2023/07/31/9074335/standard-dining-room-table-dimensions-for-4-6-8-10-and-12-people.jpg?size=350x220)


