Roof Leaking Around The Chimney? (Possible Causes & Fixes)
There are many areas of the home that homeowners don’t typically pay much attention to, like the roof. This may be a simple case of out of sight out of mind, after all, how many of us walk around looking up? This lack of attention could also be because these are parts of the house that don’t usually require or need much attention. That is until there is a problem that demands our attention, like a roof leaking around the chimney.
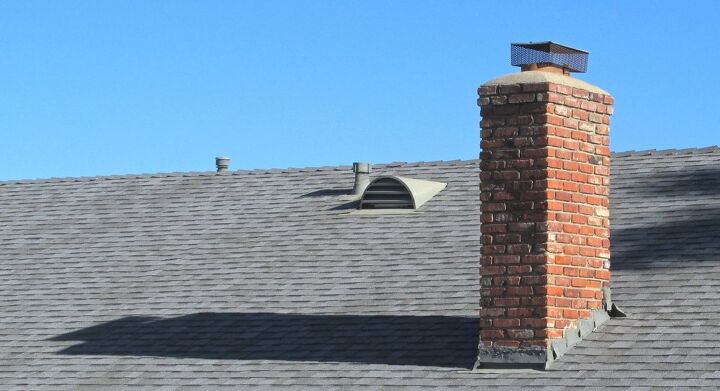
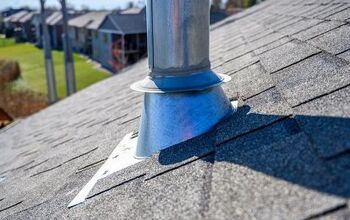
If the roof is leaking around the chimney, the most common reason is a problem with the flashing. To fix the leak, the base flashing (also referred to as step flashing) will need inspecting and sealed with a polyurethane sealant. Additionally, cracks in the brick or mortar can also be why the roof leaks around the chimney.
Hopefully, leaks from the roof and around the chimney won’t be discovered because you are getting dripped on. In the worst-case scenarios, however, that can be exactly how leaks are discovered. Fortunately, regardless of how the leak is recognized, there are some simple fixes for the most common types of leaks.
As with any problem that needs to be addressed, it begins with investigating the problem to find the cause and source. In the case of a roof leaking around the chimney, that will also require some climbing. Always take the necessary precautions when working above ground, and always have a partner to help.
Don't want to do it yourself?
Get free, zero-commitment quotes from pro contractors near you.

Investigating the Leak
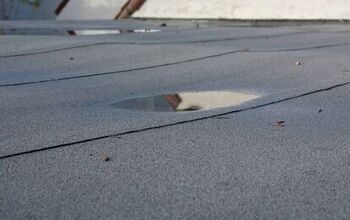
A roof leaking around the chimney will generally have some signs and indications of a problem before it starts raining inside your home. A thorough inspection of the chimney and the immediate area around the chimney will often reveal signs of a leak or an imminent leak.
Since the problem of a roof leaking around the chimney begins with locating the cause, we should start there. That will also require knowing what to look for and what signs indicate a leak around the chimney.
What are the Signs that the Roof is Leaking Around the Chimney?
In the majority of cases, homeowners don’t have to get wet before realizing there is a leak. Here are the tell-tale signs that the roof is leaking around the chimney.
Rotted sheathing
To check for a leaking roof around the chimney, the sheathing beneath the roof shingles should be examined. If the sheathing is rotting or damp, it is an obvious sign that a leak is present. Rotting, soft, or damp sheathing is also indicative that the problem is with the flashing.
Warped shingles
Another sign that may reveal a potential roof leaking around the chimney is shingles that appear warped. Shingles exposed to sitting or prolonged moisture will curl or warp. That is also another sign that the problem is related to a flashing issue.
Brick discoloration
If bricks are becoming discolored or become grayish-black, it is a definitive sign of a leak. More often than not, this points to a problem with the mortar or possibly cracks in the brick.
Missing brick facing
Another sign of a roof leak around the chimney is missing brick facings. In many cases, homeowners will find brick facings on the ground, which is a sure sign that the chimney needs inspecting.
How do You Fix a Roof Leak Around the Chimney?
The solution for fixing a roof leak around the chimney will depend on the type of leak. Once the cause of the leak is determined (either with the flashing or with the brick), we can get to work fixing the problem.
Fixing the Chimney Flashing
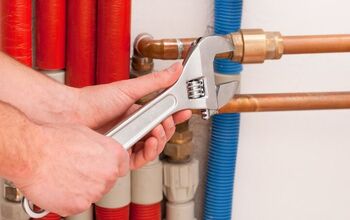
Homeowners who are dealing with a problem with the chimney flashing can most often fix this problem themselves. Here are the steps to fix the flashing around your chimney and stop your roof from leaking.
What you will need:
- Good work gloves
- Extension ladder
- Safety harness
- Hammer drill and masonry screws
- Wire brush
- Caulking gun
- Chisel
- Flashing sealant (polyurethane-based)
- Utility knife
Step 1: Getting to the chimney
Using an extension ladder, carefully climb to the roof to access the chimney. Wearing a safety harness is advised for anyone working above the ground or on a roof.
Step 2: Clear chimney flashing
Carefully remove any debris or objects that are behind the flashing. This is also a good time to locate and verify exactly where and what the problems are, and what will be required to fix the flashing.
Step 3: Clean old sealant from flashing
Using a wire brush and chisel, be sure to thoroughly remove any of the old sealant from behind the flashing and on the brick. That will allow for better adhesion and a better seal. It is advised to use the chisel to loosen and remove larger and more stubborn sealant remnants. Then proceed to use a good wire brush to smooth the surface and remove and smaller particles of the remaining sealant.
Don’t forget to wear durable and protective gloves while clearing and cleaning the flashing. Some flashing edges can be sharp and present the risk of getting cut or scratched. The goal isn’t to get the surface spotless, only to remove the majority of the old sealant.
Step 4: Appy new sealant
With a utility knife, open the sealant by cutting a hole at the top of the tube. Most sealants will have basic directions for how to best cut the tube. The goal is to open the sealant tube enough to allow for a 1/4 inch to 1/2 inch bead to be applied.
Apply the sealant around the edges of the flashing. Additionally, apply sealant to any loose flashing (this should be done before applying the sealant to the edges of the flashing).
Step 5: Secure loose flashing
Using your drill and masonry screws, reattach and secure any loose flashing. Remember that the screws aren’t used to seal the flashing, but to hold it secure and in place. This also means that only a couple of tack screws will be needed.
This step should be done after applying the sealant to both loose flashing and the flashing edges. Once the flashing is secured with screws, double-check the sealant application to confirm the created seal is still intact. This is an important follow-up step, as the seal created by the sealant can be disturbed by the movement or vibration of drilling screws.
Step 6: Seal screws
The final step is to use the sealant to cover the heads of the screws as these may permit potential access for water and moisture.
It is important to keep an eye on the roof and monitor it for a few weeks following the job. In most cases, if the leak persists, it is an issue with an edge not sealing fully or will require other minor readjustments to your fix.
If the roof continues to leak after attempting to fix the chimney flashing, it will be necessary to contact a professional roofing and repair service. Roof issues like leaks are also problems that should be dealt with sooner than later to avoid further damage and risk.
Other Possible Reasons a Roof Leaks Around the Chimney
If the attempts to fix a roof leaking around the chimney aren’t successful, it could mean a bigger or more serious underlying issue. In some situations, however, condensation can mimic a roof leak. The key is to check those aforementioned signs of a roof leak.
Condensation
If there are no indications (damp or rotting sheathing, discolored bricks, etc.), then it is more than likely nothing more than moisture from condensation. If the roof leak does persist and continues to show signs of leaking, it will be necessary to contact a professional roofing company.
Absent or missing flashing
It is reported that homeowners who have had new roofs installed have discovered that there is no flashing present around the chimney. While this isn’t a common problem, it isn’t an unheard-of occurrence either. This is likely because there was no flashing installed when the first roof was put on.
It is also reported that on occasion the flashing wasn’t replaced when a new roof was put on, resulting in the roof leaking around the chimney. Without the flashing roofs, and in particular, chimneys, are likely to develop leaks sooner than later.
Don't want to do it yourself?
Get free, zero-commitment quotes from pro contractors near you.
Is a Roof Leaking Around the Chimney Dangerous?
A leaking roof doesn’t particularly present any immediate threat, but it can be a dangerous and harmful situation if left unattended. These risks are also for both people and the roof itself. And people with breathing issues might experience even more potential health concerns as a result of sitting water, mold, and other moisture-related concerns.
If a leaking roof around the chimney isn’t fixed, the problem will only continue to get worse. That can be problems that create blockages in the flue, cause damage to chimney lining, and even cause a potential roof collapse. These are also problems that swift action and fixing the leak can resolve.
Related Guides

We are a team of passionate homeowners, home improvement pros, and DIY enthusiasts who enjoy sharing home improvement, housekeeping, decorating, and more with other homeowners! Whether you're looking for a step-by-step guide on fixing an appliance or the cost of installing a fence, we've here to help.
More by Upgraded Home Team


![12 Washing Machine Brands to Avoid [with Recall Data]](https://cdn-fastly.upgradedhome.com/media/2023/07/31/9075781/12-washing-machine-brands-to-avoid-with-recall-data.jpg?size=350x220)