How to Wire a Subpanel to a Detached Garage
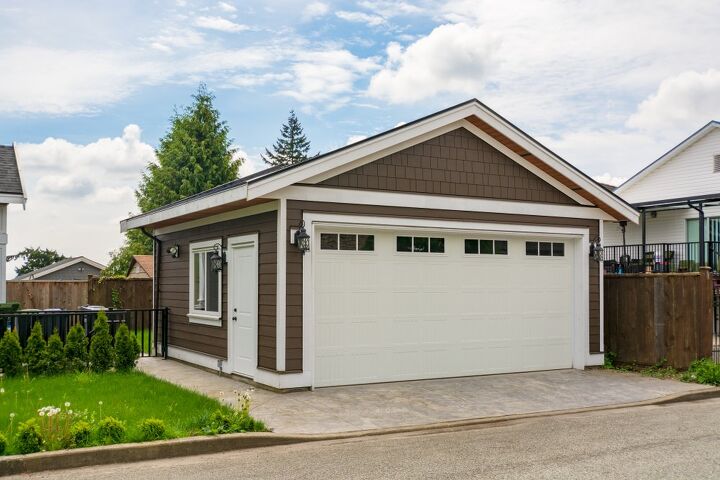
Summer is the perfect time for home improvement, and a good place to start is your detached garage so you can get ready for the harsher winter weather when it arrives.
Wiring a subpanel to a detached garage protects your main energy panels from overloading, especially if you run some heavy equipment that takes higher voltages from your garage.
In general, installing a subpanel can cost from $1,200 to as high as $4,000 to $5,000, and these numbers do not include labor costs — now you see why this is a project many homeowners choose to do by themselves.
Do You Need to Hire an Electrician?
Get free, zero-commitment quotes from pro contractors near you.

What is an Electrical Subpanel?
It’s important to first understand what a subpanel is before the installation project. This will help you in the long run when you need to decide the specs and other characteristics of your subpanel.
In short, an electrical subpanel distributes power to a specific area/part of your home or property. Therefore, it is much smaller compared to your main electrical panel.
Essentially speaking, a subpanel is a satellite circuit breaker panel. It is usually installed close to the area it serves, such as the detached garage, and typically has its own breakers.
Different Types of Subpanels & Their Costs
Subpanels are categorized by amperage and usually come in 100 amp, 200 amp and 400 amp. If needed, you can build an 150 amp subpanel for specific purposes as well.
Simply put, the higher the amperage, the more expensive the subpanel will be. We’ve put together a pricing sheet for your reference if you are considering upgrading/adding a subpanel to your detached garage.
Cost of Electrical Subpanels by Amperage
| Amperage | Price |
| 100 | $800 – $1,200 |
| 200 | $1,300 – $3,000 |
| 400 | $2,000 – $4,500 |
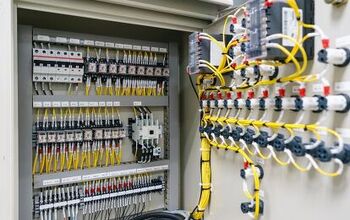
How Is a Subpanel Connected to the Main Circuit?
The subpanel you put in your detached garage is connected to a double-pole breaker in the main panel via two hot wires, which are usually called feeder wires because they “feed” the subpanel with power from the main circuit.
You will also need a ground wire and a neutral wire, as well as individual breakers to prevent overload.
Why You Need a Subpanel to Your Detached Garage
The point of having a subpanel is to prevent energy overload on the main panel side. Remember all the circuit issues you’ve encountered? Burnt fuse, jumped breaker, etc. Subpanels are meant to prevent or at least minimize these incidents.
Many of us have passion projects in our garage. Some run power tools and other heavy equipment, others built an entire gig venue for their homie band. All these things cause extra burden on your electrical circuit.
That’s when the subpanel comes in handy as it turns your detached garage into an independent energy segment and eases the burden on the main circuit board.
Getting The Job Started
Now that you’ve learned enough about an electrical subpanel, it’s time to get the job started.
Before you begin the installation process, you need to learn about some basic specs to make sure you are doing this right.
Some Basic Specs
First of all, if you don’t plan on adding any utility lines or computer/TV cables to your garage, then all you need is to run a red, white and black line from your house where the main panel is.
You will need a 6-ft ground bar and a ground wire of your choice. You will also need a circuit breaker panel with at least 12 slots and, naturally, if you plan on hooking up larger appliances that go above 240V, you will need a larger breaker panel with more slots.
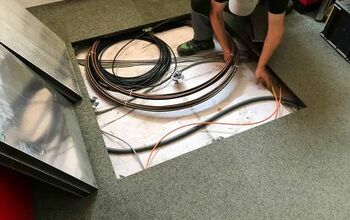
Preparing For Installation
The first thing you need to do is to dig out enough space to make a trench for the outdoor wires. The best material to use for this trench will be PVC conduits, which can be bought from any home improvement or hardware stores.
Run the PVC conduits from your main circuit panel to your detached garage and use connectors to navigate the wires according to your needs.
Building The Subpanel
Once you have the conduits run all the way to where you want the subpanel to be, nail a piece of plywood at least 6 inches bigger than the subpanel itself to the wall. Then simply screw the subpanel box to the center and connect it with the conduit.
Also, make sure you check with your local municipality because some areas require the wood backing to be painted black.
Connecting the Subpanel to the Main Circuit Panel
Now, use the three wires mentioned earlier, plus a green wire (ground wire) to connect your subpanel to the main electrical board.
After that, connect the red wire and the black wire to the main lugs placed on the very top of the main bus, then connect the white wire to the neutral bus. Connect the green wire to the ground bus bar.
Does It Work? A Simply Way to Test
You don’t have to flip it on and plug in some mega tools to see if your electrical subpanel works. At that point, it may even be too late, or too much work to come back and fix an error.
The simplest way to test your installation is using a voltage meter. If the meter reads the correct amperage, you should be good to go.
The only thing left to do is to cover the panel box, and turn the garage breaker on. And Voila — there shall be light!
Safety Tips For Subpanel Wiring
Whenever we work with electricity, it is always crucial that we follow certain safety guidelines. Just because we are not a professional skill trader does not mean we can grab wires with our bare hands.
For example, make sure you have protective gears such as rubber gloves and protective glasses. Also you should never work with electrical circuits when it is “live”, so make sure your breaker is switched off before you start.
Since you are working on a detached garage, you will inevitably be working with outside wiring. Thus make sure you install a ground fault circuit interrupter (GFCI) as it is required by The National Electrical Code (NEC).
Additional Tips
For those new to working with the electrical system, we’ve gathered a few additional tips from pros:
- If you are working on this project during colder times of the year, it’s easier to work with the wires if you can keep them warm, instead of leaving them outside.
- The type of colored wire you use should be decided by the amperage of your subpanel. For example, a 50 amp panel uses #8 THHN wire.
- Get some snacks and drinks. It could easily cost you 2 hours to wire the subpanel to your detached garage — you want to stay energized and hydrated especially if you are working during the summer time.
- Flashlights are good to have because when you are working inside your garage, such as mounting the backing and the subpanel, your lighting will be limited even if you work during daytime.
Do You Need to Hire an Electrician?
Get free, zero-commitment quotes from pro contractors near you.
Our Final Take
After reading this how-to guide for wiring a subpanel to a detached garage, we hope you feel confident to proceed with your project!
On average, this DIY installation could cost you somewhere between $1,500 to $4,500, but in the long run, wiring a subpanel to your garage saves you money because it will reduce the number of calls/requests sent to the main panel.
To complete this project, you will need red, white, black and green wires, grounding materials and a ground bar. But once you understand how an electrical subpanel works, the rest will fall into places.

We are a team of passionate homeowners, home improvement pros, and DIY enthusiasts who enjoy sharing home improvement, housekeeping, decorating, and more with other homeowners! Whether you're looking for a step-by-step guide on fixing an appliance or the cost of installing a fence, we've here to help.
More by Upgraded Home Team


![10 Best Electric Lawn Mowers - [2022 Reviews & Top Rated Models]](https://cdn-fastly.upgradedhome.com/media/2023/07/31/9070486/10-best-electric-lawn-mowers-2022-reviews-top-rated-models.jpg?size=350x220)