How To Lighten Stained Wood (In 8 Easy Steps)
When you first got that bookcase, you were totally enthralled with it. Its deep mahogany stain made it look so stately, and yet, it was only $40 at the thrift store. What a steal, right? Unfortunately, things took a turn for the worse. You soon realized that all the other furniture you bought had a light cherry finish to it. What can you do? Moreover, is it even possible to lighten stained wood?
Lightening stained wood can be done by stripping it of the current varnish, then bleaching it. After about half an hour, you’ll need to neutralize the bleach with vinegar, wipe the mixture off, and let it dry overnight. Once it looks like it’s the right shade, sand it down and apply a new, lighter finish to seal in your work.
Getting your wood stain lightened is going to be a little bit of a challenge, primarily because it’s hard to gauge what shade your furniture will turn out when you’re done. Thankfully, this procedure will make it easy enough to do.
Should You Lighten Your Stained Wood?
Lightening stained wood isn’t always a good idea. Bleach can weaken, splinter, and dry wood. If your wooden furniture has been around for years or if it’s already showing signs of drying out, lightening your furniture’s wood is not advisable. It could potentially harm your furniture beyond repair.
What is the Purpose of Lightening Stained Wood?
Lightening wood is a great way to bring life to bring new life to older, stained wood. While older trends featured darker stains, it is not too late to make your somber cabinets or other dark stained wood revitalized through lightening. The wood in your home is typically stained, and the color is usually only on the surface so the stain can be lightened.
Exceptions to Lightening
There are several exceptions to the types of wood that are naturally colored. These types of wood cannot be lightened, or only to a certain degree. These species include walnut, mahogany, cherry and certain other exotic species. Wood species like ash, maple, oak, pine, birch, fir, and cedar are much easier to lighten as they are lighter in color.
Removing a Topcoat
If the stained wood has a topcoat (i.e. lacquer, varnish, or polyurethane), it must be removed before lightening. The best method to remove the coat is to use a chemical stripper.
How To Lighten Your Wood’s Color
If you have relatively new furniture and want to make the most of a color change, then it’s possible to do it as long as you do it safely. Here’s what you’re going to need to do:
- Prep your area. If you are going to be lightening your wood indoors, put the furniture on a plastic liner and use plastic liners to protect any upholstery that’s near the furniture. Should any spills occur, you’ll be able to avoid having permanent damage. Use a drop cloth underneath the furniture.
- Apply finish stripper to the wood you want to lighten. Use a natural-bristle brush, and let it sit for 20 minutes. Make sure that the coat is evenly placed. Once the 20 minutes are up, use a plastic scraper to scrape off the finish. You might need to apply a little pressure to get it to be removed. Collect the shavings using the drop cloth, and throw them out.
- Mix a wood bleach solution. Regular bleach won’t work for this. You will need to mix a two-part wood bleach solution to make this happen. This type of bleach will lighten the stain and also lighten the natural wood’s color. When mixing your bleach solution, make sure to wear goggles, gloves, and glasses. Wood bleach will work with both water- and oil-based stains.
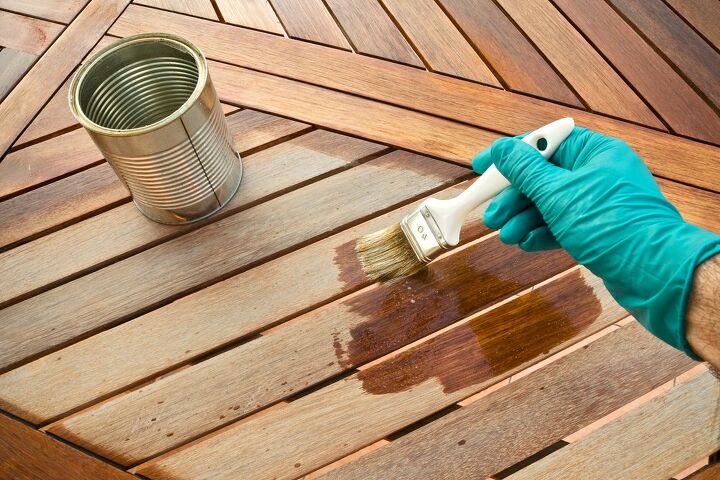
- Apply the bleach to your wood using a two-inch paintbrush. When applying bleach to the wood, make sure to spread a thin, even layer. Use a detailing brush to get into smaller nooks and crannies. Once the bleach is applied, let it sit for 30 minutes.
- Use vinegar to neutralize the bleach once the color gets to a lightness that you’re willing to work with. A 50/50 mix of warm water and white vinegar will do the trick. Once the vinegar is applied on top of the bleach, wipe the furniture down with a wet rag. Wring out any extra liquid, and dry off the furniture. Let it sit overnight.
- Take a look at the furniture and figure out if you need another go-around. Some pieces of furniture may need to have two takes to get it to the right color. Even so, it’s not advisable to do this procedure more than three times, as it can seriously damage the integrity of the wood.
- Once you have the shade you want, use a sanding block to brush off any remnants of extra stain. Sanding your furniture with a fine-grit sanding block will also remove any splinters that may have been created from the bleaching treatment. If you can, use 180-grit sandpaper for this step.
- Grab a polyurethane finish that you like and apply it to the wood. The finish should be thoroughly stirred and applied with a brand new, 2-inch natural bristle paintbrush. When applying your finish, make sure to go with the grain of the wood rather than against it. Let it dry, and you should be able to enjoy the newer, lighter furniture in a pinch. Finish off the project by using the vinegar-water solution to wipe away any extra bleach.
Can You Lighten Wooden Flooring?
You can! However, the steps are going to be slightly different. You will need to scale up all the application tools, including upgrading a regular sanding block to an electric sander and getting a mop instead of a paintbrush. Lightening wooden flooring is generally not advisable for the casual DIY-er, so if you’re curious about doing this, it may be smarter to talk to a flooring expert.
Tips For Bleaching Dark Stained Wood
There are two ways to do anything: the right way and the wrong way. These tips below will help you make sure you bleach your wood the right way:
- Do work in a ventilated, well-lit area. This will make sure you can breathe easily and also see any spots that carry extra dye. If you notice areas that are deeply stained, sand the stain away or let the stain remover sit for a longer period of time.
- Remember that different types of wood will react differently to bleach. There’s no “one size fits all” reaction to wood lightening. What will work well for one type of wood or stain won’t work as well for another. Cedar, redwood, rosewood, and cherry are known for being bad with bleach, so you might want to avoid this treatment with these types of wood.
- Clean your wood prior to trying to bleach it. Wood that has grit and grime on it will not bleach evenly, nor will it look good if you have splotches of dirt there. Grabbing a cleaner and wiping it down will make a huge difference in your results. You can wipe down the wood using regular cleaning solvents, or by using a wood polish. Either way, you’ll end up with a better finish than if you had gone through the motions without cleaning it.
Lightening Stained Hardwood Cabinets
Lightening stained hardwood cabinets will require you to first remove all cabinet doors and drawers. Place a coat of citrus strip on each cabinet and drawer. Allow it to sit overnight. This will require one or two applications to clear the seal and the stain to scrape off easily. Scrape the wood before the gel dries until it is all removed.
Sanding the Cabinets and Drawers
After the wood has dried, it is time to sand. Using a 60-grit sandpaper, remove as much of the dark stain as possible. The cabinet and drawers can sand differently and result in a different final color. Wash off the cabinets and drawers and allow them to dry. Bleach can then be poured and wiped over all the cabinets and drawers. Use several coats until you are happy with the color.
Repeat these steps on the frames of the cabinets and drawers. Once the wood matches in color, use a clear seal. A clear seal will not turn yellow and will dry quickly.
Sanding using 100-grit allows for the stain to be removed completely by hand. Make sure to sand lightly to avoid damage.
Options of Lightening
The three primary options for lightening stained hardwood cabinets are:
1. Bleaching the Wood
Use bleach after your wood has been stripped. Spread it onto the wood using a paintbrush. Allow to set for about 20 minutes. Add white vinegar to neutralize. Wipe with a clean wet cloth. Let the wood dry overnight before appraising the color.
2. Using Steel Wool
Rub the steel wool in the same direction as the grain. Wipe with mineral spirits to help lift the wood stain.
3. Diluting Stain before Application
If the stain has yet to be applied, lighten it using natural wood stain. This will make the stain lighter. You can then apply it to the wood after it is your preferred color.
No matter what option you choose to lighten your cabinets, you may still need to use the citrus stripper and sanding. If the cabinets are already stained a dark color, the bleach method is recommended.
Our Final Take
If you’re looking for a way to make your wood just a smidgen lighter, there are ways to do it. However, you have to be aware of the types of restrictions that can play a role in your bleaching. For example, you need to make sure that the type of wood you want to bleach actually works with bleaching. You also need to make sure to use bleach carefully and lock in the new color by providing a new finish for the furniture you have.
When working with bleach, always use gloves and work in a well-ventilated area. Make sure that you don’t do more than three passes of bleach on the surfaces, and clean your wood before you apply your bleach. Once you’ve finished bleaching your wood, make sure to sand it down and lock in a new color. Otherwise, you’re going to find yourself with seriously damaged furniture sooner rather than later.
Related Guides

Ossiana Tepfenhart is an expert writer, focusing on interior design and general home tips. Writing is her life, and it's what she does best. Her interests include art and real estate investments.
More by Ossiana Tepfenhart