How Many Coats of Polycrylic? (Plus Types & How to Apply)

If you are a someone who works with wood or just loves a good DIY, you know that in order for wood to last, it needs to be specially treated. All types of wood must be finished with a special layer of coating for added protection from light, moisture and other elements.
You need to apply 3 coats of Polycrylic for a proper finish. Exceeding 3 coats can cause the wood to bulge. It only takes 30 minutes for Polycrylic to dry, but you’ll need to wait 1 hour before handling it so that you don’t damage the finish.
Aside from providing you some valuable information in regards to the application, we’ll also explain what Polycrylic is and how to use it. We’ve outlined everything you need to know about this excellent top coat for wood.
Do You Need to Hire a Paint Contractor?
Get free, zero-commitment quotes from pro painters near you.

What is Polycrylic?
Speaking scientifically, Polycrylic is an interior water-based coating applied on the surface of wood for protection. It essentially acts as a barrier between the outside world and the wood by adding a durable finish. This finish protects the wood from damage due to household chemicals as well as chipping, scuffing or scratching.
In addition to protecting the wood, it can add beauty as it is available in a number of different finishes. Applying polycrylic can create a satin, matte, gloss or semi-gloss sheen that enriches the paint, stain, or natural color of the wood.
Polycrylic is most often used on interior, light wood surfaces such as maple, ash or birch. It is fast drying, has a very low, almost non-detectable odor and is non-flammable. You’ll most typically see this type of finish used on cabinets, doors, furniture or other interior pieces of wood.
Can Polycrylic Be Used Outside?
The short answer is no, polycrylic cannot, and should not, be used on outdoor surfaces. It was manufactured and designed as an interior protective agent and could likely endure damage from prolonged exposure to the elements or sunlight. This will ultimately lead to the polycrylic losing its effectiveness and becoming opaque on the surface of the wood.
If you’re looking for something to protect your outdoor wood surfaces you’ll need something like exterior clear finish or a marine grade spar varnish. Both of these options will be safe and effective for your wood.
Types of Polycrylic
This product can essentially be found in two types, either an aerosol can or in a paint can. These formats allow you to choose your preference between brush or spray-on application. To help you better understand what each involves, we’ve highlighted all the characteristics and points below.
Brush-on Polycrylic
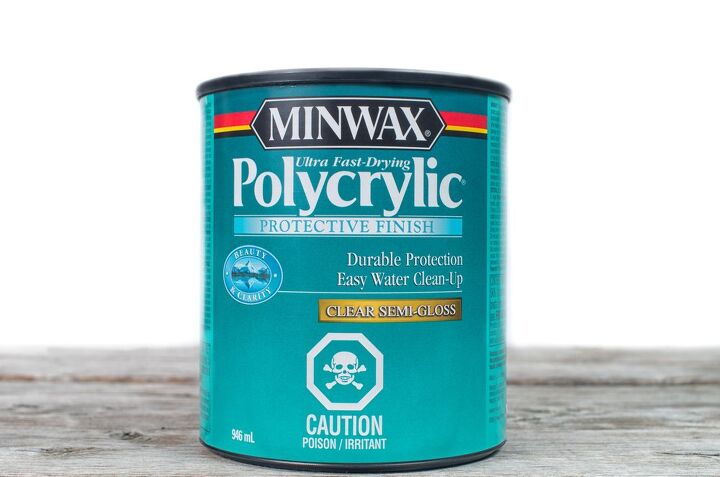
Polycrylic that is found in a paint can either be applied with a brush or using a roll-on applicator. The paint cans tend to be rather large and this type of application is best suited for larger projects that require more surface area.
Specifically, polycrylic pails come in a 1-quart size and will cover up to 125 square feet per quart. For proper application, it’s recommended to apply this using a synthetic bristle brush.
As far as the downsides for brush-on polycrylic go, it can be difficult to apply without seeing noticeable brush strokes. Also, since the finish dries fast, you have to be rather quick with your application in order to achieve the right look before it dries.
Spray-on Polycrylic
If you’re looking to quickly apply a thin layer to your wood surface, spray-on polycrylic is a good option. This is best used for smaller wood surface projects. It is applied easily by spraying the liquid out of the aerosol can and the simplicity of the application is probably the biggest benefit.
Since it comes out in such a thin layer, it does dry even faster than the paint-on version. Also, achieving a thin layer without leaving air pressure marks can be difficult. Polycrylic cans are typically hard to find as they’re often limited in quantity. The aerosols are also not the best for the environment and should be avoided if you’re looking for a more sustainable option.
How Long Does It Take for Polycrylic to Cure?
It’s important that you properly understand how to apply polycrylic and how long it takes to cure. As previously mentioned, polycrylic is very fast drying and probably the fastest among all other varnishes and polishes. However, it does not cure instantly.
When using polycrylic, you should always apply the recommended 3 layers. Only doing 1 or 2 will simply not be enough and too many coats has the potential to bulge the wood.
To the touch, polycrylic will dry in about 30 minutes time but should not be handled until 1 complete hour after you apply. However, keep in mind that it will need multiple coats. Wait two hours after the first application to apply the second coat and repeat this for the third. After you’ve done the third and final coating of Polycrylic, you’ll need to wait a full 24 hours, at least, for it to cure completely.
How to Apply Polycrylic
Let’s dive into all the necessary steps you should take in order to properly apply polycrylic to your wood surfaces. Although the initial prep of the surface will be the same, the application steps will be slightly different depending on the type of polycrylic you have chosen to use.
Preparing the Wood Surface for Polycrylic
You’ll want to first begin by making sure that there aren’t any existing dents or cracks in your wood surface. If there are, you’ll need to repair them before you apply the polycrylic. Having any imperfections can allow the protective coating to seep into the cracks and result in an uneven application.
After you’ve fixed any flaws in the surface, you’ll need to give it a good cleaning. You won’t want any dust or debris getting trapped under the finish when it’s applied as it will be stuck for good. This not only looks terrible, but it will also create streaks during application.
Note: If you’ve previously applied a fresh coat of stain to your wood surface, you need to wait at least 24 hours before adding the polycrylic on top.
How to Apply Polycrylic Paint
Applying polycrylic with a brush is relatedly straightforward. However, make sure that you are using a high-quality, fine synthetic bristle brush to avoid streaks and brush marks. Apply the paint in only one direction and follow the grain of the wood.
Avoid thick layers and applying too much pressure to the brush. Instead, make sure that your coats are thin and even so that the resulting finish comes out clear and vibrant. Again, be sure to use a total of 3 coats, allowing ample drying time in between each.
How to Apply Polycrylic Spray
Aerosol application of polycrylic is even easier than the paint-on option. However, be sure to read the instructions of the specific product that you buy, as every product will have varying guidelines.
In general, you should hold the can about a 1-foot distance away from the wood. Apply an even layer and make sure that you’re doing this in an environment with little to no airflow. Also, always wear a protective breathing mask when you’re using a spray-on polycrylic to avoid inhaling any of the chemicals.
Do You Need to Hire a Paint Contractor?
Get free, zero-commitment quotes from pro painters near you.

Wrapping It Up
Polycrylic is the best type of protective, finishing agent you can use on interior wood surfaces. However, it’s important that you properly understand what it is, how it’s used and how it should be applied before diving right in.
As long as you’re sticking to the recommended 3 coats and allowing plenty of time for them to dry in between, you really can’t go wrong! For some other tips related to wood stain check out, “ How to Lighten Stained Wood (In 8 Easy Steps)” and “ How to Repair Peeling Stain on Wood Stained Kitchen Cabinets.”

Jessica considers herself a home improvement and design enthusiast. She grew up surrounded by constant home improvement projects and owes most of what she knows to helping her dad renovate her childhood home. Being a Los Angeles resident, Jessica spends a lot of her time looking for her next DIY project and sharing her love for home design.
More by Jessica Stone


![The 5 Best Angle Grinders – [2022 Reviews & Buyer's Guide]](https://cdn-fastly.upgradedhome.com/media/2023/07/31/9071326/the-5-best-angle-grinders-2022-reviews-buyer-s-guide.jpg?size=350x220)


![10 Most Dangerous Neighborhoods in Baltimore [Updated]](https://cdn-fastly.upgradedhome.com/media/2023/07/31/9075655/10-most-dangerous-neighborhoods-in-baltimore-updated.jpg?size=350x220)


