How To Install Sharkbite Fittings On A Copper Pipe
Repairing or installing water lines within your home typically requires that you use crimpers, adhesives, or solder. However, adhesives can smell awful and be a very messy undertaking. Also, crimpers are pricey, can be challenging to install in smaller areas, and solder requires that you use an open flame to heat the pipes.
Conventional plumbing methods require that you have the patience, expertise and tools to implement them. However, for an easier install, consider using SharkBite fittings. You can install SharkBite fittings in a matter of minutes using some essential tools that you probably already have in your home.
Installing SharkBite fittings on copper piping essentially involves only two necessary steps. You’ll need to cut the pipe to size and push it into the appropriately sized SharkBite fitting.
Sound easy enough? Let’s explore SharkBite fittings in further detail. We’ll also provide you with plenty of specifics to help you successfully install your SharkBite fittings on a copper pipe.
Do You Need to Hire a Plumber?
Get free, zero-commitment quotes from pro contractors near you.

What Are SharkBite Fittings And How Do They Work?
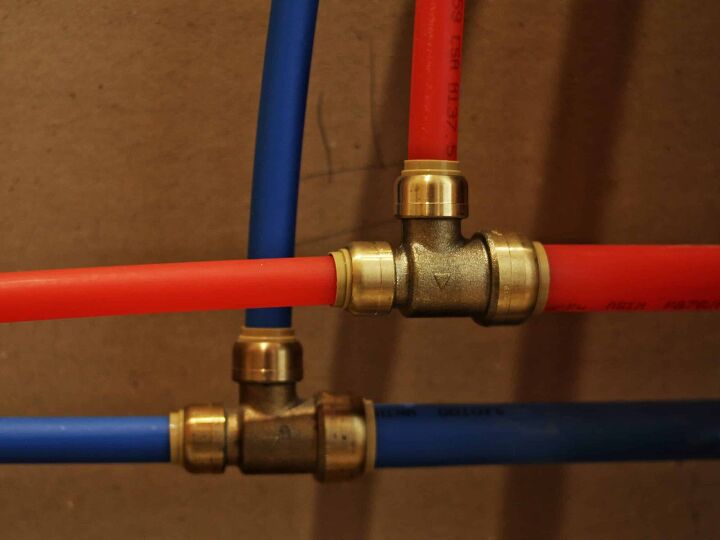
SharkBite fittings are simply plumbing fittings designed as a push-to-connect system. They can create very strong connections with simple, easy installation.
The SharkBite’s advanced push-fit connection system works in two stages. For the first stage, when the pipe or tube is inserted into the fitting, it passes through a release collar and then a grab ring made of stainless steel. The teeth on the grab ring will then open out to grip onto the pipe.
The Second Stage
At the second stage, the pipe is pushed into an o-ring protector that will align the pipe. The o-ring is specially formulated to compress between the wall of the fitting and the pipe. This will happen before the end of the pipe reaches the tube stop. A secure joint and watertight seal is created once the pipe passes through the o-ring and hits the tube stop.
According to Reliance Worldwide, the manufacturers of SharkBite, these fittings are only designed to be used with tubing/piping that is certified to the following terms:
- Copper (ASTM B 88)
- PEX (ASTM F876, CSA B137.5)
- CPVC (ASTM D 2846, CSA B137.6)
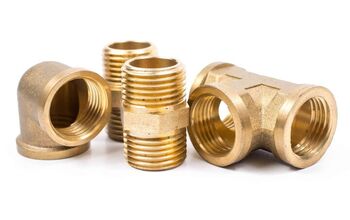
Finding The Correct Pipe And Fitting Size
Before beginning any of the steps to install your SharkBite fittings, you need to select the correct size copper pipe and fitting for the job. Determining what size pipes you need for your particular project can be a challenge. Most people assume that pipe size refers to the pipe’s outer diameter when it’s actually the “nominal diameter.”
Fitting sizes can be equally confusing as the inside diameters need to be large enough to fit the copper pipe’s outside diameter. For example, a half-inch plastic elbow has a 1-1/4 inch outside diameter.
Converting Actual Diameter To Nominal Diameter
In order to determine that you are using the correct size pipe and fitting, you need to know the nominal diameter. You can do this by following these conversion steps and referencing the conversion chart below:
For Female Threads
- Measure the Inside Diameter (ID) of your pipe or fitting using a ruler or tape measure.
- Use the chart below to determine the nominal diameter (actual pipe size)
For Male Threads
- Measure the Outside Diameter (OD) of your pipe or fitting:
- Wrap a string around the pipe
- Make a mark on the pipe where the string touches together
- Using a ruler or tape measure, find the length between the mark you made and the tip of the string. This will give you the circumference.
- Divide the circumference by pi (3.14159)
- Use the chart below to determine the nominal diameter (actual pipe size)
Nominal Diameter Conversion Chart
| Inside or Outside Diameter | Decimal Equivalent | Nominal Diameter |
| 5/16 | 0.313 | 1/16 |
| 13/32 | 0.405 | 1/8 |
| 35/64 | 0.540 | 1/4 |
| 43/64 | 0.675 | 3/8 |
| 27/32 | 0.840 | 1/2 |
| 1-3/64 | 1.050 | 3/4 |
| 1-5/16 | 1.315 | 1 |
| 1-21/32 | 1.660 | 1-1/4 |
| 1-29/32 | 1.900 | 1-1/2 |
| 2-3/8 | 2.375 | 2 |
| 2-7/8 | 2.875 | 2-1/2 |
| 3-1/2 | 3.500 | 3 |
| 4 | 4.000 | 3-1/2 |
| 4-1/2 | 4.500 | 4 |
Determining The Correct SharkBite Fitting Size
Now that you are familiar with what pipe size, OD, ID, and nominal pipe diameter means, you can use the table below in order to determine the correct corresponding SharkBite fitting size for your project.
| SharkBite Fitting Size | Nominal Pipe Diameter | Pipe OD | Pipe Insertion Depth (IN) | Pipe Insertion Depth (MM) |
| 1/4 in. | 1/4 in. CTS | 3/8 in. | 0.82 | 21 |
| 3/8 in. | 3/8 in. CTS | 1/2 in. | 0.94 | 24 |
| 1/2 in. | 1/2 in. CTS | 5/8 in. | 0.95 | 24 |
| 5/8 in. | 5/8 in. CTS | 3/4 in. | 1.13 | 29 |
| 1 in. | 1 in. CTS | 1-1/8 in. | 1.31 | 33 |
| 1-1/4 in. | 1-1/4 in. CTS | 1-3/8 in. | 1.88 | 48 |
| 1-1/2 in. | 1-1/2 in. CTS | 1-5/8 in. | 2.05 | 52 |
| 2 in. | 2 in. CTS | 2-1/8 in. | 2.19 | 56 |
Connecting A SharkBite Joint To A Copper Pipe
Once you’ve secured the correct size fitting and piping, you can begin installing the SharkBite fitting onto your copper pipe. Before you begin, double-check that the fitting and piping are in good condition, clean, and free of any foreign objects or apparent damage. Here are the steps to properly connect your SharkBite joint to the copper pipe:
- Cut the copper pipe. Using a rotary tube cutter, cut the pipe so that the ends are square and flush. You want to avoid and burrs or damage on the cut end.
- Use SharkBite Depth Deburr Gage to mark insert depth. This product is sold separately from the fitting but should be used alongside a permanent marker to mark the insert depth on the outside of the pipe. This mark will help ensure that the fitting is installed correctly.
- Insert the pipe into the SharkBite fitting. You need to insert the pipe through the release collar allowing it to sit against the grab ring.
- Push the pipe. Using a slight twisting motion, push the pipe firmly into the SharkBite fitting until you hit the tube stop.
- Ensure proper placement. To make sure that the pipe has been properly inserted, verify that the depth mark you made is within 0.005 inches of the end of the release collar.
Disconnecting A SharkBite Fitting
If you need to disconnect a SharkBite fitting for any reason, this can only be done by using their disconnect clip or disconnect tongs. Using either the tongs or clip, you’ll need to apply pressure to the release collar. This will effectively splay the grab teeth and release the pipe, allowing it to be removed for the SharkBite fitting. Here are the steps in further detail:
- If using the SharkBite disconnect clips, place it on the pipe with the logo facing away from the release collar.
- Pushing the clip against the release collar, pull the tube with a twisting motion to release.
- For the SharkBite disconnect tongs, placing the teeth around the fitting, make sure that the logo is positioned around the pipe and the other end on the neck of the fitting.
- Squeeze the tongs with one hand and pull the pipe with the other.
- Use a twisting motion to release the tube.
If done correctly, the pipe and fitting will be free of any foreign objects, damage, and marks on the outside diameter.
How Long Do SharkBite Fittings Last?
If the SharkBite fittings are correctly installed, then they can last quite a long time. When used with SharkBite tubing, SharkBite covers their fittings under a 25-year warranty. This means that they are guaranteed to last at least 25 years. However, as long as they are installed correctly, they have been known to last upwards of 30 to 35 years.
Can I Use SharkBite Fittings Underground?
Although recommended to be used in accordance with an access panel, SharkBite fittings are IAPMO tested and are approved for underground and behind-the-wall use. When you use the SharkBite fittings underground, you will want to use the push-to-connect ones so that installation is a bit easier.
Additionally, since chemicals are typically found in soil, you will want to wrap the fittings no matter where you are located. By wrapping the fittings with silicone tape, the tape will keep the fittings from being broken down. Not to mention, the tape will give your fittings that extra boost so that you can ensure everything is fully connected.
According to IAPMO Research and Testing:
“Push-fit fittings can be utilized in underground applications and as manufactured joints without access panels.”
Related Questions
Can SharkBite fittings be used for water, air, and gas?
SharkBite fittings are rated for use with water but are not recommended for use with air or gas.
Can SharkBite fittings leak?
Yes, SharkBite fittings are not immune to leaking. However, the cause is typically due to a pipe not being adequately inserted, deburred, or because of debris and scratches on the outside. This will prevent the O-ring from achieving a completely watertight seal.
Do professional plumbers use SharkBite?
No, professional plumbers do not typically use SharkBite fittings because they charge you the same amount if they install with a different type of fitting. So they will most likely use the best materials during the job. However, if you’re doing this project by yourself, the SharkBite fittings will save you money.
Do You Need to Hire a Plumber?
Get free, zero-commitment quotes from pro contractors near you.
Our Takeaway
Installing a SharkBite Fitting onto your copper pipes itself isn’t hard to do. The hard part comes when you have to measure and select the correct size of fitting for your pipes. However, we’ve made this easier for you. If you follow the charts above, you will select the correct SharkBite Fitting size for your pipes. Then, follow each step in this guide so that you secure and remove the fittings accordingly and produce a job well done. Good luck!

Jessica considers herself a home improvement and design enthusiast. She grew up surrounded by constant home improvement projects and owes most of what she knows to helping her dad renovate her childhood home. Being a Los Angeles resident, Jessica spends a lot of her time looking for her next DIY project and sharing her love for home design.
More by Jessica Stone


![10 Best Electric Lawn Mowers - [2022 Reviews & Top Rated Models]](https://cdn-fastly.upgradedhome.com/media/2023/07/31/9070486/10-best-electric-lawn-mowers-2022-reviews-top-rated-models.jpg?size=350x220)
![10 Best Electric Pressure Washers – [2022 Reviews & Guide]](https://cdn-fastly.upgradedhome.com/media/2023/07/31/9070600/10-best-electric-pressure-washers-2022-reviews-guide.jpg?size=350x220)