How To Install An Outside Light On Vinyl Siding
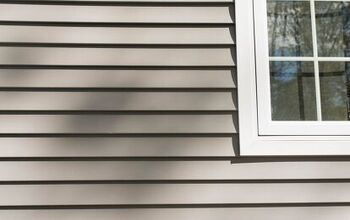
Installing lights on vinyl siding is a great way to spruce up the outside of your home. It’s essential to use exterior lights to keep the wiring safe from any potential moisture. These lights come with a built-in rubber gasket that helps seal the fixture against the siding.
If you’ve wondered just how to install outside lights onto vinyl siding, it’s relatively easy. After you attach the fixture to your house, you simply attach the wire. Some kits may be more or less complicated, but it’s a project just about anyone can do.
Everything you need to get the job done is listed down below. I’ve included detailed step by step instructions to install just about any exterior light. This can add selling value to your home and provides a welcoming atmosphere for guests.
Do You Need to Hire an Electrician?
Get free, zero-commitment quotes from pro contractors near you.

Things to Note
If you want to cut corners, you can purchase a vinyl mounting block that has the electrical box pre-installed. You simply mount it to the siding of your home, attach the wiring, and you’re all set. This saves you time and effort since you won’t have to install the electrical box yourself.
Something else to be aware of is that your power should be off when installing the lights. If you’re unsure whether or not there’s power going to the electric cable, test the voltage.
How to Install Outside Lights on Vinyl Siding
Here’s what you need to do to have beautiful lights on the exterior of your home.
What You’ll Need
- Non-contact circuit tester
- 1-inch roofing nails
- Keyhole saw
- Silicone caulk
- Remodeling electrical box
- Two wire caps
- Phillips screwdriver
- Drill
- 1/2-inch drill bit
- 1-inch lumber
- Utility knife
- Metal drip edge
- 2-inch wood screws
Step One: Picking a Location
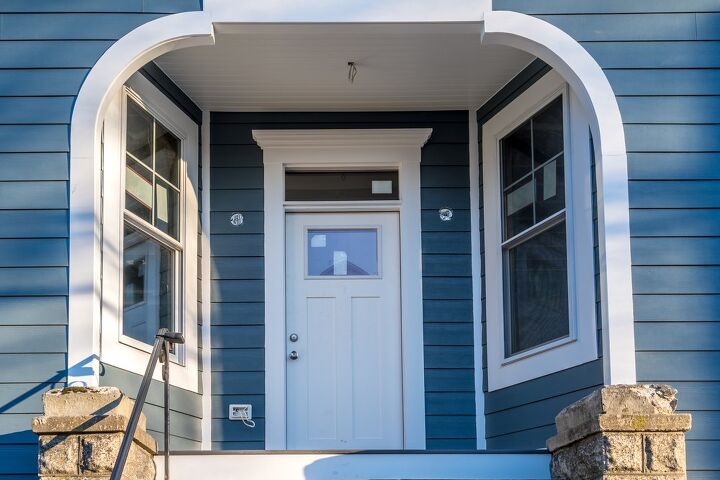
The first thing you’ll want to do is pick where you want to put your lights. Many homeowners put one on each side of their garage door, as well as one by the front door. I’d like to suggest also adding one on the side of your house and outside of any sliding glass door.
Step Two: Finding Power
After you’ve picked where you want the lights to go, run power to that location through the inside wall. When you do this, be sure that the breaker is off until you’re completely finished installing. You can use a non-contact tester to verify that the power source is off.
Step Three: Make an Outline
Take a pencil and outline the back of the electrical box onto your siding. Cut around this area using a keyhole saw. Then, pull out the electrical wire through the end of the box from inside the wall.
Once the wiring is through the hole, tighten the screws in the front using a screwdriver. This will secure it to the wall. If you’re using a kit that has a built-in electrical box, you can skip this step.
Step Four: Make a Mounting Block
The fourth step requires cutting a mounting block out of one-inch lumber. This allows you to put the fixture onto vinyl siding. Make sure the block is big enough to properly place the light.
Once you have the block cut, drill a ½-inch hole in the middle for the next step.
Step Five: Draw a Block Outline
Place the block against the siding and make an outline using a pencil. Then, take your utility knife and cut out the outline by cutting the top and bottom, while leaving the sides. Be sure not to cut into the house wrap that is under the siding.
Step Six: Attach a Metal Drip Edge
Take a piece of metal drip edge and nail it to the top of the block using a one-inch roofing nail. Now you’ll be able to place the block inside the area you previously cut out. Screw the block into the sheathing with a couple of two-inch screws.
Step Seven: Seal the Deal
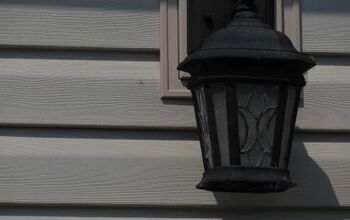
Next, take the rubber gasket and fit around the base of the light. Then, connect the wires from the fixture to the electric cable. There should be colors on each wiring that correspond with wires in the box.
Twist the wires together in a clockwise direction using pliers. Secure them by adding a wire cap onto each set, not including the ground wires. The easiest way to spot ground wires is a green color on the end, or they’ll be totally bare.
Step Eight: Finish Up
All that you have left is to screw the lighting fixture to the siding or the mounting block. There should be screws that come with the light you’ve purchased that work perfectly for this step. Since not all lights come with a roof, be sure to seal the base using silicone caulk to keep out moisture.
What to Look For When Buying Exterior Lights
Here’s a handy buying guide that will ensure you find the best lights for your home.
Design
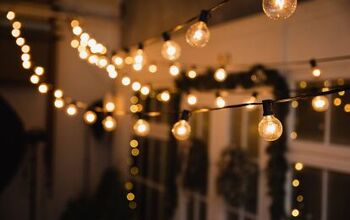
One of the main reasons people get exterior fixtures on their home is to add a design flare. Lights on your home bring a welcoming vibe to your home and is a great way to add a bit of curb appeal to your house.
Putting exterior lights on vinyl siding can create a cohesive look. You can get lights that automatically turn on when you get home as well. Overall, they make your house look more put together and warm.
Price
Just like anything else you buy for your home, it will come at a price. This plays a part in what fixtures you’ll be able to buy. Thankfully, they’re relatively inexpensive, and you can often get a pair for under $50.
Functions
The last thing you may want to look for is any special functions. Do you want exterior lights that come with dimming settings? Maybe you’re looking for motion-activated lights to add a bit of security to your home.
There are plenty of different features and functions to be on the lookout for. This can help you find the best bang for your buck when comparing one product to another.
Types of Exterior Lights
There are several types of exterior light fixtures. Here are the main ones and what they’re designed for.
Wall Lights
Wall lights are best used for porches, entryways, garages, and patios. They’re likely what you think of when you picture exterior lights on a home. These are classic and can be mounted virtually anywhere on your home.
They’re known for being rather durable and can illuminate a large area around your yard. Wall lights come in a variety of different styles, colors, and price points.
Ceiling Lights & Hanging Lights
Ceiling and hanging lights are usually found on porches and covered patios. Many newer homes will have ceiling lights above their front door to illuminate the front steps. These can also make a patio or deck feel quite cozy.
If your porch or patio is often damp, these are great additions. They’re fairly affordable and come in several unique styles.
Security Lights
Finally, security lights are best used by walkways, entrances, alleyways, garages, and backyards. They are built with a motion sensor light that is triggered by movement. These can be a bit more expensive but are well worth it to keep you and your loved ones safe.
Do You Need to Hire an Electrician?
Get free, zero-commitment quotes from pro contractors near you.
Related Questions
What’s behind vinyl siding?
You’ll usually find some sort of insulation or house wrap behind vinyl siding. I like to picture house wrap similar to a plastic wrap you’d use in the kitchen. It gets wrapped around the house to keep out moisture, prevent pests, and keep the wall frame safe from the elements. There are two popular types of insulation under vinyl siding: sheet and blown. These act similarly to house wrap.
Do exterior lights need a box?
Yes, electrical codes will require that all lights on the outside of your home be accessible in a box. There are a couple of different choices, as you read about earlier. You can buy a separate box or buy fixtures that come with one.
Should you caulk around exterior lights?
Unless you live in the desert, all exterior lights should be caulked around the edges. Poor caulking or skipping it completely can cause major damage, and things like mold within your siding. It’s best to take a few extra minutes and make sure the job is done properly to keep your home safe.

Kirstin is a passionate writer who loves helping people learn new things when it comes to home improvement. When she's not behind a keyboard, she enjoys DIY projects, crafts, spending time with her pets, and making videos. She hopes that with all she writes, someone is finding a solution to their home improvement needs.
More by Kirstin Harrington