How To Install Shutters On Vinyl Siding (Step-by-Step Guide)
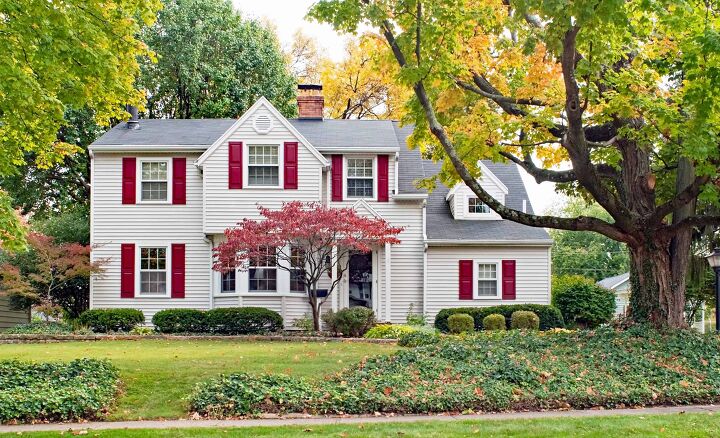
Exterior shutters can do a lot for your home. If you choose functional shutters, they can protect your windows and add shade to your house’s interior. Stationary shutters are an easy way to boost curb appeal.
To install shutters on vinyl siding, you will need to measure your windows and buy the desired shutters. Mark and drill holes on the shutter, and mark the position on your siding. You should then be able to screw your shutter into your siding with no problem.
If you’re considering adding shutters to your home, doing so is a relatively easy DIY project. You could tackle shutter installation in one afternoon!
Do You Need Exterior Shutter Installation or Replacement?
Get free, zero-commitment quotes from pro contractors near you.

Installing Shutters on Vinyl Siding
Before installing shutters on vinyl siding, you’ll need the following materials:
- A tape measure
- Shutters
- A pencil
- A level
- A drill. Your drill bit should be slightly larger than your screws.
- A screw gun
- Screws. The length depends on the thickness of the shutter and siding lap.
- A ladder if installing shutters on the second-story of a home.
When installing shutters on windows in a house with vinyl siding, follow this step-by-step process to ensure proper installation:
Step 1: Measure Your Windows
Before buying your shutters, you must measure your windows. Measure the height of each window you plan to add shutters.
If two windows are close together, measure the space between them. This way, you can ensure that the shutters don’t overlap.
If you don’t measure your windows, you run the risk of purchasing shutters that are too small. If you’re installing shutters to boost curb appeal, the wrong size will do the opposite.
Step 2: Purchase Your Shutters
You can purchase shutters at your local hardware store. Shutters are available in both wood and vinyl in a variety of colors and shapes. Typically, homeowners find a contrasting color or a lighter or darker shade than the house most appealing.
Wood shutters have a rustic, more authentic look than vinyl shutters. However, depending on the climate, they may deteriorate over time.
Vinyl shutters come in a variety of colors, and some styles even resemble wood. However, these will not provide storm protection for your windows like wood shutters.
Make sure to purchase the correct number and size of the shutters. Shutters can range in cost anywhere from $80 to $350 or more per window. The price you pay all depends on the style and size of the shutters you select.
Step 3: Determine Screw Length
To ensure your shutters remain attached to your home, you’ll need to determine the proper screw length. If you use too short of a screw, you’ll barely pierce the siding. Then, your shutter will fall off at the slightest gust of wind.
Measure the thickness of your shutters and the thickness of the lap of the siding. A lap is the part of your siding that overlaps slightly with the siding below it. You can measure this by simply measuring at the bottom of the panel where it overlaps the one below.
Add the two thicknesses and add ½ inch. The resulting figure is how long your screw should be to ensure you can attach the shutter properly.
Step 4: Add Pilot Holes to the Shutter
Some shutters come with pre-drilled pilot holes. If the ones you purchased do not, it’s essential to add pilot holes to your shutter. Pilot holes will prevent the material from breaking.
It helps to place your pilot holes on the laps near the middle and corners of your shutter. Putting a screw through your shutter and laps will help increase stability since it’s going through more material.
You can determine where to best place your pilot holes by holding your shutter next to the window. Mark the laps closest to the corners and in the middle of your shutter with a pencil.
Place the shutter on a flat surface, and drill pilot holes where you’ve marked. Make sure you’re using a drill bit slightly larger than your screws. This larger bit will prevent the shutter materials from breaking when being attached to the siding.
Step 5: Determine Shutter Placement
Place the shutter against the edge of your window. You will most likely need another set of hands to do this. It can be difficult to both hold the window up and mark where screws need to go.
Leave a small gap between the shutter and the edge of the window. This gap will give the shutter space to expand and contract with changes in the weather. Use the level to make sure you’re hanging the shutters evenly.
Place the pencil inside your pilot holes to mark on the siding. This mark provides you with a guide for where to drill pilot holes in the siding.
Step 6: Add Pilot Holes to the Siding
You will also need to drill pilot holes into the vinyl siding to prevent it from breaking. You should drill these pilot holes about ¼ inch bigger than the screw. Then, drill about two inches into the siding.
Step 7: Attach Your Shutters
Line up the pilot holes on the shutters with the holes on the siding. Next, have someone else hold the shutter in place while you screw it into place. Make sure the screws are flush with the shutter’s surface. To avoid warping, don’t install the shutters too tightly.
Different Types of Shutters
When installing shutters on your home, it’s essential to pick some that reflect your style and compliment your home. There are several different types of shutter options on the market:
- Louvered shutters. These shutters feature overlapping slats of wood in a frame. These are a fairly standard, popular style of shutter that can go with many home exteriors.
- Raised panel shutters. These shutters have a raised rectangular panel in the center.
- Board and batten shutters. These shutters consist of several vertical pieces of wood crossed at the top and bottom by smaller pieces. These shutters can add a rustic, farmhouse feel to any home.
- Plantation shutters. Plantation shutters are traditionally wide with movable slats. When you install them inside your home, they can allow more or less light into the house at any given time. When you install them outside, they are often functional and can open to allow in natural air and light. Adding them to any home helps achieve a southern vibe.
- Cut-Out shutters. This shutter style is similar in design to raised panel shutters but can have a wide variety of shapes cut from the interior. Ships, stars, and geometric shapes are popular, but you can often decide on your own custom shape nowadays.
- Scandanavian shutters. These shutters are made in the same style as board and batten but are unique for their bold patterns and colors. This option will undoubtedly add some flair to any home!
- Combination shutters. Can’t pick just one style? Don’t fret! These unique shutters can be a combination of several types at once.
Do You Need Exterior Shutter Installation or Replacement?
Get free, zero-commitment quotes from pro contractors near you.
Related Questions
What is the cost of a professional shutter installation?
The cost of a professional shutter installation will vary depending on how many shutters you are installing, what type, and the cost of labor. However, the average shutter installation costs about $2,200, including panel costs. Labor tends to be between $60 to $100 per hour, and some windows can take two hours to finish up.
Can you paint vinyl shutters?
You can paint on vinyl shutters if they’re still in good shape. If they are broken or fragile, you should simply replace them. Scrub the vinyl shutters with soap and water before painting to remove dirt and grime. Allow them to dry completely before painting. Make sure to use high-quality paint made explicitly for plastic on your shutters.
Related Guides

Stacy Randall is a wife, mother, and freelance writer from NOLA that has always had a love for DIY projects, home organization, and making spaces beautiful. Together with her husband, she has been spending the last several years lovingly renovating her grandparent's former home, making it their own and learning a lot about life along the way.
More by Stacy Randall