How To Build A Brick BBQ With A Chimney (Step-by-Step Guide)
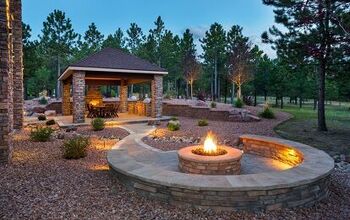
There’s something about the taste of food that’s cooked on an open fire, especially when that fire is coming from a barbeque built of bricks. While you could go out and buy a regular barbeque to replicate the taste, why not be unique? How many people have you seen with a brick-style barbeque in their back yard, let alone one with a chimney? What if we told you that we can teach you how to build one?
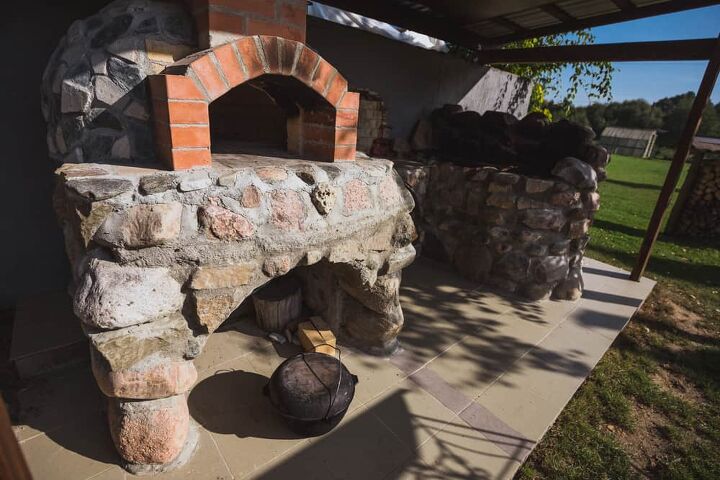
To build a brick barbeque with a chimney, you will first need to form a foundation that can bear the barbeque’s weight. Next, you will continue by applying layers, or courses, of bricks. You want to make sure that you build it to the right height for you. Afterward, you will add a chimney as the final touch.
This guide will take you through the ins and outs of building your very own brick-style barbecue with a chimney. Don’t worry if you’re new to the DIY world. If that’s the case, then this guide is perfect for you.
Do You Need Outdoor Kitchen Installation Services?
Get free, zero-commitment quotes from pro contractors near you.

Before You Start
Before you start, it’s vital to plan your project. This includes measuring the ground where you want to place the barbeque. You will also need to check with your local laws and codes to see if you need a building permit. Usually, you won’t. However, you don’t want to get caught building without one. It’s better to be safe than to be sorry.
Checking Your Local Laws
When you’re checking into your local laws, you need to find the answer to these three questions:
- Do you need a building permit?
- Do you have to hire someone to grade the soil or ground upon which you want to build your barbecue?
- How high are you allowed to have your chimney?
Some towns will require you have a professional come and check out the ground where you want to build your structure. This is to ensure that the soil can hold the weight.
Getting Started On Building Your Brick Barbeque
This project is relatively straightforward. However, because it’s made of brick, you will need to be very careful in making sure the structure is balanced, especially throughout the chimney area. No need to worry; we will cover that later on.
Step 1: Choose The Area
Walk around your property and look around to see where exactly you want to build your barbeque. However, keep in mind that it needs to abide by local ordinances and laws. For instance, local law may be that barbeques can’t be within 10 feet of the home, and some chimneys can’t exceed 3 feet tall.
A few things to think about when searching for an area is:
- Do I want to entertain guests while I’m cooking?
- What part of my property looks the most level?
- Where can I put it where trees won’t cause damage in the case of bad weather?
If you can’t find a level area to put your barbeque, don’t worry. Most people need to level out the ground before building anyways. We provide the instructions for excavating and leveling as well.
Step 2: Measure
Next, you will need to figure out just how large the concrete slab will need to be for you to build your foundation. To do this, you can use a couple of metal grill grates.
- Mark the area. Lay a metal grill grate on the ground and place bricks along the border. You will also need to apply a brick on each side of the brick border. However, instead of laying vertically like the others, they will lay horizontally.
- Take measurements. When you are measuring the width of your bricks, make sure you measure from end to end of the horizontal bricks. Then, measure front to back to get an idea of the depth. Make sure you write these measurements down somewhere, so you don’t forget them for the next step.
Step 3: Pour The Concrete
Before you excavate or pour the foundation, you will need to clear away any debris or grass from the area. This will make your project go a lot more smoothly.
- Apply your measurements. Using the same measures you took in the last step, you will now need to transfer those your ground. You can do this by using metal or wooden stakes with a string attached.
- Excavate the area. Now you will need to excavate this whole area. Make sure you dig about 8” down. This is to ensure you can level the ground and build a foundation that will be load-bearing.
- Add pea gravel. Pour in pea gravel. It should be about 3” high when spread across the area. Once you have the right amount, you will need to use a tamper to compact it down until the site is level.
- Mix the cement. It’s best to use fast-drying cement for this project so that you can get on with it quicker. Make sure you check the manufacturer’s instructions so that you can mix it the correct way.
- Pour the cement. You will then fill the rest of the hole by pouring the cement on top of the gravel until it is ground level. Using a trowel, you will need to work the top of the cement to ensure that it is level and smooth. Then let the area cure for 48 hours.
Step 4: Lay The First Bricks
Before you begin laying, you need to prepare the mortar according to the directions of the manufacturer.
- Apply the mortar along the marked lines. You need to scoop a generous amount of mortar with your trowel. When you apply the mortar to the cement, make sure it’s in a straight line.
- Set the bricks. Take the first brick and press it into the mortar gently.
- Use more mortar. You will then need to take more mortar onto your trowel and apply some to the end of the brick. Then, apply the next brick. Make sure you remove the excess mortar as you go by scraping it up with your trowel.
- Repeat until finished. Follow these steps until you have successfully laid the first course around the base of the barbecue.
- Ensure everything is square and level. The worst mistake you can make is not checking your work as you go. If you discover a brick out of place, tap it with your trowel to adjust it. Don’t feel bad if you need to remove and replace it. You may find yourself doing that several times throughout the project.
Marking Your Bricks
Before you permanently fix the bricks to the concrete, it’s best if you first do a dry run. Lay the bricks around the perimeter of your concrete, making sure there’s about ½” of space between each one to include the mortar in the layout.
Take some chalk and mark the corners of your barbeque as well as where the walls will be. However, you will need to check that your corners are perfect 90-degree angles before doing this. This marking will act as a guide when you lay your bricks.
Step 5: Continue To Lay Your Courses
The remaining courses will be formed on the outside of your barbeques and on the rear walls. The front will stay open so you can access it for fuel, as well as cleaning the ash and placing the grates.
- Apply mortar. Using your trowel, apply mortar to the top of the first course of bricks that you just got done laying. Press the first brick into the mortar. However, this time you need to make sure you stagger the joints.
- Cut the brick with a cold chisel. If you need to, you can cut the brick using a wet saw or a cold chisel if it doesn’t fit properly.
- Repeat the steps until you are finished. Continue to lay the bricks until you have applied all of the courses. The number of courses will lay differs depending on how high you need your barbeque to be for you to access it comfortably. Remember to scrape the excess mortar as you go.
Step 6: Lay Your Final Course
As you finish laying your bricks, you will need to turn a couple of the bricks to create a grill grate support ledge. The brick should stick out a little bit on the inside of the barbeque. Make sure you do this for each level. You want a grate to be able to sit.
Continue laying your bricks until you’ve reached the desired height. Choosing several heights for cooking allows you to have space to do so and different intensities of heat. However, it should be noted that when you lay your final course of bricks, you need to do this with solid bricks. This is to ensure the completion and sturdiness of the structure so you can add the chimney.
Step 7: Finishing The Base of Your Barbeque
Once you’ve set your final course, you will need to strike the joints using a jointer. This is to create the concave depression into the mortar. However, it’s essential that you do this before the mortar has had the time to dry. When the cement is nearly cured, scrape off the remaining bits of mortar with a stiff brush. Steel bristle cleaning brushes are perfect for doing this.
Step 8: Adding The Chimney
The height of your chimney will depend on your local building codes. You will need to check with local authorities before you begin.
- Start the smoke chamber at the top of the barbeque. Where you laid the solid bricks is where you’re going to start building the chimney to your barbeque.
- Construct the flue and the outside of our chimney. You can use a metal pipe if you wish for the flue. Or you can construct it from bricks or even a flexible hose or pipe. However, if you choose the hose, you need to ensure that it can withstand extreme amounts of heat as the smoke and hot air rise.
- Surround your chimney with flashing. You will want to include flashing where your chimney meets the top of your barbecue. Also, where you’re going to put the chimney cap. Then, secure it by using a silicone waterproof caulking material.
- Cap your chimney. The cap should be about 2 inches extended past the walls of your chimney. This will help to prevent water and wildlife from entering.
Related Questions
How many bricks do you need to build a BBQ?
The amount of bricks you use solely depends on how tall you want your barbeque to be. You shouldn’t be reaching high or stooping low to cook. You will use anywhere from 100 to 650 bricks depending on if you build a chimney too.
Can you use block paving to build a BBQ?
Block paving is not a good material to use when building a BBQ. This is because high temperatures can cause them to break and crumble. You can, however, use brick, clay, or metal/steel.
Do You Need Outdoor Kitchen Installation Services?
Get free, zero-commitment quotes from pro contractors near you.
Wrapping It Up
The most important part of this project is going to be your research to find out your local laws regarding the structure of your barbecue, as well as your chimney. From there, you can set realistic expectations accordingly and get started on your project.
Also, don’t forget to just several bricks into the fireplace so that you can have a few platforms to set your grill grates upon. Failing to do this will result in struggling to find another method to hold the grates in place while you cook.
Related Articles

Heather is a passionate writer who loves anything DIY. Growing up, she learned everything from home repairs to design, and wants to share her tips with you. When she's not writing, she's usually hiking or searching for her next DIY project.
More by Heather Robbins