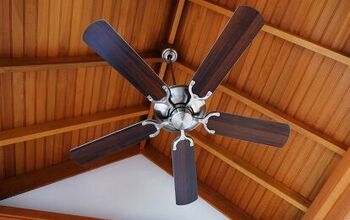
Ceiling Fan Pull Chain Stuck? (We Have A Fix!)
If you’re not familiar with Murphy’s Law, chances are you are a new homeowner. Tried and true, Murphy’s Law states that anything that can go wrong will go wrong. No sooner is the dripping faucet fixed than the ceiling fan pull chain is broken. Fortunately, you can repair a faulty ceiling fan pull chain without replacing the entire ceiling fan.
Most of the time, you can fix the fan’s pull chain by replacing the fan’s switch. Other times, you can fix the pull chain with a soldering kit or ball chain connector. To determine whether you should repair or replace the ceiling fan switch, you’ll first need to disassemble the ceiling fan.
To fix a ceiling fan pull chain that is stuck, turn off the power and locate the bolt that threads the pull chain through to the switch. Unscrew the bolt and remove the light housing from the ceiling fan by unfastening the three screws around the base. Identify the switch. If your pull chain has an external break, you can probably repair it with a ball chain connector or a soldering iron. For an internal break, replace the switch.
Do You Need Ceiling Fan Repair Services?
Get free, zero-commitment quotes from pro contractors near you.

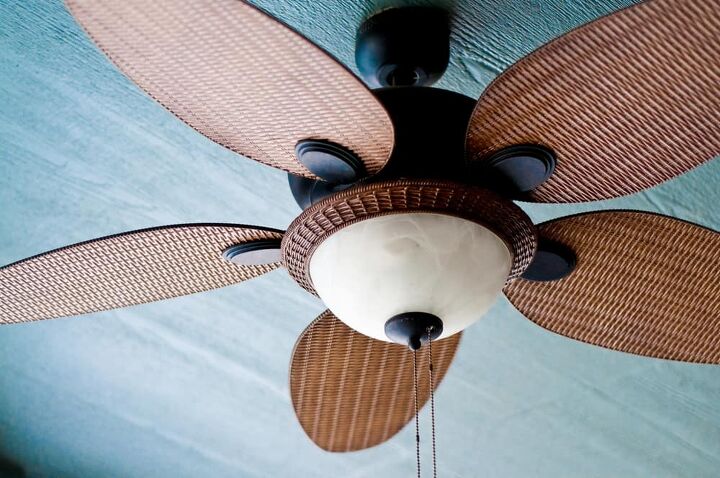
How Does a Pull Chain Work?
For a pull chain to work, the ball chain is threaded through the switch and connected to the plastic cam. When you pull the pull chain, the plastic cam rotates 90 degrees to complete the circuit, activating the toggle switch. When you tug on the pull chain, you should hear an audible click. Light on, light off.
For ceiling fans, there are usually two options: a toggle switch and a multi-position switch. The toggle switch is a simple on-off feature, while the multi-position switch moves through various settings. Ceiling fans may employ one or both of these switches as the toggle switch is commonly used for light and the multi-position switch for fan speeds.
The purpose of a pull chain is to make the appliance accessible. It would not be efficient nor reasonable to have the light switch on the ceiling. The pull chain makes it easy for anyone to turn on the overhead light by simply tugging on a chain.
Replace a Broken Pull Chain and Switch
Tools You’ll Need
- Screwdriver
- Replacement switch
- Wire cutters
- Wire nuts
- Electrical tape (optional)
- Ball chain connectors and extra ball chain (for repair only)
Step One: Power Off
Before doing anything, turn the ceiling fan off. If you have access, flip the circuit breaker. Remove any light fixtures or accessories.
Step Two: Detach the Housing
Disconnect the housing from the rest of the ceiling fan by unscrewing the bolt through which the pull chain runs. Then, unscrew the three screws located around the side of the housing. Support the switch (or light) housing as you detach it and lower it to a comfortable working position.
Step Three: Locate the Switch
Identify the switch. Usually small and plastic, the shape of the switch resembles a snail. Untangle the switch from the wires. Some modern switches are labeled with L, 1, 2, and 3 to help match up corresponding wires. Make a note of the positioning or take a picture for reference later.
Step Four: Replace the Switch
Clip the wires that are connecting the old switch to the rest of the housing. Cut close to the switch so that you can preserve as much of the wiring as possible. Using your wire cutters, strip the wire cover back to expose ½” of wire.
Attach the new replacement switch by holding the corresponding wires parallel and twisting the exposed wire together clockwise. Match corresponding wires together by color or refer back to your photo. Secure with wire nuts and electrical tape. Attach the wires securely to one another to avoid shorting out– there should be no exposed wire.
Step Five: Re-attach the Housing
Once you have installed the replacement switch, feed the pull chain through the housing side and secure the outside with the bolt. Lift the housing to the ceiling fan and screw it into place, checking that all three screws are secure. Add any light fixtures or covers if necessary. Turn the power back on and pull the chain gently to test your ceiling fan.
Repair a Broken Pull Chain
Pull Chain with External Break
If the pull chain is still visible but is broken or short, you can quickly fix it with a ball chain connector and an extra length of chain. You can also solder the chain together.
Pull Chain with Internal Break
If the pull chain is not visible, the chain has broken inside the switch. Pry open the switch with a screwdriver. Locate the pull string and assess whether a connector can repair the pull chain. Prying open the switch can be tricky since switches are made to be replaced and not fixed. Beware of the torsion spring jumping out as you open the switch– it’ll be fully loaded.
To repair the pull chain, attach the existing pull chain to an extra length of chain with a soldering iron and coil the chain with the spring. Snap the back of the switch back into place and reassemble.
Keep in mind that if the pull chain has an internal break, it’s often easier to replace the switch. The parts of the switch are small and hard to maneuver. To save yourself the trouble, you can purchase replacement switches for under $5 at your local hardware store.
Creative Solutions
Pull chains do require some motor skills and could be difficult for younger children to reach or operate. Make pull chains more accessible by attaching yarn or other sensory material.
Teach children to pull gently but firmly to turn the switch. Pulling too hard will result in the pull chain splitting inside the housing. Pulling too fast can result in the pull chain snapping back and becoming stuck in the fan.
Additional Considerations
Take Notes
It’s a good idea to take pictures of the switch housing as you disassemble it. Take a note of the color or location of each wire in relation to the switch. Not all switches look the same, so documenting the process ensures that no wires get crossed as you install the new switch.
Warranty
Although installing a replacement switch is relatively uncomplicated, remember that your ceiling fan’s warranty will be voided if the housing has been tampered with. Make sure you can carefully follow the directions before installing a replacement switch.
Safety Recommendations
While you can complete this job on your own, don’t be afraid to ask for help. If working on a ladder, have someone assist you. An extra hand will be beneficial when detaching and re-attaching the housing to the ceiling fan.
If you have access to the circuit breaker, turn it off. Make sure all switches are in the off position. If you have a voltage tester, check to see if there are any live wires.
Vocabulary to Know
Lead Through-hole
The lead through-hole is typically located on the side of the switch housing. This idea allows you to thread the pull chain into the switch and secure it with a bolt.
Switch/Light Housing
The switch housing, or light housing, is the part of the ceiling fan that contains the switch along with the electrical components for the ceiling fan. The housing protects the wires. The housing can also be the base to which the light fixtures or accessories are attached.
Torsion Spring
You’ll only have to deal with the torsion spring if you repair the switch instead of replacing it. The torsion spring is located inside of the switch. When prompted by the pull chain, the torsion spring reacts by turning the switch 90 degrees, connecting the copper wire, and thus completing the circuit. Open your switch carefully as the torsion spring could jump out.
Cam
The cam is a small piece of plastic on the back of the switch. When activated by the pull chain, the cam charges 90 degrees and clicks into place, connecting the copper wires and completing the circuit.
Ball Chain Connector
A ball chain connector is a small clasp designed to join two ball chains. These can be purchased in various sizes and finishes to match your existing hardware. Slip the end of the ball chain into the connector and secure it with a snap. Add the ball chain extension to the other side of the connector and repeat.
Do You Need Ceiling Fan Repair Services?
Get free, zero-commitment quotes from pro contractors near you.
Related Questions
What happens if I wire my ceiling fan incorrectly?
Modern ceiling fans have reverse polarity protection to ensure that the device is not damaged or a hazard if wired incorrectly. Essentially, it cuts off the power supply when wired to flow in the wrong direction.Although it’s likely that nothing will happen if you wire your ceiling fan incorrectly, it’s helpful to know the signs of a bad ceiling capacitor.
Which replacement switch should I purchase?
Although you can wire most modern ceiling fans to either a single switch or a double switch, not all switches are the same. Check your previous switch when buying a replacement. Make a note of switch speeds, wattage, and size. Replacement switches run from $1.50 to $15, but a $5 switch should be sufficient.
Should I lubricate the pull chain?
Like any mechanical appliance, a ceiling fan switch needs proper lubrication to operate. Some new fans are self-lubricating, but most will need to be manually lubricated each year. Use a non-conductive spray lubricant to spray the area where the pull chain enters the switch.

We are a team of passionate homeowners, home improvement pros, and DIY enthusiasts who enjoy sharing home improvement, housekeeping, decorating, and more with other homeowners! Whether you're looking for a step-by-step guide on fixing an appliance or the cost of installing a fence, we've here to help.
More by Upgraded Home Team