Is Your Ceiling Fan Chain Stuck? (We Have An Easy Fix)
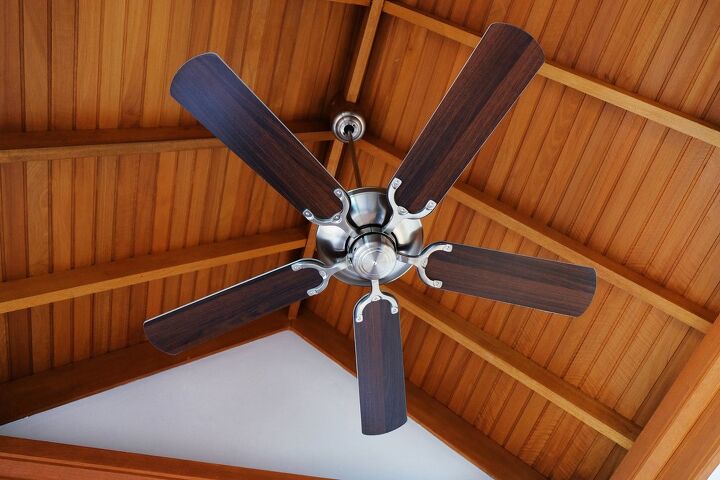
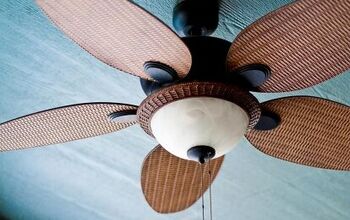
A ceiling fan can be an excellent addition to any home for both aesthetics, comfortability, and saving energy. In the wintertime, you can have the benefit of enjoying warm air being pushed down into your living areas. Whereas, in the summer, the fan will draw the excess warm air up and away.
Most of these ceiling fans are operated by a pull switch that adjusts both the lighting and speed. However, one of the most common problems among ceiling fan owners is a broken pull chain. More specifically, a ceiling pull chain that is stuck and not functioning correctly. If you’re experiencing this issue, you’re in luck because it’s a relatively simple fix.
The pull chain is ultimately attached to the switch, and over time it can jam, preventing you from being able to pull it. In this case, the best solution is to replace the entire switch system. Thankfully, ceiling fan companies are aware of this issue and have made the whole process very simple.
We’ll explain all of the steps you need to take in order to swap out the old switch and get your ceiling fan to function correctly again. There is no need to call in a specialist as this is extremely easy to do.
Related Content: Most Common Ceiling Fan Problems | Ceiling Fan Pull Chain Stuck? | How To Take Down A Ceiling Fan
Disassembling The Fixture Housing
Before you begin replacing the ceiling fan pull switch, you need to remove the housing. Follow the below steps to properly access the switch area.
- For safety, turn off the power at your circuit breaker. You’ll most likely find your circuit breaker in a closet, basement, or possibly outside your home. Open the circuit breaker’s outer cover and completely turn off the power for the entire room that you will be working in. You want to ensure that electricity doesn’t cause any moving fan parts while you’re working. If you’re unsure of which switch coordinates to the room with the ceiling fan, you can cut off all of the power for safety.
- Take out the light bulbs to prevent breakage. In order to reach the ceiling fan safely, you may need to set up a step stool or ladder. Unscrew and remove the light bulbs and put them in a safe, soft place for later. If your particular ceiling fan has any globes or sconces attached to it, you can remove these easily with a screwdriver.
- Using a screwdriver, unscrew the screws that are holding the fixture in place. The main housing of your ceiling fan that contains the switch will be attached together with a few screws. Use a screwdriver to remove them and loosen the fixture so that the switch and wiring are visible. Make sure everything that you are removing is kept in a safe spot to be reattached at the end.
- Locate and remove the nut on the side of the fixture. There will be a small nut visible on the side of the fixture that you’ll need to unscrew in order to access the switch.
Rather watch a video, click on the one below.
Installing A New Fan Switch
If your ceiling fan’s pull chain is jammed, the easiest fix is to install a new switch completely. Once you’ve turned off the power and removed the outer housing, swapping out the old switch with a new one is a relatively simple undertaking.
First, you’ll need to head to your local home improvement store to purchase the replacement switch. We recommend taking a picture or writing down information about your old switch in order to make sure that you’re purchasing the correct one. However, if you need any help, you can always consult the employees at the store as they often have a wealth of information.
Step 1: Disconnecting The Old Wires
Once you’ve secured your replacement switch, you can disconnect all the wires attached to the old one. Take a photo of the existing setup before taking anything apart so that you know how to reassemble it all.
Disconnecting the wires can easily be done by twisting or pulling off the connectors, holding them together, then allowing you to remove the old switch.
Step 2: Prepping And Installing The New Wires
To properly allow the electrical connection to pass through the wires of the new switch, you’ll need to strip the insulation off the ends. Using a wire stripper, remove about 0.5 to 0.75 inches of insulation. To strip, cut into the insulation first and then pull it to the end of the wire.
Using the photo that you took of the original setup, locate the old wires that your new wires will need to be connected to. Most wires are color-coded, so this step should be relatively easy. Tightly twist the wires together in a clockwise motion and cover them with a twist-on connector. Make sure that the connector covers the entire bare wire.
Step 3: Putting The New Switch In Place
At this point that you’ll need to locate the small nut that you removed from the outside of the ceiling fixture. This nut is what will hold your new switch into place within the housing. Place your new switch into the housing and hold it in position while screwing the nut back on the outside of the fixture.
Step 4: Reassembling The Fixture
The final step in this entire installation process is to put the fixture back together. With your new switch, place the section of the housing that you removed back where it belongs, over the wiring. Hold it steady and screw it back into place.
Put the lightbulbs that you removed back into the fixture and reattach any sconces or globes that you took off. Next, head to your circuit breaker and turn the power back on.
In order to check for proper functionality, you’ll want to test the pull chain. Now that you a have a brand-new switch, you should no longer be experiencing any issues with your pull chain being stuck. Pull on it gently until either the fan begins to rotate or the light turns on. Avoid using too much force on the chain, as this is often how it breaks.
Replacing The Pull Chain
A broken pull chain or chain that is too short to access is another common issue among ceiling fan owners. They’re relatively fragile, and if too much pressure is applied, they can snap easily.
However, ceiling fan pull chains are very easy to replace in a few simple steps.
- Open the switch. Once you’ve removed the outer housing and the switch using the steps outlined above, you’ll need to pop open the switch using a small sized screwdriver. Do this carefully so that nothing gets broken.
- Remove the contents. Take out all of the contents of the switch, including the broken chain. The chain will be connected to a spring and disc. Using a screwdriver, remove the broken chain from the disc and discard.
- Replace the chain. Just like you removed the broken piece, place a new, longer chain in its place. You’ll want to ensure that it’s long enough to reach through the fixture and be easily accessible to pull on.
- Reassemble the switch. Pull the chain through the hole and put the spring back into place. Now, reassemble the switch by putting the disc that contains both the chain and the spring back inside.
- Secure the switch in place. Put the switch back into the fixture just as you previously removed it and secure by screwing in the switch nut.
- Repeat step four of the previous process. Repeat the above “Reassembling The Fixture” steps to put the entire fixture back together.
How Much Does It Cost To Replace A Pull Chain?
It is not necessary to hire a professional for this job, but let’s assume that you’re considering it. If an electrician fixes your stuck pull chain, it will cost you about $85 to $100 for materials and labor. Now, if you were to do this project on your own, you can expect to pay between $2 and $20 for the chain itself. Then, add in additional costs if you don’t have the tools necessary.
Overall, it will cost you between $2 and $40 depending on whether or not you need to purchase tools. Even then, you’re still saving over half the amount it would cost to hire a professional. However, you can save even more if you choose to borrow tools from your friend, family member, or neighbor.
What If I’m Not Good At DIY Projects?
If you’re uncomfortable with a task like this one, then, of course, it may be better if you don’t do it. You can always ask a friend who knows what they’re doing to come and teach you. We all need to start somewhere! Don’t feel bad about asking for help.
Wrapping it Up
A ceiling fan pull chain that is stuck or jammed is a very common issue and is easy to remedy. The pull chain is attached to the switch, and the easiest way to fix this problem is to install an entirely new switch.
After detaching the housing, removing the old switch, and replacing it with the new one, your ceiling fan and pull chain should be working like normal again. Now you can enjoy all the many benefits that come with a properly functioning ceiling fan!
For more common home issues and their fixes, check out: “ Garbage Disposal is Leaking From The Bottom? (We Have a Fix)” and “ Kwikset Latch Won’t Retract? (We Have a Quick Fix).”
Related Guides

Jessica considers herself a home improvement and design enthusiast. She grew up surrounded by constant home improvement projects and owes most of what she knows to helping her dad renovate her childhood home. Being a Los Angeles resident, Jessica spends a lot of her time looking for her next DIY project and sharing her love for home design.
More by Jessica Stone