Window Leaks When It Rains? (Possible Causes & Fixes)

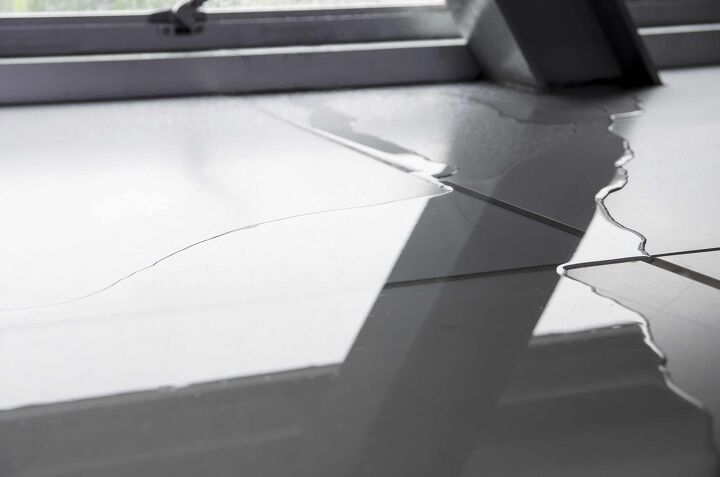
Whether it is gushing or just drizzling, having a window leak can be a major problem. Sometimes it can just be an annoyance when it rains really hard while other times it seems like it rains more inside than outside your home. Either way, it can do a lot of damage.
If you are experiencing window leaks when it rains, it is most likely due to clogged gutters, a damaged roof, or bad window installation. Begin by checking your gutters and cleaning them out if they are clogged. If your window is leaking from the top, it may be due to faulty or damaged flashing.
Whatever is causing it, you need to figure it out fast and get it fixed.
Do You Need Roofing, Siding, or Gutter Installers?
Get free, zero-commitment quotes from pro contractors near you.

It Could be Faulty Installation
Is it just one window or several of them? Maybe it is all of the windows that face a certain side of your home. If it is all of your windows, the cause is most definitely improper installation. You need to call the company that did the work and tell them to fix it. However, there are other reasons why your windows may leak.
Some Things to Think About
When did you first notice your window was leaking? Has it been going on for a while now? Is it just getting worse? Maybe it only happens when the wind is blowing in a certain direction or when it is raining harder than usual. Is the water coming through at the top, only on the window itself between the panes, or all around the window?
All of the above questions can help you to determine what may be causing the leak. It is important to figure out why it is leaking before you go calling a professional because it may just be something simple like a clogged gutter or insufficient caulking. You can fix that in a few minutes without an expert. Let’s look at some of the common reasons for window leakage.
Insufficient Caulking is the Most Common Cause
Check around your windowpane for damaged or missing caulk or sealant. This is one of the easiest and the most common reasons for window leakage. Not only that, but it is also the easiest (and least expensive) to fix.
If you see any cracks in the caulk or spots that look too thin, you can fix this easily in just a few minutes. Remove the old caulk and put on some new stuff. That is all you have to do. Problem solved.
Faulty Installation is Often a Factor
Have you recently had new windows put in or had any of them replaced? It could be a case of a faulty installation. Some of the companies that install windows hire people off the street and let them install windows with very little or no training. This saves them money to allow them to give you a really good deal.
However, that great deal can end up costing you more in-home repairs if the leaking windows cause wall damage or damage to your interior. When hiring a window installation company, make sure you check their references and reviews. And make sure they offer a warranty.
It Can be Condensation from Between the Panes
Are you seeing the water on the window itself but not on the outside of the window frame? This is probably just condensation. Although it is common in homes with double- or triple-paned windows, it can still cause damage.
Condensation happens when the cool air from inside your home comes into contact with the warm air from outside, or vice versa. This typically means that your windows are insufficiently insulated, or your home is not well-ventilated enough.
Your Siding May Be Leaking
If your siding is not insulated well with waterproof material, water can get between the siding and the interior walls, causing the leak. Siding is not waterproof. That is why water-resistant barriers are installed under the siding when it is installed.
In some cases, siding installers do the very least they can get away with to follow the International Residential Code (IRC). This saves them time and money but ends up costing you in the long run. Make sure you use a reputable siding company when having siding installed or replaced.
It May Be a Clogged or Damaged Gutter
Go outside and look at your gutters. If your gutters are clogged up with leaves and other debris, they do not allow water to flow down to the outlet and into the downspout. Instead, the water is coming down and leaking right into the window.
You can fix this easily by cleaning out your gutters. Or hiring someone else to do it if you do not like ladders. Or if your old gutters are just not in good condition anymore, you may need a new gutter system.
Check Out Your Roof
If you are missing any shingles or there is other damage to your roof, this can cause water to get into the house and find its way out the window. Some of the other signs of roof problems include:
- Stains on your ceiling
- Strange smells like mildew or rot
- Mold or mildew on the roof
- Stains on the siding coming from the roof
Improper or Damaged Flashing Could Be the Culprit
If your window is leaking at the top, it could be a faulty flashing installation. Every home should have proper flashing to keep rain and other elements outside where it belongs. It is just a wrap or shingled waterproof material between the siding and the interior walls.
If part of your flashing is damaged or missing, the water can get in between the siding and the walls, causing a leak in any opening it can find. In this case, it finds its way into a tiny crack in your window sealant to cause the leak. This can be fixed by repairing or replacing the flashing.
Repairing or Replacing the Flashing
Repairing or replacing the flashing around your window is not a difficult job. However, it is a bit time-consuming so make sure you have enough time to finish once you get started.
Step One: Remove the Window
Using the manufacturer’s instructions, remove the leaking window. Take out any nails or screws from the trim and remove the trim as well.
Step Two: Install a Pan Flashing
If your window is leaking from the bottom, remove the pan flashing and cut a new piece of flashing for the sill. Install it carefully, peeling away the back as you install it. This piece should stick out over the window at least three inches.
Step Three: Put in the Side Flashings
After measuring the sides of the window, add about six to eight inches to the measurement and cut the flashing. Apply it to the sides, overlapping the jamb by three inches. The top and bottom should be at least three inches past the bottom and top of the window.
Step Four: Apply the Corner Flashing
Measure the inside corners of the windows at the top. Cut pieces of flashing to fit over each corner where the two larger pieces meet. Make sure it overlaps the other pieces.
Step Five: Apply the Top Flashing
After measuring the top of the window, add another six to eight inches on this measurement too. Place that piece carefully over the top and overlap on both sides. Make a cut in the corners and fold it over to stick to the inside of the frame.
Do You Need Roofing, Siding, or Gutter Installers?
Get free, zero-commitment quotes from pro contractors near you.

Related Questions
What Are the Different Types of Flashings?
There are a few different types of window flashings that can be used. Each one is specifically for a certain part of the window. You can also use a vapor barrier, but that is typically done when the windows are first installed. The different types include:
- Pan flashing (also known as a sill pan) is a hard piece of vinyl that fits into the bottom of the window. It should be sloped so that the water is able to drain down and out.
- Flashing tape is used along the inside edge of the window openings.
- Drip caps are metal strips that are made to fit over the top of a window like a canopy. They make the water go outward to keep it from getting inside the window.
If you just have a few shingles that are loose or missing, you can replace them easily. All you have to do is remove the old ones (if they are still there) and put on the new ones. Slip the new one into place where the old one was and secure it with roofing nails about a half-inch from where the old nail holes are. Be sure to place the shingles over the top of the other ones and nail them into place as well.

I am a DIYer who loves writing about anything home-related. When I am not writing, you can find me studying for my PhD in Psychology, photographing nature, and swimming at the lake with my grandkids.
More by Patricia Oelze











![Standard Dining Room Table Dimensions [for 4, 6, 8, 10 and 12 People]](https://cdn-fastly.upgradedhome.com/media/2023/07/31/9074335/standard-dining-room-table-dimensions-for-4-6-8-10-and-12-people.jpg?size=350x220)