How To Remove Ice Dispenser Cover On A Whirlpool Refrigerator

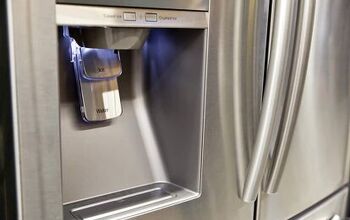
Most modern models of Whirlpool refrigerators come with both an ice and water dispenser built right into the fridge. There are panels on the front of the fridge where the user can place their cup, activate the trigger, and get their choice of ice or water.
If, for whatever reason, you need to remove the dispenser, then you have to take the cover off first. The process of removing the ice dispenser cover is relatively straightforward, though it may take a little time to execute. You have to take off the plastic trim beneath. Then, there are eight screws underneath the trim that have to be removed as well.
Do You Need Appliance Repair Services?
Get free, zero-commitment quotes from pro contractors near you.

Why You Need to Remove the Dispenser Cover
If you are here, then there is one likely explanation: your ice dispenser has stopped working. When this happens, the easiest course of action is to call out a repair technician. That said, those visits tend to cost quite a bit and some people would prefer to do the entire thing themselves.
So, in order to remove the old unit and install the new one, you have to remove the cover. The good news is that the process is both easy and straightforward. Even better, it doesn’t take much technical know-how to get the job done.
How to Remove the Ice Dispenser Cover
Whirlpool refrigerators all have the same basic construction. So, in order to remove the cover and then the ice dispenser entirely, you need to remove the trim and the screws underneath. When in doubt, consult the manual that came with your refrigerator first.
Another piece of good news is that you won’t need a very deep toolbox to accomplish this mission. All that you need is a Phillips head screwdriver to get the job done. It probably doesn’t hurt to have a small flathead screwdriver available to help you pry away the trim.
Step 1: Find the Slot
Start by finding the little slot at the bottom of the plastic trim. Depending on your model of Whirlpool refrigerator, that slot may be on either the left or right side. It is important that you use the slot because prying from another part of the trim can potentially damage or break it.
Those slots also provide you with something of a visual aid. When it comes time to put the cover back on, you can simply recall the orientation of the slots at the bottom of the plastic trim. That ensures you put the trim back the way that it was meant to be.
Step 2: Pry
This is where your flathead screwdriver would come in handy. You may be able to do so with your fingers, but the flathead screwdriver would simply make things easier. It all depends on what you have available to you in the moment.
Carefully insert the flathead screwdriver into the slot, prying gently at the corner of the trim. It is imperative that you do this part gently. Too much force and you could wind up cracking or breaking the plastic trim. That is just another component that you will have to replace at the end of the day.
Step 3: Removing the Trim and Disconnecting the Cables
Continue to pry gently all the way around the entirety of the trim. You may not have to pry all the way around to remove the trim but keep going until you can easily pop the trim out of its designated positioning.
When you remove the plastic trim, you should see a couple of cables. These cables are connected to the rear portion of the control panel and will have to be removed. Do so carefully and you should be able to properly pull the trim away from the fridge entirely.
Why Your Ice Dispenser is Not Working
Remember, the entire purpose of prying off that trim and removing it is to get to the dispenser. The dispenser may stop working from time to time for various reasons. You could be looking at a dispenser control board issue, a dispenser switch, an auger motor, or something different.
Removing the dispenser cover is just the first step in the troubleshooting process. With the trim out of the way, you can begin inspecting the dispenser to find the problem. Here are the most common issues preventing your ice dispenser from working.
Dispenser Control Board
The most likely reason that your ice dispenser is failing to work is due to the dispenser control board. The control board governs just about all of the functions within the dispenser’s system. When the board is faulty, it may not be able to deliver power to the rest of the dispenser system.
Of course, you may be looking at a dispenser system with just one faulty component. When that is the case, test each of the other components out before moving on to the control board. When there is a singular component not working, you can replace it. When the entire system is not working, then you will have to replace the entire dispenser control board.
Dispenser Switch
Your dispenser’s switch is what sends the requisite voltage into the dispenser. When one of the switches stops working, then the dispenser will not get the necessary voltage and will stop working altogether.
If you think that the switch may be at fault, you will have to test it out with a multimeter. The multimeter will tell you whether or not the switches have continuity. When they do not, replace the part entirely.
Auger Motor
The role of the auger motor is to move the auger blade, pushing the ice down through the chute. When the auger motor is defective or burned out, then the ice can’t move forward and it will not fall down through the chute.
In order to check to see if the auger motor is defective, try turning it by hand. Should the auger turn freely, then you need to use your multimeter to test out the continuity of the motor. If there is no continuity, or the motor is getting power yet still won’t run, then you should look into replacing the auger motor.
Dispenser Actuator
The actuator is the component that interacts with each of the dispenser switches. Those switches, if you remember, are what power the auger motor as well as the other components within the dispenser.
When the actuator is damaged or broken, it cannot activate the switches. Unlike the other components, you don’t need to test out the continuity. Simply inspect it to look for any potential damage that could stop it from working. Should you notice damage, replace the unit entirely.
Dispenser Door Motor
The door motor is what closes the door to the dispenser, keeping the cold air from the freezer from escaping. When the door motor is damaged or defective, then the dispenser door can’t open and ice won’t come out.
You can check to see if the dispenser door motor is defective by checking to see if it is getting power. If it is, test out the continuity with your multimeter. Should the motor be damaged or defective, it should be replaced.
Dispenser Solenoid
The solenoid in your dispenser is what opens a door flap, releasing the ice. When the dispenser is done, the door flap closes again. When the solenoid is defective, then the dispenser door can’t open and won’t dispense ice.
Use your multimeter to check the dispenser solenoid for continuity. You will also want to check that the actuator pin is able to move freely. If the pin is damaged or doesn’t move freely. Likewise, if the dispenser solenoid does not have continuity, then it will have to be replaced entirely.
Do You Need Appliance Repair Services?
Get free, zero-commitment quotes from pro contractors near you.

Related Questions
As you can see, there is quite a bit that can go wrong with your Whirlpool refrigerator’s ice and water dispenser. Knowing how to properly troubleshoot the issue can save you a ton of time and hassle, as well as a little bit of money. Here are some of the most pertinent questions from users about their ice and water dispenser.
Why is There Black Stuff in my Ice Maker?From time to time, you may see little black specks in the ice that your ice dispenser makes. The most likely explanation is that there are hard water deposits. It could also be an indication that your filter has lost effectiveness and needs replacing.
Try to replace the water filter, making sure to flush water through the dispenser after installation. If you continue to see black specks, you can move on in your troubleshooting quest.
Can Mold Grow in Refrigerator Water Dispensers?Unfortunately, mold can grow just about anywhere that offers optimal conditions. And since the water dispenser can provide a cool, dark, wet space for mold, it is more than possible for you to see some mold growth.
The good news is that getting rid of the mold is relatively simple. You can use vinegar to get rid of mold and even descale your water dispenser. Make sure that you check out the waterline, too, since mold can grow there as well.
More Related Guides

Ryan Womeldorf has more than a decade of experience writing. He loves to blog about construction, plumbing, and other home topics. Ryan also loves hockey and a lifelong Buffalo sports fan.
More by Ryan Womeldorf




![How Much Weight Can a 4×4 Support Horizontally? [It Depends!]](https://cdn-fastly.upgradedhome.com/media/2023/07/31/9070333/how-much-weight-can-a-44-support-horizontally-it-depends.jpg?size=350x220)
