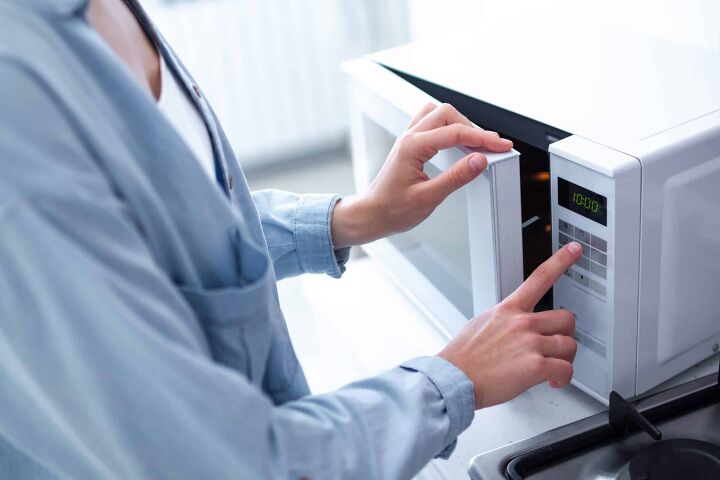
What Type of Paint Can Be Used Inside The Microwave?
Just like any other kitchen appliance, microwaves face daily wear and tear. Over time, one of the most common issues microwaves face is peeling interior paint. This can quickly become a fire hazard and even contaminate your food.
The only kind of paint that you should use in and around your microwave is paint that’s designed to withstand high heat. The label should specify that it’s microwave-safe and heat resistant. Using anything less than this type of paint will result in peeling, damage, and paint that doesn’t last. Specifically, you should look for High Heat Enamel Paint that’s microwave safe.
Since not many homeowners know they can paint their microwaves, I wanted to write up a little how-to guide. We’ll discuss what can cause paint peeling, how to prevent it, and how to repaint the appliance’s interior.
What Causes Microwave Paint to Peel?
Have you ever put a bowl of leftover pasta into the microwave only to see sauce splattered everywhere? People see this all the time and decide to wait to clean up the mess. Did you know this can cause the paint to peel?
Believe it or not, when spilled food inside the microwave isn’t cleaned, it can bake onto the surface. Once it’s hard, it’s called a “hot spot.” As you continue to use the microwave, these hot spots get warmer than anywhere else in the appliance.
Eventually, this can cause the paint to deteriorate in those areas. While the most obvious solution is to clean up spills right away, that’s not always possible.
Prevention
Prevention is the key to avoiding having to paint the interior of your microwave in the first place. The best way to do this is to avoid getting those pesky hot spots in the first place. Here are a couple of simple and cost-efficient ways you can deep clean the appliance.
Lemon Juice
This is my favorite way to prevent needing to paint a microwave because it smells fantastic. To do this, follow these easy steps:
- Cute a lemon in half and place them face down on a plate.
- Add a tablespoon of water to the plate and microwave it for a minute.
- The inside of the appliance should be steamy, and the lemon should be hot.
- Wipe down the interior with a paper towel or washcloth.
- You can kill two birds with one stone by putting the used lemon in the garbage disposal as an organic cleaner.
- Repeat this whenever you get hard-to-clean hot spots in the microwave.
Vinegar and Baking Soda
Another easy and cheap way to get the job done is by using vinegar and baking soda. Here’s what you do:
- Take four tablespoons of baking soda and mix it with warm water.
- Stir it vigorously until it’s completely dissolved.
- Take a cloth or sponge and dip it into the mixture and wipe it all over the interior of the microwave.
- Get equal parts water and white vinegar and pour them into a bowl.
- Place the bowl in the microwave and run it for three minutes until the water is boiling.
- Keep the appliance closed for 10 minutes to allow the steam to do the work for you.
- Open the microwave and take out the turntable and down the inside.
Possible Dangers
Anywhere that has been scratched by a sharp utensil or has peeling paint inside a microwave is a fire hazard. They can spark as the microwave is turned on, which is why many people opt to paint the interior.
Depending on the watts the microwave has, it can get fairly hot pretty quickly. If you start to see sparks while using it, immediately stop using it.
If there is rust, several hot spots, or an excessive amount of scrapes, consider replacing the unit. Painting the interior is a great fix for an appliance that just needs a few touch-ups here and there.
What You Need to Paint the Inside of a Microwave
It’s important to get the proper products to get the job done. Here’s a list of the things you’ll need to pick up at your local hardware store:
- Washcloth
- Appliance paint (Some good options are QB Products Microwave Cavity Paint and SOTO Appliance + Porcelain Paint Touch UP)
- Paintbrushes
- Gloves
- Sandpaper
- Cleaning solution
Many people who have painted their microwaves before say that the spray version of paint is much easier to work with. Not only does it dry quicker, but it applies more evenly and gives a better finish.
How to Paint the Interior of a Microwave
Now that you have what you need to get to painting, let’s do just that. This is a straightforward job that can easily be done on the weekend, and your microwave should be ready to use in no time.
Step 1: Move Peeling Paint
The very first step that must be done is moving any peeling paint. If the paint is left flaking and peeling, it will eventually rust. Once that happens, it’s time to replace the microwave or remove the rust completely.
To do this, ensure that the microwave is unplugged. Take what peeling paint off you can with your hands wearing gloves to prevent cuts. Then use sandpaper to get rid of any rust or sharp edges.
Step 2: Clean Up Remnants
Next, take a cleaning solution or hot soapy water and clean up the remnants from step one. The last thing you want is tiny flakes of loose metal in your microwave. This also helps to prep the interior for the paint by getting rid of any grime or food particles.
Step 3: Get Rid of Moisture
Then take a dry cloth and get rid of any leftover moisture. The inside of the microwave has to be completely dry in order for the paint to set properly. There’s no primer needed, just a dry and clean surface.
Step 4: Test The Area with Paint
Test the paint in a small area first. If you’re using appliance-safe spray paint, consider doing this in a well-ventilated space. Apply the paint and allow it to dry completely. Once this is done, run the microwave on HIGH for one minute with a cup of water inside.
Step 5: Paint the Rest of the Microwave
After the minute is up, touch the area you tested with paint. It shouldn’t be any warmer than the unpainted areas of the microwave. Feel free to paint the rest of the microwave and allow it to dry for 24 hours before using it.
You may have to repeat these steps over time. While the paint will stay on the affected areas, if your microwave is rusting, it’s bound to continue. You can continue painting over the exposed spots until you have a new microwave.
Where Can I Find Microwave Safe Paint?
While microwave safe paint might seem like a specialty item that’s difficult to find, it’s actually readily available. Most appliance stores, home improvement stores, and hardware stores sell at least one type of microwave safe paint. Paint stores such as Sherwin Williams and Benjamin Moore are also likely to have this type of paint. However, most stores will only have one or two options to choose from so make your choice wisely.
What Types of Microwave Safe Paint Options are There?
As with most paint jobs, there are plenty of options available to choose from when it comes to painting the inside of your microwave. Let’s look at the different paint options and considerations to keep in mind when choosing your paint.
Spray Paint
Spray paint is the most commonly used microwave-safe paint. It’s easy to apply and makes very little mess as long as your aim is true. Spray paint comes in the form of a can and there’s a button or tiny trigger on the top that you push or squeeze to apply the paint. The only downside of spray-on paint is that it can be difficult to control the flow of paint, which means that spray paint is best for painting the entire interior of a microwave rather than a spot here and there.
Brush On Paint
As the name implies, brush-on paint is applied with a paint roller or brush. This type of paint is better for repairing small scratches or tiny areas inside the microwave rather than widespread damage. You’ll also likely have to apply multiple coats of brush on paint in order to properly repair any rust or discoloration damage.
Touch Up Kits
Rather than being used to repaint the entire interior of the microwave, touch-up kits are used to replace the waveguide cover of the microwave. These touch-up kits are usually made of silicone resin mica paper and are very resistant to high heat, even that which is produced by a microwave. The nice part about a touch-up kit is that you can buy kits that include all the tools and pieces that you need to complete the whole job.
Non-Toxic Paint
No matter what type of paint you choose, it’s vital that you choose one that’s non-toxic. Choosing a paint that’s non-toxic is even more important than choosing a high-quality product that won’t chip or crack. You can always repaint the interior of your microwave if there’s chipping, but toxic paint can be deadly in high doses. You should specifically check the label and only purchase a paint that specifies that it’s safe to come into contact with food and drink. Anything less than this is unacceptable and could be dangerous to your health.
Related Guides

Kirstin is a passionate writer who loves helping people learn new things when it comes to home improvement. When she's not behind a keyboard, she enjoys DIY projects, crafts, spending time with her pets, and making videos. She hopes that with all she writes, someone is finding a solution to their home improvement needs.
More by Kirstin Harrington