How To Use A Wood-Burning Stove To Heat A House
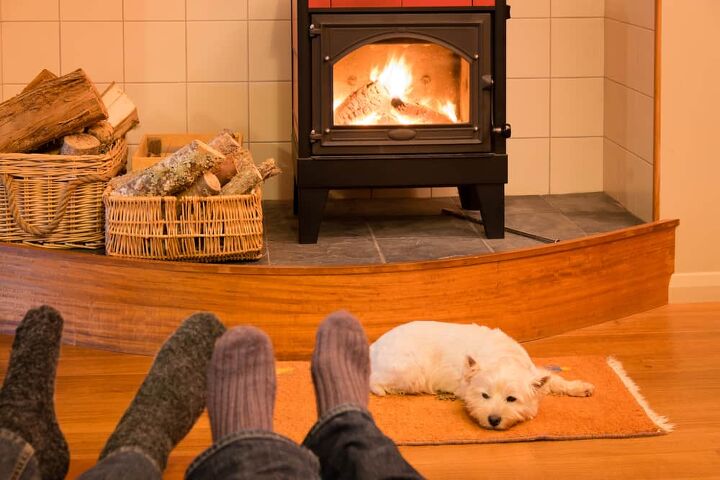
A wood-burning stove is great to have, especially if you’re living in an area where the winter feels like an arctic freeze. However, operating a wood-burning stove and getting it to heat your entire house is far different than the standard electric heater that people use today. But it can do just as good of a job, if not better. The question is, how do you heat your house with one?
The first thing you’ll want to do is get a ventilation system going. A couple of ways to do this is installing a fan on top of your wood stove or purchasing a plug-in blower. However, the best choice will be to hook up your wood stove to your central heating ducts.
In the article, we will take you through the different methods to ensure your wood stove heats your entire house. We’ll also briefly walk you through how to hook your wood stove up to your central heating ducts.
Your Number One Goal Is To Disperse The Heat
Wood burning stoves give off immense amounts of heat, which is perfect for warming up a house. However, there’s one issue: The heat needs to be dispersed; otherwise, all of that heat will sit in one room. In this situation, you’ll have one room that’s too hot, and the others that are too cold.
There are many different ways to disperse the heat, ranging from installing chimneys and vents to using a fan. What you choose will depend on your budget, as well as the layout of your home.
Install A Fan On Top Of Your Stove
One method that you can use to disperse the heat around your home is to install a fan on the top of your stove. As long as your stove is free-standing and it’s not in a fireplace, the fan will be able to push the heat up and out. While this method takes a bit longer to heat your home, it’ll soon be warm and cozy.
You can also use other fans to blow the heat where you want it to go. While this isn’t an ideal way to disperse the heat, it’s easy, and it’s budget-friendly. You’ll spend about $100 installing the fan on the stove and purchasing a couple of oscillating fans.
Get A Plug-In Blower
A plug-in blower would work about the same as a fan system. However, the blower would be more powerful and efficient at spreading the warm air around your home quicker. The blower will take the heat directly from the stove and push it outwards in the direction you have it facing.
Connect Your Woodstove To Central Air Ducts
The best choice for heating your home, especially if it’s multi-level, will be to connect your wood stove to the central heating ducts. This will work much like a regular electric heater and keep every room in your house warm.
For this to work, your wood stove would need to be adjacent to the furnace. This is so that the fan can supply the plenum with the warm air. It would be impractical to try this with the woodstove located anywhere else.
Tools You Will Need
- Awl
- Tape Measure
- Duct Pieces
- Inline Duct Wood Stove Fan
- Tin Snips
- Marker
- Screwdriver
- 1-inch, self-tapping sheet metal screws
- Starting collar
- Leather palm gloves
A couple of pointers you will want to keep in mind to make this process easier on you is:
- Make sure you always wear leather gloves when you work with any sheet metal duct, for your protection.
- Also, use either metal tap or mastic to wrap the seams and then use insulation to cover the ductwork. This will aid in maximum heat transfer.
Step 1: Take Your Measurements
You need to measure about six inches down from the top of your plenum. It’s best if you use a carpenter’s tape measure, rather than one used for sewing or body measurements. This will help you get a more accurate reading.
At the six-inch mark is where the top of your starting collar should be. Make sure you do not mount the collar on the top of the plenum. The collar should be end-up to the plenum. Using a marker, you will then need to trace the outside diameter onto the sheet metal.
Step 2: Pierce The Plenum
After you’ve got all your measurements, you will need to pierce a hole into your plenum where the line was drawn. Use your awl for this step.
Insert your tin snips into the hole and cut the hole out. Make sure that you take your time, so you don’t risk any injuries during this step. After you cut the hole, pull off the top of the plenum. If it doesn’t come off, check to see if any sheet metal screws are holding it in place and remove them.
Step 3: Insert The Collar
Take the starting collar and insert it into the hole. You will then need to reach the plenum inside to bend the tabs from the collar. The tabs will help to hold the collar in place.
Step 4: Attach The Duct Work
For this step, you will need your self-tapping sheet metal screws. Attach the inline stove fan to your ductwork and secure it with the 1-inch self-tapping sheet metal screws. You will insert them where the seams meet, which will help hold everything together more efficiently.
Step 5: Operate The Fan When The Wood Stove Is Going
When you operate the fan when you start the fire, the duct fan blows the warm air from the stove into the plenum. From there, the plenum evenly distributes the heat throughout the duct system.
What If I Don’t Have A Duct System?
If you don’t have a duct system, there’s no need to worry. On average, it will cost about $1,800 and $3,300 to get a duct system installed so that you can adequately heat your home with a wood stove. This price also includes materials as well as labor.
Now, if you wanted to do this yourself to save on costs, you can. However, you’ll want to make sure that you know what you’re doing. A poorly installed duct system can lose up to 40% efficiency. Also, make sure you speak to your local building authorities to see if you will need to obtain any permits.
Budget-Friendly Ideas
If you don’t have the money right now to hire a professional or do it yourself, there are a couple of other things that you can do in addition to using a fan.
- Leave doors open and crack a window. The oxygen from outside will help to depressurize the house, resulting in airflow. This air should help to disperse the heat throughout your home, and with the doors open, the heat can get into all rooms of the house.
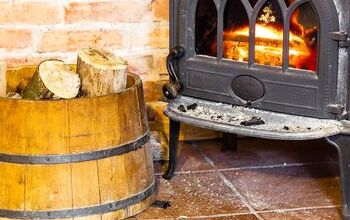
- Re-position the stove. Sometimes the position of your stove can affect how far heat is dispersed. For instance, if your stove is over in a corner, instead of in a fireplace on a wall, the heat can get trapped in the corner of the room. Having the stove against a wall or in a fireplace will help the heat evenly distributed throughout the room.
Related Questions
How long does it take a wood stove to heat a room?
In about one hour, the stove will heat the room to about 70 degrees Fahrenheit. From there, you can make the necessary adjustments to either maintain the temperature or increase it. Check out our guide: How Much Wood Do I Need To Heat My House?
What happens if my woodstove gets too hot?
If your wood stove gets too hot, then it will result in a fire that’s burning inefficiently. Also, it will damage some of the stove components over time.
How hot should a wood stove flue get?
The hottest that your flue should get is about 250 degrees Fahrenheit. This will help to avoid any chimney fires. Also, cleaning your chimney on a regular basis will also help to prevent chimney fires.
Wrapping It Up
While many people may argue that a wood stove is inefficient in keeping a house warm, especially in winter, we politely disagree. Your best plan of action will be to use your home’s heating duct system to disperse the heat throughout the house evenly. Following the steps above and you can have this done in no time!
If you don’t have a duct system that allows you to do this, you can always install one. You will need to decide whether you want to hire an HVAC technician or do the work yourself. Either way, you’ll soon enjoy a nice and cozy atmosphere in your home.

Heather is a passionate writer who loves anything DIY. Growing up, she learned everything from home repairs to design, and wants to share her tips with you. When she's not writing, she's usually hiking or searching for her next DIY project.
More by Heather Robbins


![10 Best Cordless Leaf Blowers – [2022 Reviews & Ultimate Guide]](https://cdn-fastly.upgradedhome.com/media/2023/07/31/9070789/10-best-cordless-leaf-blowers-2022-reviews-ultimate-guide.jpg?size=350x220)


![Standard Dining Room Table Dimensions [for 4, 6, 8, 10 and 12 People]](https://cdn-fastly.upgradedhome.com/media/2023/07/31/9074335/standard-dining-room-table-dimensions-for-4-6-8-10-and-12-people.jpg?size=350x220)