How To Turn On A Water Heater (Quickly & Easily!)
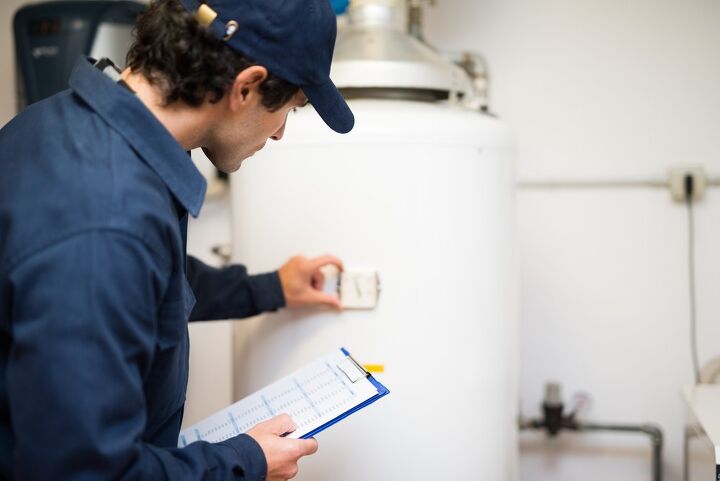
Sometimes big machines like water heaters can be intimidating to turn on. When following the proper steps and taking safety precautions, it is relatively simple. There are four different methods to remember.
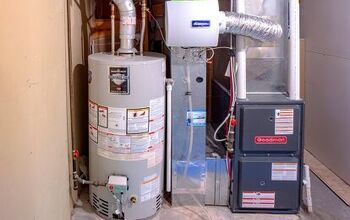
The method you use depends on the type of water heater you own. There is the modern-day gas water heater, older model gas water heater, and tankless or electric water heaters. So how do you turn on a water heater for each type?
To turn on a water heater, you must know the type you are working with in your home. All tanks must be full before starting. For the gas water heaters, old and new, the pilot light needs to be lit. The new ones have a spark igniter, while the old ones are lit with a long neck lighter and the gas release button. Tankless and electric water heaters are turned on from the breaker.
Make Sure Your Water Tank Is Full
This might seem like a given, but some water heaters won’t turn on unless the tank is full. Below are the steps for ensuring that your water tank is full.
Step 1: Shut Off Your Water Supply Along with Your Gas Valve or Circuit Breaker
If you are turning the water supply off, twist the main water valve that should be attached on the top of the water heater.
Step 2: Drain and Flush the Tank to Clean It Out
To drain your tank, attach a hose to the bottom of your water heater and flush the water in a nearby sink. If there is, clean the sediment out.
After this, let cold water flush through the tank for five to ten minutes.
Step 3: Fill Your Water Heater Tank Back Up
Once you’ve flushed the water tank, you detach the hose and close the valve. Let the cold water fill the tank back up.
Step 4: Ignite Pilot Light or Turn On Circuit Breaker
Now you can restart your machine by igniting the pilot light (gas water heater) or turning on your circuit breaker (electric water heater).
Starting a Modern Gas Water Heater
Step 1: Make Sure the Temperature and the On and Off Controls Are Set to the Right Settings
You must make sure your water heater’s temperature control is set to the lowest setting. After this, make sure the on and off control is set to the pilot setting. This will allow you to ignite the pilot light.
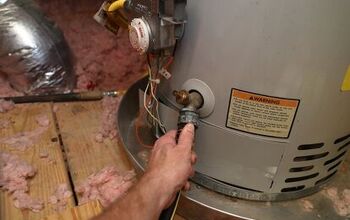
*Side note: If you smell gas or a rotten egg-like odor, stop what you are doing. Call your local gas company because you might have a gas leak for old and new models*
Step 2: Press the Pilot Igniter on Your Water Heater
Hold down your pilot igniter, and while doing so, you should press the spark generator. You should then see a spark indicating that the pilot is lit.
Step 3: Continue to Press the Pilot Igniter
You will want to continue to press the pilot igniter for an additional twenty to thirty seconds after seeing the spark. This will allow the pilot light to get hot enough and stay lit.
*Side note: Sometimes, steps two and three can take a couple of times to catch the pilot light. If this is the case, start with step two and try again*
Step 4: Turn Control On and Set Your Desired Temperature
Now that the pilot light is lit, you can turn on your water heater. Once you turn it on, set it to your desired setting.
Igniting an Older Gas Water Heater
Step 1: Make Sure the Temperature and the On and Off Controls are Set to the Right Settings
You must make sure your water heater’s temperature control is set to the lowest setting. After this, make sure your on/off valve is set to off, then wait ten minutes. After you have waited ten minutes, you can now switch your valve to pilot.
Step 2: Remove Access Panels
Some older gas water heaters have an access panel that covers the pilot light. If this is the case, remove the panel to expose your water heater’s pilot light.
Step 3: Press and Hold Your Water Heaters Pilot Light
Once you have exposed your pilot light, you will want to hold the pilot light button-down.
Step 4: Light the Pilot
While holding down the pilot light, you will find the small silver tube connected to the gas control valve. Follow this tube to the end and light it with a long neck lighter to ignite your pilot.
Step 5: Continue to Hold Down the Pilot Light Button
Hold down the pilot light button for an additional 20-30 seconds to make sure that your pilot fully lights and stays lit.
Step 6: Put the Access Panels Back in Place
If you had to take the access panels off your machines to expose the pilot light, put them back into place.
Step 7: Turn Control On and Set Your Desired Temperature
Now that the pilot light is lit, you can turn on your water heater. Once you turn it on, set it to your desired setting.
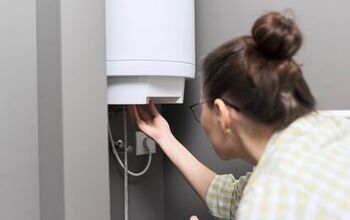
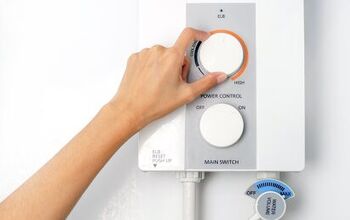
Turning on Electric or Tankless Water Heaters
Step 1: Turn on the Breaker for the Hot Water Tank
After you make sure your tank is full of water, turn on the breaker that controls your water heater.
Step 2: Simply Wait for the Water to Heat
After you turn on the breaker, the next step is to wait for your water heater tank to heat up. This could take several hours.
Step 3: Confirm the Temperature
Once heated, double-check that the temperature of your tank is set to your desired temperature. We recommend 120 degrees Fahrenheit.
For an electric water heater, you will most likely have to turn to your circuit breaker and make sure that that is on. Gas heaters will deal with a pilot light that must be lit.
Twelve Precautions to Take When Turning on Your Water Heater
- Always check for drips coming from your water heater’s pipes. If you see drips, this might mean that the pressure in your water heater is too high. If this is the case, you should down the temperature and pressure immediately.
- When starting a gas heater that hasn’t been used for a while, make sure that you keep an eye out for weird smells coming from the heater. This could indicate a gas leak. You should not ignite the pilot light if you smell any form of gas.
- If your pilot light goes out, make sure to pinpoint the reason why it went out before you try to reignite it.
- Make sure the relief valve on your water heater works before re-lighting.
- On an electric heater, make sure to periodically check for bare or exposed wires.
- If you notice your water heater going out a lot, it’s recommended to get it serviced.
- Keep your distance from the pilot light while laughing. You wouldn’t want to burn yourself.
- Periodically check the burner for dust, dirt, or rust before igniting your pilot light. If any of these sediments are present, make sure to clean them before proceeding to ignite the pilot light.
- Make sure your outer and inner covers are in place before turning the gas valve.
- Make sure you let any gas pass before trying to ignite the pilot multiple times.
- Check your manual. Your manual is your friend that will give things to look out for and safety tips for your water heater.
- Some water heaters will have guidance marked on the actual tank, don’t be afraid to use those.
Some Reasons Not to Turn Off Your Hot Water Heater When It’s Not in Use
There are a few things to keep in mind when you leave for extended periods.
- You Won’t Be Saving Money. Studies show that turning off your water heater while not using it will save you approximately $1 a day.
- It’s a Hassle. Turning your water heater on and off a lot can be a hassle because they are not always easy to turn on.
- It Takes time to Heat the Water. Every time you turn your water heater on after it’s been off, it will take hours for your water to heat up.
Alternatives to Turning Your water Heater Off
Below is some good advice to follow to keep from turning off the water heater, which can damage it.
- A vacation mode may be included with the water heater you own. It is wise to use if you’re going to be away from your house for a while. This will lower the water heater’s temperature while you’re gone, but it will not take hours to heat.
- Lower the thermostat on your water heater while you are not using it to save money.
- Insulate your tank. This will allow your water heater to use less energy to keep the water warm.

We are a team of passionate homeowners, home improvement pros, and DIY enthusiasts who enjoy sharing home improvement, housekeeping, decorating, and more with other homeowners! Whether you're looking for a step-by-step guide on fixing an appliance or the cost of installing a fence, we've here to help.
More by Upgraded Home Team


![How To Turn On A Gas Fireplace With A Wall Switch [Quickly & Easily]](https://cdn-fastly.upgradedhome.com/media/2023/07/31/9076525/how-to-turn-on-a-gas-fireplace-with-a-wall-switch-quickly-easily.jpg?size=350x220)