


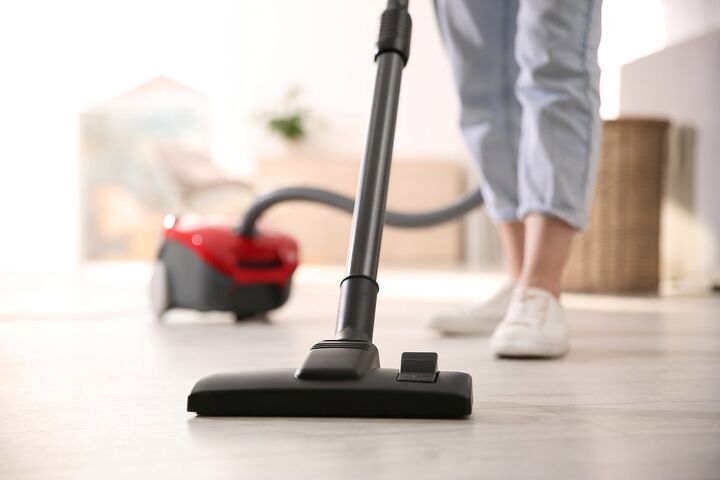
How To Take Apart A Dirt Devil Vacuum Cleaner
Thanks to its lightweight profile and value proposition, Dirt Devil has become one of America’s top vacuum cleaner brands. If you’re looking for a simple, lightweight, and functional vacuum cleaner, it’s hard to go wrong with Dirt Devil.
However, excessive use can clog the vacuum with dirt. To give them a good cleaning, you need to take them apart. Unfortunately, many people are finding it difficult to take apart their Dirt Devil.
Press the release button on your Dirt Devil vacuum, remove the battery, rotate the locking collar, and remove the handle with a screwdriver. Hold the button to release the dirt canister, empty it, turn the vacuum on its side, and unscrew the brush. Unscrew the metal plate from the frame, and pull out the brush head to take apart your Dirt Devil vacuum.
Do You Need a Vacuum Repair or Service?
Get free, zero-commitment quotes from pro contractors near you.

Steps on How to Take Apart a Dirt Devil Vacuum Cleaner
Before we proceed, make sure that you have a #2 Philips screwdriver – and that’s about it. Also, keep in mind that this guide is only applicable to upright models of Dirt Devil.
Step 1: Remove the Power Brick or External Battery
Most upright models of the Dirt Devil vacuum line come with an external battery or power brick. Locate the power brick on the side of the vacuum kit. It should be attached through a cable to the charger plug out of the AC socket.
Take out the power brick and set it aside for the meantime.
Step 2: Lay the Dirt Devil on the Floor
Taking apart your Dirt Devil can get messy, especially when it’s been a while since your last cleaning. So place a sheet of newspaper on the floor to catch the dirt and debris that will drop from the vacuum.
Lay the Dirt Devil horizontally on the floor with the suction head in the newspaper. Rotate the vacuum cleaner so the side where the handle is located is facing upwards.
Step 3: Detach the Handle
Now, we need to detach the handle by rotating the locking collar at the base of the handle counterclockwise. In case the locking collar won’t turn, a quick spray of a lubricating product should loosen it up. Keep rotating the collar counterclockwise until you can’t anymore.
Grab the handle and pull the handle away from the collar. Just keep pulling the handle until the end detaches from the vacuum’s frame.
Step 4: Unscrew the Sections
Turn the handle to its side and you should see a screw facing up. Grab your #2 Phillips screwdriver and take out the screw and set it aside in a small container or paper cup for safekeeping. Next, using your hands, pull the two sections apart.
Step 5: Release the Dirt Cup or Canister
Check the vacuum for a specific button that will release the dirt cup or canister. It’s generally near the bottom of the unit. Push the button with one hand while holding the canister or dirt cup that’s connected to the bottom of the vacuum.
Detach the dirt cup off the vacuum and release the button. Empty the dirt cup into the trash, remove the filter inside, and rinse the cup with cold water. Then, set aside the cup.
Step 6: Remove the Screws of the Brush
Rotate the vacuum so the side where the bristles are found is facing upwards. You should see the screws on each side of the bristles so use your screwdriver to remove them.
If you find it hard to reach the screws, try pulling away from the bristles from the vacuum frame. Again, keep the screws safe in a container you used earlier.
Step 7: Remove the Metal Plate
With the brush head detached, remove the metal plate and set it aside. You should see more screws from each side of the frame so go ahead and unscrew them. Place the screws in your handy container.
Step 8: Remove the Brush Head for Cleaning
At this point, you should be able to remove the brush head. You can now proceed with cleaning all the parts. If you’re going to wash the vacuum parts with water, make sure that you dry them properly before reassembly.
Congratulations, you’ve just disassembled your Dirt Devil! It may seem like a particularly confusing task but Dirt Devil did a good job with the vacuum’s modular design. It’s not that difficult as most people believe.
Are Dirt Devil Vacuums Easy to Maintain?
In general, the most basic maintenance steps required for Dirt Devil vacuums are emptying the dirt cup and cleaning or replacing the filter. However, here are more upkeep and preventative tips that will help ensure the good condition of your vacuum.
Electronics
All Dirt Devil vacuum cleaners are using an all-in-one control board. They used to house parts like transformers, individual relays, and mini-breakers but not anymore. A central control board is simply more powerful, cost-efficient, and durable.
To replace the all-in-one control board, verify the number of motors in your unit as well as the amperage requirements. Fortunately, it’s not that difficult to retrofit a control board.
Filter
Similar to many vacuum cleaners, one basic maintenance step for a Dirt Devil vacuum cleaner is to empty the dirt canister. Most Dirt Devil filters are washable but it’s always best to check if it’s safe to wash with water.
With continued use, you’ll eventually need to replace the filter. It’s a good thing that it’s an easy replacement since the filters are fairly inexpensive.
Motor
All Dirt Devil vacuum cleaners use permanently sealed motors. They virtually don’t require any maintenance since oiling or lubrication isn’t required. Even if you perform routine maintenance of the motor, you only need to check it once every five years.
When checking the motor brush, ensure that the central motor shaft is not loose or wobbly. Otherwise, the bearings might be going out and due for a replacement. To replace the motor, you can contact a local dealer for service or going the DIY route.
Motor Brushes
The motor of Dirt Devil houses two carbon brushes in each motor. However, the brushes can be replaced before they can damage the motor. As a rule of thumb, Dirt Devil motor brushes should be inspected every five years in residential applications.
Keep in mind that the Dirt Devil motor may become defective for other reasons. Dust build-up in the motor and bad bearings just to name a few.
Vacuum Head
Your Dirt Devil’s vacuum head and carpet brush need attention as well. So take the time to cut off long fibers, strings, and hair that have accumulated around the roller.
When the roller goes off balance, friction and vibration can cause the bearings and bushings to fail. Thus, make sure that you check and clear the brush head on a regular basis.
Do You Need a Vacuum Repair or Service?
Get free, zero-commitment quotes from pro contractors near you.
Related Questions
Which is Vacuum Brand is Better: Dirt Devil or Bissell?
When it comes to portability, Dirt Devil has better offerings, thanks to models like the Dirt Devil Classic Bagless Handheld M0100. On the other hand, when you look at the suction power, Bissell has the upper hand.In terms of bag capacity, the Dirt Devil models generally have a smaller capacity when compared to Bissell vacuum cleaners.
Why Won’t My Dirt Devil Vacuum Pick Up Anything?
There are many potential reasons why your Dirt Devil’s suction loss. First, check if your unit’s suction control is properly configured. You might have inadvertently switched to the minimum setting which can greatly reduce its suction power.Also, make sure that you regularly empty the dirt canister as a full cup can also reduce suction power. Lastly, check if the filters need to be cleaned or replaced.
What is the Best Handheld Dirt Devil Vacuum Cleaner?
Handheld portability is the main selling point of the Dirt Devil brand. The brand offers many handheld units so there’s plenty to choose from. However, it’s hard to go wrong with the Dirt Devil SD20005RED Scorpion Vacuum Cleaner.Weighing less than 4 pounds, this handheld vacuum is easy to use and comes with a 16-foot power cord for more reach. Highly recommended if you’re looking for a vacuum cleaner for hard to reach areas like stairs, wardrobes, and car interiors.

We are a team of passionate homeowners, home improvement pros, and DIY enthusiasts who enjoy sharing home improvement, housekeeping, decorating, and more with other homeowners! Whether you're looking for a step-by-step guide on fixing an appliance or the cost of installing a fence, we've here to help.
More by Upgraded Home Team


![10 Best Electric Lawn Mowers - [2022 Reviews & Top Rated Models]](https://cdn-fastly.upgradedhome.com/media/2023/07/31/9070486/10-best-electric-lawn-mowers-2022-reviews-top-rated-models.jpg?size=350x220)
![The 10 Best Table Saws - [2022 Reviews & Buyer's Guide]](https://cdn-fastly.upgradedhome.com/media/2023/07/31/9070645/the-10-best-table-saws-2022-reviews-buyer-s-guide.jpg?size=350x220)
![10 Best Zero Turn Mowers – [2022 Reviews & Ultimate Buyer's Guide]](https://cdn-fastly.upgradedhome.com/media/2023/07/31/9070522/10-best-zero-turn-mowers-2022-reviews-ultimate-buyer-s-guide.jpg?size=350x220)


