How To Rough In A Double Sink Vanity

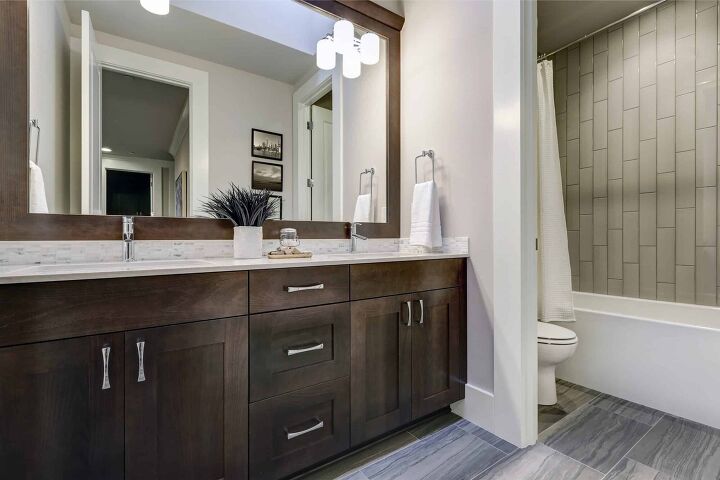
Double sink vanities are regal, helpful, and completely practical. When having a double sink vanity, you essentially get two sinks rather than one, but for the same price. Roughing in a sink involves connecting a sink, toilet, or tub in its final stage. After you rough-in your sink, you will be almost finished with the install. Although it can seem complicated, it is not too hard if you follow the steps correctly.
In many situations, you will be able to change the supply and drain pipes to accommodate two sinks. All you will need to use are tee fittings, special valves, extension pipes, and hoses. You may have to vent each sink separately, but roughing it in is entirely possible.
This article will take you through the terms and dimensions regarding your rough-in double sink vanity. Then, we will describe how you can do this for your own home.
Do You Need to Hire Cabinet Installers?
Get free, zero-commitment quotes from pro contractors near you.

Rough-In Dimensions And Terms
When speaking of plumbing dimensions, the term centerline is very often used. This term essentially just means in line with the very center of whatever you are working on. This can mean the drain pipe or piece of equipment you are installing. If you have two pipes that are supposed to be 10 inches apart, then you would measure 10 inches between the centers of the pipes. This is important because it is not 10 inches between the edges of the pipes!
Another term is the base floor height. In new construction, this is known as the subfloor, but in remodeling, it is considered finish flooring. This is not really important, but if you are speaking to a plumber or contractor, it will help them know what you are working with.
Keep in mind that not all dimensions are set in stone; consider them general guidelines. They will vary according to your bathroom. Consult the instructions that come with the fixture (sink, tub, etc.) for more precise dimensions.
Line, Discharge, or Fixture | Location |
Vertical Supply Line | 2-3″ above the drain pipe |
Horizontal Supply Line | 4″ to the left or right of the center |
Vertical Discharge | 16-20″ |
Side to Side Buffer of Fixture | At least 15-20″ |
Front Buffer of Fixture | At least 21″ |
Sink Rough-In Parts And Details
- Supply line: This usually is two holes. When placed vertically, they should be around two to three inches above the drain pipe. If your supply line is horizontal, then one hole will be four inches to the left of the centerline, and the other, four inches to the right
- Discharge hole: The hole is always vertical. It will always be 16-20 inches above the floor.
- Drain pipe: The drain pipe is the easiest vertical centerline.
- Side to side buffer of the fixture: This will be at least 15 inches from the centerline. Although 20 inches is recommended, you can use your best judgment.
- Front buffer of the fixture: Regarding your front buffer of the fixture, the minimum distance should be 21 inches, but 30 inches is more recommended. Remember to use your best judgment.
- Sink placement: Generally, you will want your sink to be 31 inches above the floor. This is measured from the floor to the rim of the sink.
Supplies To Complete A Double Vanity Rough In
- Sink drain assemblies (2)
- Faucets (2)
- Level of 4-feet
- Saw
- Tape measure or yardstick
- 90-degree drain elbows (2)
- Tee
- P-trap
- Extension for p-trap
- Drain trap adapter
- Double-outlet shutoff valves (2)
- Flexible faucet hoses made from mesh (4)
- Pliers (should be adjustable)
Steps To Installing And Attempting A Double Sink Vanity Rough In
Step 1: Measure And Prepare
If you want your sinks to share a standard drain, then you will need to install the sinks with at least 30 inches between them. What is good about purchasing a sink is that the spacing is typically already done for you. However, if it’s not, then you will need to take the time to do the measurements on your own. It’s a good idea to measure from the center of the sink to the center of the other sink.
The difference comes if you are installing sinks at different levels. In this case, you should make sure there is not more than a 6-inch height difference between them. If there is, you will need to take the time to adjust this before going further.
Step 2: Attach The Drain Assembly
You need to make sure that you attach the drain assembly to each sink before you install it. This is important. Be aware that it is much easier to install both faucets if you actually bolt it to the sink before installing it. Typically fasteners should be provided with your purchase.
You will always want to double-check the packaging, though, to ensure that the fasteners are included. If they aren’t, you will need to purchase these separately as they are necessary to have.
Step 3: Measure And Level
Now you will need to use a level. It should be around four feet tall. Place it against the drain opening in the wall, and be sure to center the bubble.
Grab your tape measure, and use it to measure the height of the point where the level crosses the link between the drains. This point is where you will be installing a tee. This tee will help you to join the sink drains in a common P-trap. Make sure you measure the distance from each drain tailpiece to this point.
Step 4: Cut The Pieces
Using a saw, you will need to cut the piece hanging vertically from each drain. Ensure that the pipe that is extending from it will have a slope of 1/4 inch per foot.
Then, install a 90-degree elbow onto each of these pieces. You should be able to connect two elbows to the tees. Be aware you must use pipes of the right lengths, or this will not work.
Step 5: Connect The Tee To The P-Trap
At this point, you need to point the tee down and connect it to your P-trap. The other end of the trap should be connected to the wall drain. You may need to use an adapter to fit the P-trap extension into the wider drainpipe if that is the case with your sink. Ensure that this is tight and fitted correctly as it is needed to work appropriately for the overall functioning.
Step 6: Remove The Shut-Off Valves
Now turn off the water. Be sure to remove the shut-off valves from the hot and cold water supply pipes. You will need to find a double-outlet valve, and it also must be able to connect to two separate hoses. If there is no double outlet valve, you will need to purchase this from the store as well. So, it’s a good idea to ensure you have all of these necessary components before even starting the project.
Step 7: Connect The Faucets And Valves
Finally, connect each faucet to each valve. You can use faucet supply tubing made from mesh. This will be easy to cut and adjust. Use pliers to tighten the connection, and you are done.
When you are tightening the connection, you don’t want to do it too tight to where you break anything. However, it should be extremely snug to the point that you cannot make it budge with just your hand. For example, if you’re tightening it as tight as possible with your pliers, that’s fine. But, don’t use your feet to kick it further into place.
Related Questions
Can two sinks share one drain?
You can have two sinks share one trap in a dual sink bathroom. The only issue with this is that without two traps, you can get air pockets. Make sure to check with your local codes because, in some places having two separate sinks served by a single trap is not code compliant. If this is the case, then you will need to ask a plumber to help you to design your drain system.
Do I need to use pliers, or can I tighten them by hand?
Drain fittings can often be closed and tightened by hand. The only problem is that they can possibly leave leaks. Using pliers will help you to avoid this. You can usually tighten these by hand, but you should check for leaks when you’re finished and tighten any that leak with adjustable pliers.
How big should my extension pipes be?
Your extension pipes can be the same diameter as your tailpiece. For example, if your tailpiece is 1½ inches in diameter, you can use the same extension pipe side. Alternatively, you can increase this by a ¼ inch or so by using the adapters that typically come with traps and extension pipes.
Do You Need to Hire Cabinet Installers?
Get free, zero-commitment quotes from pro contractors near you.

Our Takeaway
Roughing in your own double sink vanity is a simple project that you won’t need a professional to do for you. However, you need to make sure you have the necessary components before beginning to ensure that you can do the job smoothly and correctly. Take the time to measure everything and ensure that it’s all level. That way, you won’t need to go back later to fix any issues, and you can enjoy your new double sink vanity.

Real estate agent and copywriter, originally from California. Chloe brings her real estate expertise into her writing to create effective and helpful home guides for you! When not writing or selling homes, she spends her time as a digital nomad traveling the world.
More by Chloe Meltzer


