How To Replace An Interior Window Sill
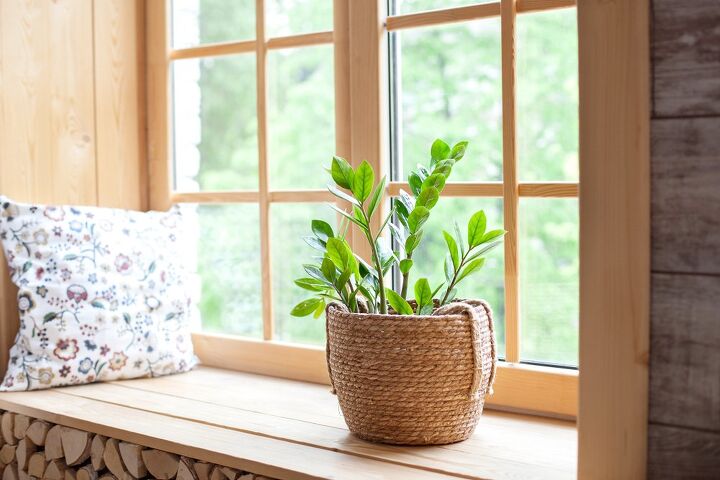
Window sills can be a beautiful place to display fine objects or allow a plant to bask in the sun. However, if your window isn’t properly sealed, leaks and water intrusion can damage your window sill. If the sill has started to rot or become moldy, it’s time to replace it with a new one.
With a little DIY knowledge, replacing an interior window sill isn’t too complicated. You’ll need to carefully remove the old sill using a hammer and pry bar before cutting a new one to the right size. Paint or stain it to your liking, then install the new sill and complimentary trim with small nails.
Replacing a window sill is easiest if you have various power tools, including several kinds of saws. If you don’t have all of those on hand, you can make substitutions or use a hand saw. Just remember that this is a highly visible piece of trim, so precision counts!
Do You Need Handyman Services?
Get free, zero-commitment quotes from pro contractors near you.

Removing the Old Sill
Materials Needed:
- Utility knife
- Safety glasses
- Hammer
- Prybar
- Putty knife
- Pliers
- Circular Saw
Step 1: Prepare the Window
Open the window. There’s a lot of swinging and prying that’s about to happen. It would be a shame to have one missed knock end in broken glass!
Step 2: Cut the Caulk
Using the utility knife, cut the caulk lines. Caulk secures the window sill edges near the window’s base and the drywall or wood trim on the vertical sides. Cutting the caulk line allows this sealant to loosen for easier extraction.
Look to see if there’s an apron underneath the window sill. This is a decorative wood trim piece that lays flat on the wall below the window sill. If it’s there, cut the caulk lines on all sides.
Step 3: Remove Any Wood Trim
Are the sides of your window made of drywall or wood trim? If the window is cased in drywall, no action is necessary on the sides. However, if the casing is wood, you’ll need to remove the vertical pieces that touch the sill on each side. Put on your safety glasses before using a hammer or pry bar. This is good practice just in case anything chips off and flies your way.
For each trim piece, use the hammer to tap the pry bar’s tongue underneath the wood. Start with the apron, then the side pieces, then the window sill. Lay a putty knife flat against the wall behind the head of the pry bar. This will keep you from damaging the drywall behind it.
Pull gently and firmly with the pry bar. Do this at several points in the center and on each end until the trim piece comes off the wall. Be cautious of sharp, broken nails to avoid injury.
Step 4: Remove the Window Sill
With the trim removed, it’s time to tackle the sill itself. If you’ve removed the vertical trim, you should be able to pry the sill up from underneath with no problem. Hit it from below with a hammer, and it should lift off easily.
If the drywall on the vertical sides prevents the wood from lifting, you may need to cut the sill in half with a circular saw. Drop in to cut it down the center (on the short axis) without plunging the blade deeper than necessary.
Then you should be able to hammer and pry out the sill one piece at a time. Once you’ve removed the sill, pull any remaining nails in the trim pieces and the window frame with pliers. Make sure to dispose of them safely so nobody gets poked.
Preparing the New Sill
Materials Needed:
- Window stool, door casing, or wood trim in 1×4 or 1×6 dimensions
- Measuring tape
- Pencil
- Speed square
- Safety glasses
- Chop saw, table saw, circular saw, jigsaw, or hand saw
- Sandpaper
- Dropcloth
- Paint or stain
- Paint tray or cup
- Paintbrush or roller
Step 1: Measure and Mark Your New Window Sill
Measure the old window sill’s length and depth. (You can do this before or after you remove it.) Use your pencil, measuring tape, and speed square, to mark these measurements on a piece of window stool.
Note: Window stool is the type of trim traditionally used for window sills.
It has one routed, finished edge. You can create your own window stool with a router and a piece of 1×4 or 1×6 lumber. Alternatively, you can just use 1×4 or 1×6 lumber for a more modern look.
Step 2: Cut Your New Window Sill
Put on your safety glasses before operating any power tools! Cut your window sill material to the proper size. A chop saw is ideal for making the cut on the short axis, while a table saw is best for the long axis.
Alternately, you can use a circular saw for both or a hand saw (if you’re feeling strong). A chop and table saw, however, will give you the smoothest results.
Take a look at the window sill you removed. Does it have “wings”? These are T-shaped protrusions that make the sill look wider than the window frame when installed.
To recreate these, use the old sill as a template to measure and mark that design on your new sill. Cutting these with a jigsaw will be best, but again, a circular or hand saw will do (carefully).
Step 3: Prep Your New Window Sill
Give your sill a good sand with a medium-grit piece of sandpaper. Remove any jagged pieces that resulted from cutting and make sure it’s smooth to the touch. Wipe off any excess sawdust with a clean cloth.
Step 4: Paint or Stain Your New Window Sill
Lay out a drop cloth and pour your paint or stain into a cup or small roller tray. Apply two coats of paint or stain to the new windowsill, one side at a time. Make sure to let it dry thoroughly between sides so it doesn’t pick up any dirt and debris.
Note: Painting or staining your windowsill is important for weatherization. If you prefer the plain wood look, consider a clear polyurethane coat to prevent staining and rot.
Step 5: Finishing Touches
Follow the same process for the apron and vertical trim pieces, if applicable. If the pieces you removed are not damaged, simply pull any existing nails and cut off the old caulk. It wouldn’t hurt to give them a fresh coat of paint to match your new sill, too.
If you need to cut new trim pieces, do so using the chop saw, table saw, circular saw, or hand saw of your choice.
Installing the New Sill
Materials Needed:
- Safety glasses
- Battery or compressor-powered trim nailer
- Trim nails
- Hammer
- Nail set
- Mallet
- Caulk
- Caulk gun
- Rag
- Painter’s putty
- Putty knife
- Paint or stain
- Small paintbrush
Step 1: Check Your Sill
Do a test-fit of the new window sill. You may find that you need to go back to the drawing board and do some sanding or additional cuts to make it fit.
If you’ve taken them off, remember to put on your safety glasses before using power tools or the hammer.
Step 2: Install Your New Sill
Install the window sill first. Place the cut edge of the new sill at the back (closest to the window itself). Using a battery or compressor-powered trim nailer, shoot nails into the sill along the back edge and sides every 6-8 inches.
Alternately, you can tap these nails in with a hammer. When they get close to being flush, use a nail set to tap them down a bit more. This way, you avoid damaging your beautiful new window sill by dinging it up with your hammer.
Step 3: Install the Trim
Install the vertical trim pieces. Again, you may need to trim them to fit. Hide the cut edges at the top and back, away from where your eye would usually be drawn. Tap them gently into place with a mallet. Nail along the back edge just like the window sill, but add some on the opposite edge as well for security.
Install the apron. Pay attention to its angle: it may have V-shaped cuts on the ends. Make sure the broader part supports the window sill and the shorter part is closest to the floor.
Step 4: Time to Caulk
Caulk around all edges of the trim you just reinstalled. Keep a damp rag at hand to clean up caulk-y messes as they arise. It’s easy to clean when wet and much harder once it cures.
Remember, the best caulking job is the one you can’t see at all. Less is more: try to fill in the crack but leave nothing on the surface.
Step 5: Finishing Touches
Fill the nail holes with painter’s putty or wood putty. This will be much more successful than caulk, which will sink into the hole and look obvious. Touch up with paint or stain as needed on the window sill, vertical side trim, and apron.
Stand back and admire your handiwork! Replace the objects or plants that lived there before and bask in the glow of your upgraded, sunny window.
Related Questions
Can I fix a damaged windowsill without replacing it?
Yes. If your window sill needs some love but isn’t damaged enough to replace, you can rebuild and refinish it in place. Ensure that it’s clear of dust and debris to start, and is dry and free of greasy residue.Mix up a batch of two-part wood filler or epoxy designed to fill substantial wood gaps. You can even drill small holes into the window sill to help the wood filler bond. Using a putty knife, spread on the compound as smoothly as you can.Once it’s dry, sand out any remaining ridges and paint it to match the rest of your trim. Good as new!
Why do you recommend using so many different types of saws?
Because a window sill is very visible in your home, it’s essential that all the cuts are high-quality. Each saw specializes in a different type of cut and offers the most control or precision for that cut.For example, a chop saw makes great 90-degree cuts on pieces of lumber up to 12” wide. (Some chop saw blades are bigger than others, so yours may max out at 4” or so.) Table saws are great for “ripping,” making long cuts that run the length of the board.Circular saws are incredibly versatile and can make all of these cuts. But because it’s not attached to a stabilizing mechanism (like a table), there’s more opportunity for user error. The same thing with a hand saw: it can do many things, but there are many ways it can go awry too!
Do You Need Handyman Services?
Get free, zero-commitment quotes from pro contractors near you.
A Window of Opportunity
A window sill can be a great way to display beautiful things in your home. It can even just be a way to achieve clean lines with your decor. No matter how you adorn it, a window sill free from rot and mold is now within your reach!

Stacy Randall is a wife, mother, and freelance writer from NOLA that has always had a love for DIY projects, home organization, and making spaces beautiful. Together with her husband, she has been spending the last several years lovingly renovating her grandparent's former home, making it their own and learning a lot about life along the way.
More by Stacy Randall


![10 Best Electric Pressure Washers – [2022 Reviews & Guide]](https://cdn-fastly.upgradedhome.com/media/2023/07/31/9070600/10-best-electric-pressure-washers-2022-reviews-guide.jpg?size=350x220)