How To Blend Touch Up Paint (Step-by-Step Guide)
Even the most professionally painted rooms in the home will need a touch-up eventually. This is especially true for high-traffic areas such as bathrooms, hallways, and living rooms. The spots on walls that are around light switches are also subject to heavy wear, necessitating a refresh once in a while. Additionally, if areas have become damaged or were missed during the initial paint job, a touch-up is absolutely necessary.
Although necessary, paint touch-ups can be notoriously difficult to pull off. More specifically, blending the touch-up so that new paint isn’t noticeable or doesn’t stand out is a challenging task. However, with the right techniques and tools, you can achieve a paint touch up that blends flawlessly, without having to repaint an entire room.
When done correctly, touch-ups should mesh acceptably with the surrounding painted area. In fact, the only person that should be able to tell whether or not new paint was applied should be the painter. The key to getting your touch up to blend well is using the exact same batch that was originally applied to your walls. Although, this isn’t always possible. Thankfully, there are other things you can do to achieve a perfectly blended touch-up paint job.
Do You Need to Hire a Paint Contractor?
Get free, zero-commitment quotes from pro contractors near you.

Blending Touch Up Paint
We’ll explore all the methods, techniques, and good practices for perfectly blending your touch up paint into the original paint.
Step One: Selecting Wall Touch-Up Paint
This is arguably the most important piece of the project to ensure a seamlessly blended touch-up. The easiest match job is achieved when you still have the original paint that was used on the wall during its initial paint job. When properly stored, leftover paint can last between ten and fifteen years. As long as the paint is still in good condition, this will be your best bet to accomplish a successful touch-up.
However, using the original paint isn’t always possible. If you need to purchase new paint, the best way to match it is by getting the same sheen, brand, and exact color you used previously. Although lower-sheen and flat paints are the easiest paints for creating a touch-up that is not noticeable, always go with the original sheen for optimal blending.
If you’re unsure of the type of paint that was first used on the wall, you can try going to a local hardware store that offers color-matching technology. With this service, you provide them with a sample of your existing paint and they use a spectrophotometer to measure the color. They will then attempt to recreate the color to create a perfect match in a new can of paint.
Step Two: Preparing the Wall Surface
Just like any paint job or home improvement project, the initial preparation of the work area is very important. To help the paint blend, you want to make sure that the surface of the wall is smooth and blemish-free. Use a sponge or clean cloth with warm soapy water to wipe the area clean of any dirt, dust, grease, or grime. If not properly cleaned, the debris on the wall will negatively affect how the paint adheres. Allow the surface to either air dry or pat it dry with a towel before you proceed.
If your touch-up involves any damage to the surface such as scrapes, gouges, or holes from previous screws, use a spackling compound to close them. With a putty knife, spread the compound into the holes and feather outward at a 45-degree angle. Scrape off any excess and let your patch job set for several hours. If it isn’t completely level once dry, use a fine-grit sandpaper to sand it down.
Step Three: Priming The Touch-Up Area
To aid in color blending and help the paint stick, it is always a good idea to prime the area that you will be touching up. Select a high-quality primer that is intended for indoor use with latex paint. You’ll only want to prime the area that you will be painting; avoid going outside of the touch-up area.
Using a small paintbrush to apply the primer will help you keep it within the affected area. Allow the recommended time for the primer to dry before you continue on with painting.
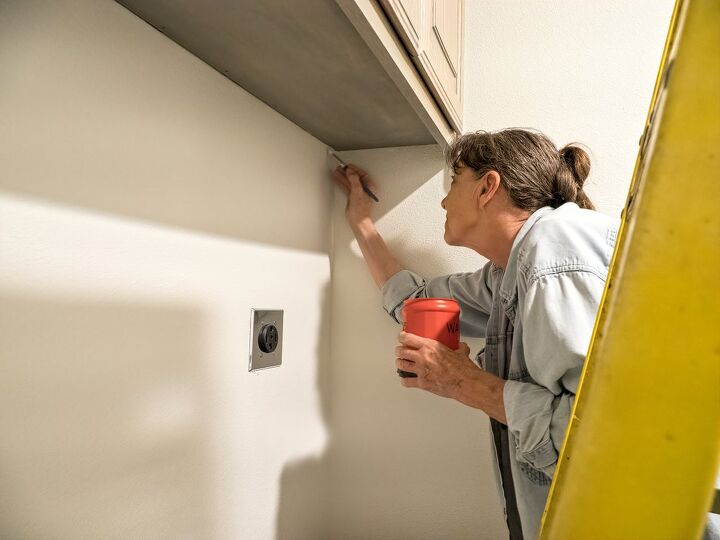
Step Four: Applying the Paint
With the wall surface cleaned and primed, you are ready to proceed with the actual touch-up. If you’re using an older batch of paint, make sure that you stir it well to allow the pigment to mix throughout the can. As far as touch-up paint brushes go, the best choice is to use one that is just large enough for the job and will not spread paint too far outside of the touch-up area.
However, it is often understood that a paint roller will give you much better blending and a higher quality finish than a brush. The preferred roller among professional painters is what is referred to as a “weenie” roller with a quality synthetic cover. For best results, choose a nap thickness that is between ¼ and ½ inch.
If you are just filling a small piece or tiny scratch, consider using an artist’s brush. Just tackling the missing paint with a smaller brush will make your touch-up less obvious.
Quick Tip: One of the best ways to help paint touch-ups blend better is to thin the paint first. After you’ve given it a good stir, thin latex and other-water based paint with a small amount of clean water. For oil-based paints, use 5%-10% mineral spirits. This will help to minimize the sheen difference between your touch-up and the original paint job.
Touch-Up Application Techniques
When it comes to the best application for achieving a good touch-up, there are generally two schools of thought among professional painters. While some like using the original applicator that was used on the first paint job to match the texture, others prefer to use the brush technique.
Matching Texture
The easiest method for creating a perfect blend is to match the texture that already exists on the wall. Obviously brushes and rollers do not leave the same textures on walls, however, the nap thickness of roller covers also makes a huge difference in the resulting texture.
The nap on most covers is what is typically referred to as ‘directional,’ meaning the direction you roll it will affect the texture. Just like your carpeting, if you lay your hand across your roller brush in one direction the fibers stand up, and brushing in the opposite direction causes them to lay down. This is an important point to keep in mind when you’re trying to achieve the appropriate texture on your touch-up.
To maintain a consistent texture, professional painters use a technique called ‘tipping off.’ Tipping off involves applying the paint to the wall, rolling it out evenly, then going over that same area again to give it a final gentle roll. This final roll is done with just the weight of the roller frame and not any additional pressure.
If the texture still doesn’t match after the paint has dried, you can try flipping your roller frame over so that the elbow faces in the opposite direction. Then, make a second attempt at touching up the area.
Brush Technique
The brush technique is the touch-up method that many of the pro’s prefer. To use this method, you’ll want to obtain a high-quality paintbrush and load up the tips of the bristles with paint so that you have no dry spots in the center. Wipe off any excess paint and then apply it to your touch-up area.
To help blend using this technique, you’ll want to lightly tip-off in multiple directions. Work from the center and move outward in each direction as if you were painting the rays on a sun. This will help reduce the noticeability of the brush strokes on your wall.
It is always best to use a small amount of paint and then add more as needed. Wait until the paint dries and then examine it from multiple angles and different lighting to determine if it blends well and if it may benefit from another pass.
When to Consider Repainting the Wall
If after your touch-up has dried you notice that it is either darker or lighter than the original paint job, you may want to consider repainting the entire wall. If the paint matches relatively close, you don’t necessarily need to repaint the entire room. However, you can opt to paint just the affected wall from corner to corner.
As long as the paint is the same color and sheen, you likely will not notice a difference between this wall and the other walls in the room. The corners of the room give a break between walls and this will help to make your repainted wall blend well with the rest.
Do You Need to Hire a Paint Contractor?
Get free, zero-commitment quotes from pro contractors near you.
Dos and Don’ts to Perfectly Blended Paint Touch-Ups
Follow these general dos and don’ts for achieving a successfully blended touch-up paint job:
- DO determine if a touch-up is really necessary. For marks on the wall, first attempt to remove them with a damp, soapy sponge or a magic eraser. A solution of baking soda and water is another great way to gently remove markings. If all else fails, proceed with your paint touch-up.
- DON’T neglect matching the finish. In order to achieve a seamless appearance, knowing your semi-gloss from your satin is just as important as selecting the right color.
- DO prepare the surface first. Wipe it clean with a damp, soapy sponge to ensure that any dirt is removed and the paint can adhere properly. After it is cleaned, prime the area that you will be painting.
- DON’T overload your paintbrush. Always begin with a small amount of paint and reapply where necessary. Several thin coats are better than one thick glob.
- DO achieve proper ventilation in your workspace. Open windows, doors, and bring in fans to increase the airflow to the room you are working in.
- DON’T improperly store leftover paint. Avoid placing any leftover paint in a hot or sunny area. Instead, store extra paint in a cool, dry place in the home such as a basement or closet. Clean the rim of the lid prior to closing it to make the can as airtight as possible during storage.
- DO slightly thin the paint first. Use water for latex or water-based paint and mineral spirits for the oil-based varieties. Dilute your paint about 10 to 15%, as a thinner layer of paint will be much less obvious than thick patches.
- DON’T shake the paint can before opening. If the can has been in storage for several years, it likely has a thick layer of film on top. Open the lid, remove the film, and give it a good stir before you begin painting.
- DO be patient and wait until your touch-up has dried completely before examining it. A touch-up that is very visible when wet may end up drying to an exact match.

Jessica considers herself a home improvement and design enthusiast. She grew up surrounded by constant home improvement projects and owes most of what she knows to helping her dad renovate her childhood home. Being a Los Angeles resident, Jessica spends a lot of her time looking for her next DIY project and sharing her love for home design.
More by Jessica Stone