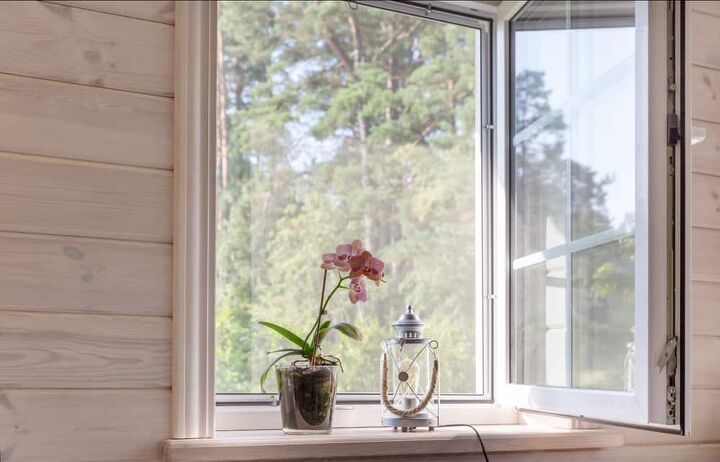
How To Remove An Old Window Screen Without Tabs (Do This!)
Window screens serve a practical use in homes everywhere. And just like anything else, it can wear down and require replacement from time to time. The easiest way to change out an old window screen is to use the tabs that come built-in, making the process quick and simple.
Removing an old window screen without tabs is simple, as long as you have a flathead screwdriver or a butter knife. Simply place the flathead or knife between the frame and the screen, and pry it out. Do this closer to the corner so when the corner pops out you can remove the screen.
Do You Need Window Repair Contractors?
Get free, zero-commitment quotes from pro contractors near you.

How Window Screens Work
Typically speaking, window screens are constructed from metal wire, aluminum, polyester, fiberglass, or even nylon. Those materials are stretched inside of either a wooden or metal frame to create a sort of filter that keeps large contaminants from getting into your hope while allowing airflow.
Over time, thanks to exposure to outside elements, the window screens can deteriorate, tear, and even break over time. Changing them out is generally pretty easy unless the tabs in the frame have broken or stopped working.
Steps to Remove Old Window Screens Without Tabs
The process of removing an old window screen without breaking it depends on a few things. You will need to know the style of the window and screen as well as whether or not you are dealing with pins or tabs. From there, the process is quick and easy.
Step 1: Know Your Window Style
Windows are definitely not universal. They come in a variety of different styles and types that dictate what kind of screen you will need to use. Moreover, there are specific ways to remove each type of window screen that you may need to implement.
- Casement window. A casement window has hinges on the side and is opened through the use of small hand cranks. They won’t have any pins or finger lifts in them, but they are simple and easy to remove and replace.
- Sliding window. You will find this type of window in places that are a little tougher to reach like bathrooms or above your kitchen sink. These are also the easiest to operate since they simply have a release latch and slide open or closed.
- Double-hung window. This is far and away the most common type of window out there and there’s a good chance that you have this type in your home. There is a sash that can also slide up and down to provide improved ventilation.
Step 2: Know Your Window Screen Style
Though there are only two types of window screen style, it is important to know which one you are dealing with. There are minor differences between the two – interior and exterior – but they are important to know before you start.
- Interior window screen. This type of window screen uses a tension-based system. The interior screen is installed around the grooves in the window and is mostly used when it comes to sliding windows. These typically have tabs that allow you to adjust the screen accordingly.
- Exterior window screen. As you can guess, this window screen hangs on the outer portion of the window. It is secured through the use of plunger pins which can be adjusted by twisting either clockwise or counterclockwise. You will find this type of window screen generally related to double-hung windows.
Step 3: Removing Screens with no Plunger Pins or Tabs
Depending on the age and condition of your window screens, there is a chance that the tabs or plunger pins will either be broken or gone entirely. This is obviously not optimal, but it doesn’t mean that you are screwed, either.
- The tools. You can get the job done with either a flathead screwdriver or a butter knife. Don’t go with a particularly sharp or jagged knife; you can slip and gouge the frame or end up cutting yourself in the process. Something flat and sturdy should get the job done properly.
- Pry. Slide your tool into one side of the frame slowly and carefully. Even if you are throwing the screen out, you want to avoid doing any damage to the window frame. Start on one side and pry gently; it should click or pop to indicate that it has come loose. Trace around the screen until you get at least half of it pried up.
- Pull. When you have enough of the screen pulled up that you can get your fingers in, start to pull. Do so gently; the screen may still be secured too much to get it out. If that is the case, simply continue with step two until you can pull the screen away entirely.
Step 4: Removing Interior Window Screens with Tabs
For the most part, those tabs should be there and in working order. They are meant to make it far easier to remove the window screen so that you don’t have to use ingenuity to get the job done. The process of removing an interior window screen (with the tabs) is relatively straightforward.
- Pull the tabs. Remember, interior window screens have lift tabs. They push in and you can then adjust the screen accordingly. Pull them with your fingers until you see the screen pop up ever so slightly. Those tabs work by compressing the tension-spring mounts located in the top portion of the screen.
- Lift. With the tension relieved, you should be able to lift the screen up from the bottom. Use your right hand to lift the bottom of the screen up out of the groove of the millwork. Use your left hand to keep the finger lifts compressed, keeping tension released.
- Pull out. Finally, pull the window screen out. It will come towards you. This should be easy if you managed to leave the screen far enough out of the frame that it pops. If you are having a hard time, try tipping the screen to one side so that you can pull it out more easily.
Step 5: Removing Exterior Window Screens with Plunger Pins
Exterior windows don’t come with tabs like their interior counterparts. Instead, they come with plunger pins that twist to tighten or loosen the screen in the frame. The process is a little more complicated but not overly so.
- Detach the sash. For modern, double-hung windows, you will notice a sash that is actually quite easy to remove. Start by finding the aforementioned plunger pins; they typically start around the bottom. Pull them inward and the window screen should release.
- Detach the screen. With the plunger pins pulled in, you should be able to remove the screen from the window. Make sure that you do this step with caution. Don’t lean out the window and be alert in case the screen ends up falling out. Most screens are relatively light and won’t do major damage, but safer is better than sorry.
- Pull the screen out. If you need to, turn the screen at an angle and try wiggling it a bit. The screen should slide right out with relative ease.
Do You Need Window Repair Contractors?
Get free, zero-commitment quotes from pro contractors near you.
Related Questions
Can I Just Cut the Mesh Out of a Window Frame?
It might seem easier to simply cut the mesh out of an old window frame, but this is a bad idea. Cutting the mesh out will leave you with an empty frame and replacing just the mesh is difficult and time-consuming.You should always remove the entire frame of the screen whenever possible. Not only is it simpler and easier, but it will save you the trouble of having to find specific mesh replacements. Just remove the whole thing and save yourself the hassle.
How Do I Clean a Window Screen?
When you are done replacing your old window screen, you should probably clean it. There is a good chance that the old screen will have built-up dust and dirt (and other grime) that needs to be removed. Keep in mind that failing to clean the screens could potentially damage the screen, shortening its lifespan.
- Take out the screen. It is ideal that you clean the screens before you install them. If you’re coming back later on, remove the screen so that you have better access to all areas of the screen.
- Create your cleaning solution. An effective cleaning solution in this instance is warm water and mild dish soap. You only need a small amount to get the job done, so don’t go overboard.
- Scrub gently. Screens can be fairly fragile, so use a soft bristle brush for any scrubbing. Do so gently, using the soapy water to get out the grime and dirt. You may have to rinse and wipe the area and then scrub a second time to get the truly tough stains out.
- Rinse. Rinse after each scrubbing. Keep going until you are happy with the look and condition of the screens. Make sure that you completely rinse away the soap when you are finished.
- Dry completely. Make sure that the window screens are completely dry before returning them back into place. Excess water can get stuck and eventually rust the frame.
Related Guides

Ryan Womeldorf has more than a decade of experience writing. He loves to blog about construction, plumbing, and other home topics. Ryan also loves hockey and a lifelong Buffalo sports fan.
More by Ryan Womeldorf