


How To Remove Solder Without A Soldering Iron (Do This!)
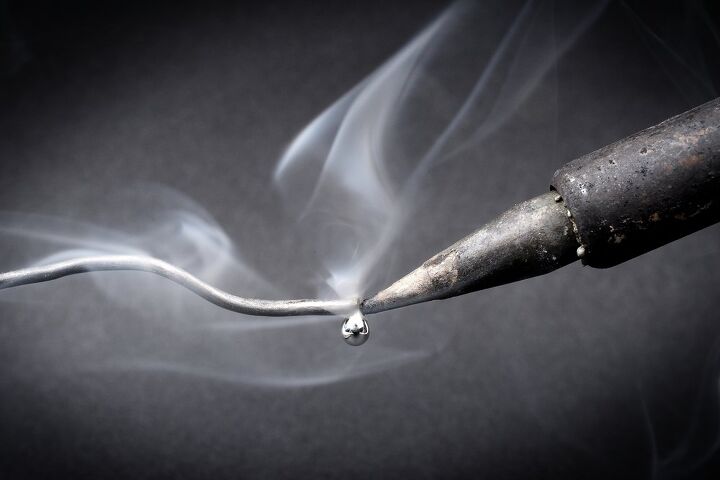
Although a soldering iron makes solder work faster and more comfortable, they are not always necessary. A soldering iron isn’t much more than a heated metal piece used to turn solder into a liquid state. Hence, when you need to remove solder, you can essentially substitute a soldering iron for virtually any other heated piece of metal.
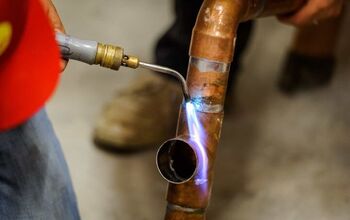
In a pinch, there are a couple of methods that can be done to reproduce the function of a soldering iron. A propane torch and two long, flat screwdrivers are the ideal tools to use for this. However, you’ll want to make sure that you choose screwdrivers that you don’t mind being discolored or covered in solder.
Do You Need to Hire a Professional Welder?
Get free, zero-commitment quotes from pro contractors near you.

How to Remove Solder Without a Soldering Iron
By using something other than a soldering iron to remove solder, you’ll be able to avoid spending unnecessary money on a tool that you may only need for a single job. With that said, let’s dive into our step-by-step guide for “how to remove solder without a soldering iron.”
Step One: Gather Your Materials
Since a soldering iron is really just a heated piece of metal, you can sub in something similar. For our purposes, collect two flat head screwdrivers – one you are comfortable with becoming discolored, and another that you don’t mind having solder adhered to – and something to produce the flame.
Also, the screwdrivers should be long enough to prevent you from burning yourself. In order to heat up one of the screwdrivers, make sure you have a propane torch handy. Or, you may find luck with a flameless heat gun.
Step Two: Heat One of the Screwdrivers
To begin, use the propane torch to heat up the end of one of the flat head screwdrivers. For best results, keep applying the heat until the tip of the screwdriver turns red. This step should be performed as close as possible to the solder you intend to remove. That way, you’ll be able to prevent the screwdriver from cooling down too much before you can get to the project area.
Step Three: Apply the Hot Screwdriver to the Solder
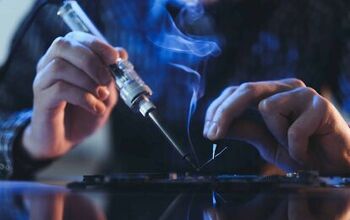
With one of the screwdrivers properly heated, touch the red-hot end to the solder you want removed. Use special care, if you’re working on a piece of electronic equipment, to avoid touching any of the surrounding circuitry.
Additionally, it’s recommended to perform this step on a level surface to avoid the solder from running when it melts. Carefully touch the tip of the flat head screwdriver to the “bubble,” or highest area of the solder. Then, press down on the solder lightly. This will cause the heat from the screwdriver to transfer to the solder, causing it to transform to a liquid form.
Step Four: Remove the Solder
With the other flat head screwdriver, touch the tip to the liquid solder. You’re essentially using it as a wick, as molten solder will quickly attach to the cold surface of the screwdriver.
This should be done immediately after it turns liquid and you’ll want to move quickly to remove it successfully. If done correctly, the solder will adhere to the end of the cold screwdriver and can easily be lifted off of the surface.
Note: Do not use the cold flat head screwdriver to chip away or pick at the solder if it cools down too rapidly. If you are working on an electrical circuit you could cause irreversible damage to the area surrounding the solder.
Step Five: Clean Solder Off the Screwdriver
With the solder successfully removed and transferred to the cold screwdriver, you’ll want to get it off. To do this, use the propane torch to heat up the solder and return it to a liquid form again. Once it is liquid, use an old rag to carefully clean it off.
Make sure to hold the screwdriver away from your body while doing this to decrease the risk of getting hot solder on your clothing or your skin.
Alternative Tools for Removing Solder Without a Soldering Iron
Fortunately, as indicated in the steps above, you can solder or remove solder without the need for a soldering iron. If you don’t have one on hand, you’re not completely doomed as there are plenty of other tools that can be used along with almost any heat source.
For best results, steel tends to be the best option for an impromptu tool. In addition to screwdrivers, you can also use nails, steel wire, and Alan wrenches for emergency soldering work. Simply heat the wire or other steel material over an open flame for roughly 20 to 30 seconds and then proceed as you normally would with soldering or removing solder.
While this may take more time and not be as efficient, it can work in a pinch. It’s important to note that when doing any sort of work around excessive heat and an open flame, always take the necessary precautions to protect yourself.
Safety Precautions
Although you’re not using a soldering iron, you should still use care when removing the solder. The temperatures created by heating up the screwdriver and solder can be very dangerous. To prevent burns or other safety hazards, consider the following safety precautions:
- Never touch the end of the heated screwdriver. After heating it with the propane torch it’s going to be very hot (roughly 400 degrees Celsius) and will burn.
- Always conduct soldering work in a well-ventilated area. This includes opening windows or doors and possibly installing fans temporarily.
- Perform the work on a surface that is nonflammable and cannot be easily ignited. Also, wear clothing that is nonflammable.
- To prevent burns from hot solder, wear a long sleeve shirt, long pants, and closed-toed shoes.
- Goggles, face shields, or safety glasses must also be worn when performing any sort of soldering work.
- If you are removing lead solder, it must be disposed of properly. Lead soldering waste is hazardous and must be placed in a container with a lid. Do not place this in your regular trash can. Lead solder needs to be disposed of as hazardous waste.
If you do accidentally touch the tip of the heated screwdriver, immediately cool the affected area with cold water for 15 minutes. If the burn covers an area that is larger than three inches across, seek medical attention.
Related Questions
How do you remove old solder?
As solder gets older, it can become increasingly more difficult to turn into a liquid state. However, modern solder still melts the same way as old solder did, meaning both can be removed the same way. By applying a new layer of solder over top, eventually, the heat will start to melt the old material underneath. Then, you can remove it using a standard desoldering technique.
Can I remove solder without a wick?
While using a wick to remove solder is helpful, it can be done without it. Essentially, you need anything that can absorb the molten solder, whether it’s a wick or something else. In fact, any stranded cabling should do just fine as a homemade wick. Or, for something a bit more efficient, dip your homemade wick into some solder flux before you start using it.
How do you remove solder flux?
Depending on the solder that you use, you might detect some flux buildup around the area. While flux is generally harmless and can be left there, you may want to clean it off.To remove flux, use one of the many chemical cleaners specially designed for flux on the market. They are all found in aerosol cans, similar to shaving cream or hairspray. Simply spray the product on the area and use a stiff brush to remove and a cotton swab to dry up any residue.
Do You Need to Hire a Professional Welder?
Get free, zero-commitment quotes from pro contractors near you.
Wrapping It Up
Although using a soldering iron to remove solder tends to be the most efficient method, it isn’t your only option. Whether you need to do some emergency solder removal or simply don’t want to spend money on a tool you’ll only use once, the work can be done with a few basic tools you likely already have in your toolbox.
By heating up one flat head screwdriver to use as an alternative to a soldering iron and another cold screwdriver as a wick, you’ll be able to effectively remove solder from any surface. Work quickly, carefully, and as close as possible to the soldering area for best results.

Jessica considers herself a home improvement and design enthusiast. She grew up surrounded by constant home improvement projects and owes most of what she knows to helping her dad renovate her childhood home. Being a Los Angeles resident, Jessica spends a lot of her time looking for her next DIY project and sharing her love for home design.
More by Jessica Stone


![10 Most Dangerous Neighborhoods in Baltimore [Updated]](https://cdn-fastly.upgradedhome.com/media/2023/07/31/9075655/10-most-dangerous-neighborhoods-in-baltimore-updated.jpg?size=350x220)

