


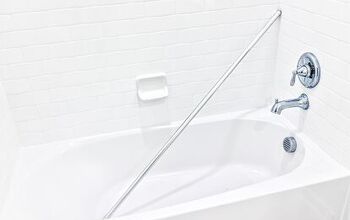
How To Remove A Bathtub Without Damaging The Tile (Do This!)
From time to time, the bathroom can use a little bit of a renovation. That project can be as simple or complicated as you like and one of the easiest ways to change things up is to change out the bathtub for a new one.
Removing the tub isn’t as simple as it seems, though. So, how can you remove the old tub without doing damage to the tiles? Avoid using any heavy equipment or putting additional force on the tub, for starters. Make sure to cover the tile as well to prevent scratching and gauging. And if you can get the tub out through the bathroom door without breaking it, that’s ideal as well.
Do You Need Bathtub Installation or Replacement?
Get free, zero-commitment quotes from pro contractors near you.

Step 1: Measure
Start by measuring the width, length and height of the old tub. Make sure that you get the very widest points to avoid any potential difficulties. Then, measure the doorframe from top to bottom as well. It is imperative that your measurements be accurate for easy removal.
The idea here is to see if the old tub can be removed without needing to be broken. Having to break the old tub down can be problematic. For one, it’s a much larger cleanup effort. For two, those pieces could potentially damage the tiles of your bathroom floor. So know if you can move your old tub out in one shot before doing anything else.
Step 2: Removing the Door
If your measurements don’t work, taking the door off may be the only option. Unscrew the door from the hinges using a screwdriver if the tub is too big to fit. Make sure that you put the door somewhere out of the way so that it doesn’t fall during the moving process.
Be certain to close the hinges on the doorframe before moving forward. Also, make sure that there are no screws sticking out as they can hurt quite a bit if you get caught on them. The door is now ready for the tub.
Step 3: Clear Obstacles
Should there be any potential obstacles, they will need to be removed. In smaller bathrooms, that could even mean removing the toilet to get more room for removing the tub. Having to maneuver while carrying the tub can be difficult and dangerous, so make it all a little easier on yourself.
Step 4: Cover the Tiles
Lay down a layer of cardboard over your bathroom tile. Once the cardboard is down evenly, cover that with a layer of plastic sheeting. Tape all of the edges and corners down so that it doesn’t move or come up during the removal of the tub.
Make sure that your coverings don’t overlap with the caulk at the base of the tub. You will need to remove the caulk and the covering can get in the way or shift while moving.
Step 5: Shut Off the Water
With a protective layering in place, it is now time to prepare to move the tub. Start by shutting the water off. With the water off, unscrew the knob covers for both the cold and hot water knobs. Do so carefully to avoid breaking or damaging them.
With the knobs removed, insert a screwdriver down into the opening of the downspout, turning the downspout as you go. Keep unscrewing until the downspout finally comes off completely. Store this hardware in a bag if you plan on selling the tub, otherwise, toss it out when you throw out the tub.
Step 6: Removing Pipe Components
Now that the downspout has been addressed, it is time to unscrew the overflow components. Unscrew the overflow pipe, the valve cover, and the waste trap. A pipe wrench should work just fine for this purpose.
When you’ve removed each of these components, unscrew the locking nuts. Make sure that you hold the drainpipe in place with an adjustable wrench as you complete this step.
Step 7: Cut Old Pipes
The next step is to cut through the old overflow pipe at the wall. A handsaw should work fine for this, but a battery or electric saw should work fine as well. Older pipes tend to be made of tougher metals and need a blade that can cut through them.
For projects like this, go with a metal-cutting blade for iron or a masonry blade for cast iron pipes. These will be able to cut through any kind of old piping with ease and little stress and strain during the process.
Step 8: Unscrewing the Water Lines
The water lines need to be unscrewed from the faucet at this point. Use a spanner to safely and carefully remove those water lines as we will need them for the new tub.
As for the pipes near the tap tails, you can use something like a circular saw if you aren’t able to unscrew them using a screwdriver. If you can remove components by hand, try that method first as it tends to be safer and more precise.
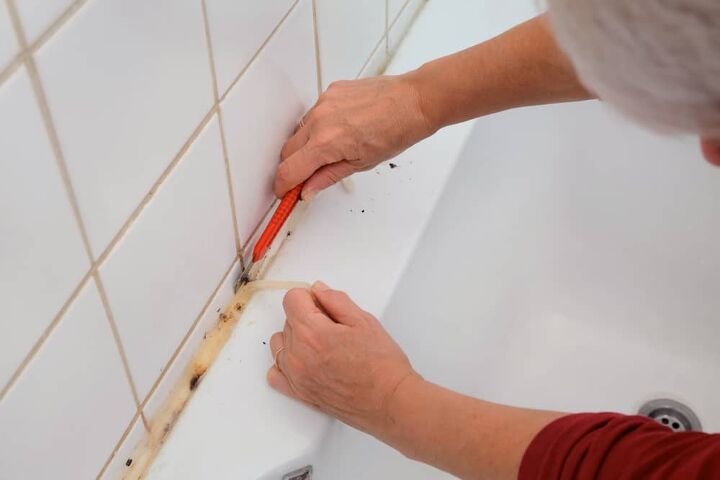
Step 9: Caulk Remover
Now we need to deal with the caulk between the wall, the tub, and the flooring. Use a thin layer of caulk remover on each of these layers. Also, be certain to use the caulk remover to get rid of the caulk around the downspout and faucet assembly.
Follow manufacturer directions as far as wait time for the caulk to soften. After the requisite amount of time has passed, use a utility knife to cut through the caulk. You may need to peel or scrape some of the softened caulk away from the wall, floor or tub, but make sure that it all gets removed.
Step 10: Pry Up the Tub
All of the lines have now been disconnected, the old pipes have been cut away, and the caulk has been removed, it’s time to pry the tub up. Carefully pry the tub away from the floor, inserting pieces of scrap wood underneath to hold it off of the floor.
Next, carefully pry the tub away from the wall, inserting more scrap pieces behind to keep it away from the wall. The idea here is to fit in enough pieces that the gap becomes wide enough to comfortably fit your hand in.
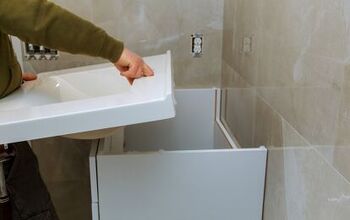
Step 11: Slide the Tub Away
The tub is now ready to be moved. Get a solid grip on the tub and move it away from the wall. Be extra careful so as to not gouge the plastic or have it drop off of the scrap wood. You want to keep sliding the tub out of the way so that the walls don’t become an issue when it comes time to remove it completely.
It’s also a good idea to put a carpet roller at one end of the tub, locking the wheels in place. That will prevent it from rolling and give the tub an extra layer of stability until the tub is removed. Lift up the tub at the opposite side until it comes to a rest on the carpet roller. You can then easily roll it through the doorway (if it fits) and out of the house.
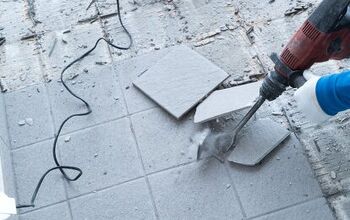
Step 12: Breaking Apart the Tub
If you are breaking apart the tub for removal, there is a safe and responsible way to do so. Lay a tarp or old blanket over top of the bathtub. Carefully but forcefully use a sledgehammer to break the bathtub apart.
Make sure to hit the sides in order to avoid hitting the tub from above. The force can transfer into the flooring, chipping, breaking, or otherwise shattering the floor tiles beneath. You can then pick the pieces of the tub up and dispose of it easily.
Do You Need Bathtub Installation or Replacement?
Get free, zero-commitment quotes from pro contractors near you.
Related Questions
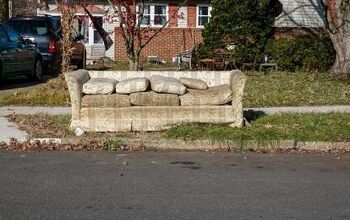
Does Removing a Bath Devalue Your Home?
In many modern homes, homeowners opt for a standup shower in contrast to a traditional tub. While standup showers tend to be easier to use and have a modern aesthetic quality, it isn’t advised that you remove the tub.Bathtubs are a must for families, particularly those with young children. Taking the bathtub out of your home can actually hurt the value of your home in the long run. So, if you plan on selling the home at any point in the future, removing the tub can be detrimental to that goal.
How Much Does It Cost to Remove a Tub and Install a Walk-In Shower?
Though it may seem surprising that your home’s value would suffer without a bathtub, it can do just that. Not only that, replacing the tub with a walk-in shower can be a very expensive endeavor. So, not only do you have to worry about devaluing your home, but you have to come up with the funds to make the shift, too.A walk-in shower will generally cost in the $1,000 to $3,5000 neighborhood. There are a few factors that come into play, though. The size, complexity, fixtures, and type of tile that you choose can all raise the costs of your project substantially. And that’s not even counting things like tear-out, new fixture, new plumbing pipes, and any custom carpentry that you plan to implement.

Ryan Womeldorf has more than a decade of experience writing. He loves to blog about construction, plumbing, and other home topics. Ryan also loves hockey and a lifelong Buffalo sports fan.
More by Ryan Womeldorf


![12 Washing Machine Brands to Avoid [with Recall Data]](https://cdn-fastly.upgradedhome.com/media/2023/07/31/9075781/12-washing-machine-brands-to-avoid-with-recall-data.jpg?size=350x220)


