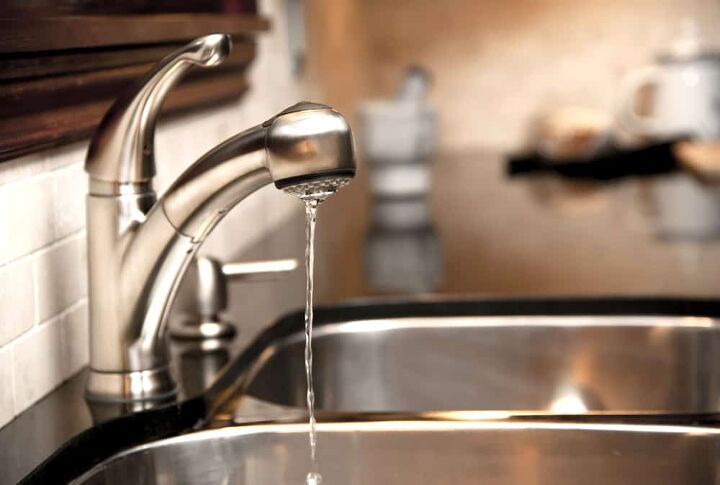
How To Remove A Kitchen Faucet Without A Basin Wrench (Do This!)
Even for the most amateur of do-it-yourselfers out there, you want to have a few essential tools in your toolkit. One such tool is a basin wrench, which also goes by the name of a sink wrench. If you don’t have one in your toolbox, it is recommended that you get one ASAP.
That said, you may face the need to tighten or remove a kitchen faucet without having one handy. So, what are you to do if you do not have a basin wrench at the ready? With a socket wrench, screwdriver, channel lock pliers, and a few other things, you should still be able to get the job done.
Do You Need a Faucet, Fixture, or Pipe Repair or Replacement?
Get free, zero-commitment quotes from pro contractors near you.

How to a Remove Kitchen Faucet Without a Basin Wrench
Step 1: The Tools for the Job
Again, it cannot be recommended enough that you have a basin wrench available when removing the kitchen faucet. But you are here because you don’t have access to a basin wrench, so alternatives are what we will provide.
When removing the faucet for either cleaning, fixing, or replacement, you have to have the right tools to get the job done. Just make sure that you have your new faucet on hand if you are replacing the old one before you take the old faucet off.
The tools. If you don’t have a basin wrench, a socket wrench is suitable. Like a basin wrench, a socket wrench is something that you want to have available in your toolbox as it is. You will also need the following:
- Ratchet spanner
- Screwdrivers
- Channel-lock pliers
- Water pump pliers
- Towels or a cloth
The more tools that you have available for the job, the quicker and easier it will be. When all is said and done, consider heading to your local home improvement store to grab what you may be missing. They will no doubt come in handy sooner rather than later.
Step 2: Turn Off the Valves
When you are ready to get the task underway, you need to make sure that both the hot and cold water lines are closed off. The last thing that you want is to get water everywhere, making a huge mess along the way.
Water valves. You will find the water valves underneath the sink. Turn them off so as to block off the flow of water to the faucet. You may want to have a bucket handy to catch any residual dripping that may take place after shutting off the valves.
No, there is no way to skip this step unless you want to get yourself and everything around you soaked. Take your time and make sure that you locate and turn the valves off before proceeding.
Step 3: Open the Spigot
Even if it seems like all of the water has exited the faucet, there is likely still some air pressure and a little residual water left inside. That leftover air pressure in particular can present a challenge if you don’t rid yourself of it.
Open the spigot. Before moving on to the next step, open the spigot to let that air pressure out. Give it a couple of minutes before moving on. By doing so, you ensure that the tap is lighter and a bit easier to maneuver as you go.
Step 4: Disconnecting the Water Piping
The water supply lines connect right to your kitchen faucet. Whether you are fixing the old faucet or installing a new one, cutting the flow of water is the first thing that you should do. This is also where having water pump pliers help.
Detach the faucet from the line. Using your water pump pliers, you need to disconnect the faucet from the water line itself. You can use improvised tools or even another pair of pliers, but water pump pliers help to prevent damage to the waterline.
Use the water pump pliers to hold each line in place, gently disconnecting them. Do not just torque on the water supply line. Since you are using alternative tools, extra care is required here. The last thing that you want is to damage the water line or the faucet and need additional parts or repairs.
Step 5: Removing the Mounting Screws or Nuts
With the water line out of the way, you now need to turn your focus to the mounting screws or nuts. What you have will depend on your model of faucet. The good news is that they are easily identifiable since they are what hold the faucet together.
Socket wrench. A socket wrench is the best tool for the job here. If the bolts are really locked tightly, try using a bit of grease or WD-40 to loosen up those stiff nut joints. Should you be staring down screws instead of nuts, then you can use the screwdrivers that you brought with you. You won’t really know what you are facing until you get down into it.
Step 6: Disconnect the Hose
Now that you have the screws or nuts removed, set them off to the side. You need to turn your attention to the hose and disconnecting it from the sink entirely. This step is relatively straightforward but use patience and care as always.
Clean the sink. Start by cleaning both the faucet and sink. Take a look at the faucet to see if there is any use to be had. If you are set on replacing it anyway, you can skip that part. Some faucets can be reused but if there is a crack or corrosion apparent, then you can just toss the old one out.
Disconnecting the hose. Disconnecting the hose is simple as there is nothing holding it into place. When installing the new sink, just follow all of the above steps for connecting it and you will have a new sink in no time.
Do You Need a Faucet, Fixture, or Pipe Repair or Replacement?
Get free, zero-commitment quotes from pro contractors near you.
Alternatives to a Basin Wrench for Basic Nut or Screw Tightening
Not everyone needs to completely remove their old faucet. Sometimes, there are slight, bothersome leaks that come from a loose handle or base. While you won’t need quite as many tools to implement a fix, having a basin wrench handy makes things all the easier.
Like the step-by-step guide above, however, you are likely here because you do not have a basin wrench available to you. Instead of throwing your hands in the air in frustration, you can instead turn to some of these household items to get the job done. But make sure that you go out and grab a basin wrench sooner than later.
Duct Tape
If you have heard the saying that duct tape can fix anything that’s because someone, somewhere has used it to fix a lot of things. Duct tape should be available for even the most basic of DIYers out there. You will no doubt need to use it several times throughout your life and it is as close to a do-it-all tool as you can have.
Tearing off strips. Start first by tearing off a section of duct tape that is about 12 inches in length. When you have your strip, tear that right down the middle. You are then left with a pair of 12-inch strips of duct tape. You can make a strong strip of tape by sticking one of the strips to the back (the side that isn’t sticky) of the other.
With your super-long strip of duct tape, wrap it around the nut in question. Make sure that you leave a tail of around 6 or 8 inches available so that you have something to grab onto. Press the tape firmly so that it adheres to the nut. Gently but securely pull on the tape to tighten the nut or remove it, depending on what you need. When you are finished, simply remove the duct tape and throw it away.
Coins or Zip-Ties
This is really going to test your ingenuity and DIY skills, but it is still possible. There are a couple of other makeshift tools that you will no doubt have lying around: zip-ties and coins. Either one will work in completely different ways.
Two coins. If you have two large coins, about the size of a quarter preferably, then you can either tighten or remove the nut in question. Just place the coins on either side of the nut, gripping them between the knuckles of your middle and index fingers to get extra grip. Twist slowly in the direction needed. If you are tightening the nut, make sure that it is snug before you move on.
Zip-ties. This is very similar to the duct tape trick from above, with fewer steps. Place the zip-tie around the nut, ensuring that you have a tight grip. With the tail of the zip-tie, you can pull to either loosen or tighten the nut depending on your need.
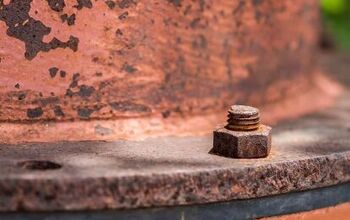
Other Nuts and Bolts
We are really getting down to the bottom of the DIY barrel here. When all else fails, you can look to some of the other bolts and nuts that you may have laying around. Use them to create a makeshift spanner.
Attach the used nut to one of the bolts and up against the nut that you want to move. Then, adjust by gripping tightly between the nut and the head of the bolt. Then, use the second nut so that you can create a connection between the bolts, turning your makeshift spanner in either direction.

Ryan Womeldorf has more than a decade of experience writing. He loves to blog about construction, plumbing, and other home topics. Ryan also loves hockey and a lifelong Buffalo sports fan.
More by Ryan Womeldorf