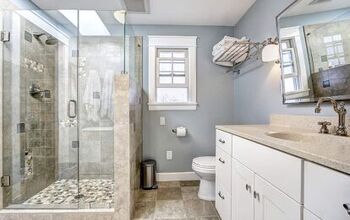
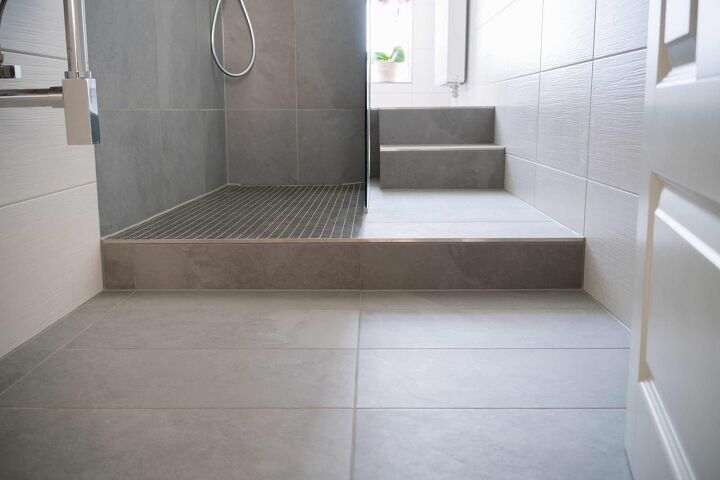
How To Retile A Shower Floor (Easy Step-By-Step Guide)
There can come a time where your shower or bathroom starts to look outdated. It can really drag the overall appeal and aesthetic of the home down. When that happens, it can require a change or an update to the bathroom. So, how do you retile a shower floor?
First, you will need to take out the old tiles and examine both the shower base and water barrier. If both are in good condition, then install the new tiles and made sure that you use tile spacers in the process. Then, put in the finishing touches and you’re all done!
This article will take you step by step through the process of tiling your shower. That way, you can create the space the way you want with your own style and characteristics to make your home your own.
Do You Need to Hire Tile Installers?
Get free, zero-commitment quotes from pro contractors near you.

Why It May Be Necessary To Retile A Shower Floor
Sometimes it can come down to more than visual appeal when replacing shower tiles. There can actually be a more practical reason to replace that tile once in a long while. This reason is mold and mildew.
Certain types of tile, like ceramic, can be particularly vulnerable to mold and mildew. This can start to stain the tile floor, making it look old, worn, and quite unsightly. Not only that, you don’t want mold of any kind in your home as it can lead to potential respiratory issues should be left unchecked.
Step 1: Take Out The Old Tiles
The first thing to do is get rid of those old tiles. If you have grout removing tools or a putty knife, you can take out the grout that is holding the current tiles together. You can actually reuse those old ceramic tiles if you want after they have been cleaned, just not in the shower.
When you’ve removed the grout, it is time to pry up the ceramic tile. This is done by sliding the putty knife as far as you can under the ceramic tile to give yourself a better chance of prying them loose. Most of them should come up pretty easily.
For those tiles that aren’t coming up easily, a little more force will be needed. Do this carefully as the ceramic tiles can be broken relatively easily. Use a small hammer to pry up those tougher tiles. When you get the first tile up, the rest should be easy to remove.
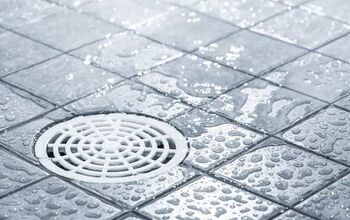
Step 2: Examine The Shower Floor Base
After you have removed all of the old tile, make sure to check out the base floor of the shower to look for any leftover adhesives. Any leftover adhesive can be removed using a commercial paint remover and some elbow grease using a scrub brush.
Before continuing on to the next step, ensure that the base floor is as even as it can be and free of any of those tile adhesives. A smooth surface is absolutely essential to the proper installation and adhesion of the new flooring tiles.
Repeat the process as often as is necessary to ensure that the base floor is smooth and clean.
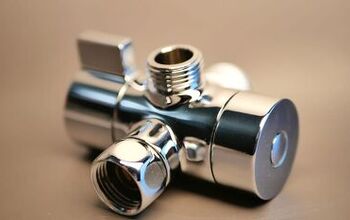
Step 3: Examine The Water Barrier
After the adhesives have been properly removed, it is now time to check out the condition of the water barrier in place on the shower floor. The water barrier is a layer of materials that is thin in nature and it is what keeps water from soaking down into the base of the shower floor.
If the water barrier looks fine, it is time to move on to the next step. If the water barrier is damaged or broken, you will need to repair or replace that barrier before moving on to the next step in the process.
Step 4: Thinset Mortar Application
When you get the thinset mortar, make sure to mix it specifically to manufacturer requirements. Don’t deviate from this under any circumstances. When the mixture has been completely mixed, apply an even coat of the thinset mortar to the area of the floor where the new tile will be installed.
A good rule of thumb: only apply the thin mortar to an area where the tiles can be installed in 15 minutes. The thinset mortar will set before you install the tiles and it will require removing before reapplication. Do not apply the thinset mortar over the entirety of the floor all at once.
Step 5: Installing The Tiles
Use an old comb to comb over the thinset mortar before installing the tiles. This is because the tiles will have a much better chance of adhering to thinset mortar that is coarse instead of flat. Again, we want to ensure that the tiles adhere as securely and flatly as possible.
Lay down your first row of tiles over the coarse thinset mortar. Make sure to tap them into place gently (remember, ceramic is prone to cracks and breaks) using a small hammer. You can put a flat board over top of the tiles to ensure that they have been placed evenly, pressing down all at once to ensure that they are resting in the adhesive properly.
Step 6: Make Sure To Use Tile Spacers
The goal is to install the new tiles as evenly as possible. This can be achieved by picking up a tile spacer from a local hardware store. Best of all, they are relatively cheap to pick up so don’t worry if you don’t already have one in your tool kit.
Lay down all of the tiles in that row and check for any anomalies that may have occurred, making the changes to them as you see fit. Remember, we are doing this one row at a time because the thinset mortar will set before you are able to install the new tiles across the entirety of the flooring. This will only make the job take that much longer and waste some of the materials unnecessarily.
Step 7: Putting In The Finishing Touches
Make sure that the thinset mortar is completely dry before applying the tile grout. Whatever grout that you decide on, make sure to follow manufacturer instructions properly to avoid any mishaps or issues with the grout itself.
Use a grouting trowel to apply the grout between each of the spaces that separate the tiles. Any excess grout should be removed using a wet sponge. When everything has been successfully wipe away and cleaned up, the shower tile has been properly installed and is ready for use.
Creating An Asymmetrical Design
Creating an asymmetrical design can be a beautiful aesthetic for a shower floor. But it is much the same as a mosaic or a jig-saw puzzle. It requires a lot of planning to ensure that the tile is laid properly. It may take a little longer, but it creates a unique appeal that others cannot quite match.
Create A Grid
For any intricate or difficult installations, it is a good idea to grid everything out first. Put the design down on paper first using grid paper if possible. Since grid paper already is marked out into individual squares, this will make it far easier to map out and work with those geographical shapes.
You can scale the grid paper to the proper size of the shower flooring and then set the rest of the design out over the grid paper. Make sure that you follow the grid when tiling to ensure evenness and accuracy throughout the process. Deviating can result in some discrepancies that you may not have accounted for.
Do You Need to Hire Tile Installers?
Get free, zero-commitment quotes from pro contractors near you.
Some Additional Tips For Retiling Your Floors
- Bigger is easier, but it’s not always better. The larger the tiles, the easier it will be to install them. They are common for bathroom walls and great for kitchens as well as other rooms.
- Even if you can’t see it, it will still hurt you. If your subfloor isn’t flat then installation will not be successful. however, you can use a self-leveling compound for your subfloor as it’s super easy to install. You can also use plywood or cement backer.
- Rent a wet saw if you’re cutting corners. You’re probably going to have to cut tiles, so rent a wet saw beforehand. This will save you tile and let you cut the tiles perfectly. You can rent one or buy one from any home improvement store.
- Don’t rush. Take your time to ensure you get everything right. Yo don’t want to rush and have to go back to fix it later on. It’s better to get it all done the right way now.
- Butter the tiles if the trowel is jammed. If your trowel gets jammed in a corner or edge you can put some adhesive on the back of the tiles.
Our Takeaway
It’s great when you finally own your own home and you get to decorate it the way that you want to. Sometimes that means retiling your shower, which is a great way to put your own little design and spunk into the home. Follow the instructions in this article to properly retile your shower, you won’t be sorry!
Related Guides

Ryan Womeldorf has more than a decade of experience writing. He loves to blog about construction, plumbing, and other home topics. Ryan also loves hockey and a lifelong Buffalo sports fan.
More by Ryan Womeldorf