


How To Wire A Light Fixture With Red, Black, And White Wires
Installing a new light fixture looks to be a simple operation. Two wires to connect and hang the new light fixture. Then you take down the old light fixture and find a mass of white, black, and red wires. There is an instant flash of panic as you try and figure out how to wire the new light fixture. Which of the black, white, and red wires do you use?
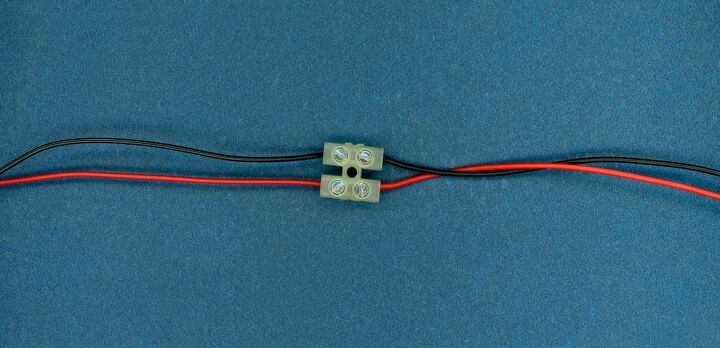
In general, if there is a red wire in a ceiling junction box where a light fixture is mounted, the red wire is the hot wire from the wall switch. Black wires are typically hot wires that are not attached to a switch. However, while this is the usual method, there are no strict standards for these color standards.
Working on the electrical wiring in your home is not something that many homeowners will attempt. A basic understanding of electrical systems, how electricity works, and the proper ways to make electrical connections is essential. Our tips, tricks, and step-by-step instructions will help you get your electrical project done safely and properly.
Related Content: How To Add A Light Fixture And Switch To An Existing Circuit | How To Add A Neutral Wire To An Existing Light Switch | How To Replace A Ceiling Fan With A Light Fixture | How To Wire A Bathroom Exhaust Fan With Light And Heater
Do You Need to Hire an Electrician?
Get free, zero-commitment quotes from pro contractors near you.

Wiring Light Fixtures – Not as Straightforward as you Might Think
Installing a new light fixture can be an easy to accomplish project under many circumstances. Many bathroom and bedroom light fixtures have only two wires in the ceiling box. These two wires are typically black and white. In this case, the installation is as easy as:
- Connect the black wire on the new light fixture to the black wire in the ceiling box.
- The white wire on the new fixture attaches to the white wire in the junction box in the ceiling.
- Attach the new light fixture, install the trim ring and light bulbs.
- Turn on the light.
That Pesky Red Wire – What’s the Deal?
You may find a third wire running into the ceiling box. There can be several reasons that a third red wire is in the junction box. The challenge is determining why the red wire is there and its purpose in the electrical circuit. There are several possibilities.
- The black wires in the box pass through the box and deliver power to other outlets or lights on the circuit. If all the black wires are connected, this is probably the case. There may be one black wire not connected to the others, which is more than likely the connection for the light fixture.
- The red wire my run from the wall switch to the light fixture. You may find a separate red wire where the electrical circuit for the ceiling box may include a ceiling fan.
- Occasionally, you will find a red wire in an electrical circuit for a light fixture with two or more switches located in different places. Two switches are not uncommon in long hallways or large rooms with several entrances. Another use of three-way switch installation is at the foot and head of stairs.
In general, if you encounter a red wire in a ceiling-mounted fixture box, the red wire is connected to the switch and is mean to control the light fixture.
Video: Important Tips for Installation
The Simplest Situation – Red and White Wires
If the circuit contains one light fixture and one light switch, the wiring is usually straightforward. Most homeowners can replace a light fixture in these situations. The steps are easy to accomplish.
Step 1: Have the Proper Tools
Installing a new light fixture is not tool-intensive. However, there are a few essential tools you will need.
- A Circuit Tester – These simple tools have two wires and LED lights. If you touch the leads on the tester to the wires or connections of a live circuit, the LED lights tell you if the circuit is live, how much voltage is present, and often, if the polarity of the circuit is correct.
- Screwdrivers – You will need both a Phillips screwdriver and a standard straight screwdriver.
- Electrical Pliers – Often called linesman pliers, these are handy when working with wire. The flat jaws allow you to grab wire securely and twist or pull the ends. These tools include a wire cutter which has obvious uses.
- A step stool or ladder – Use a good step stool or ladder to reach the light fixture. Trying to work while standing on a chair is a common cause of falls and injuries. Make sure you have a stable platform from which to work.
- A small flashlight – Remember, the light fixture in the area in which you are working is not. The non-working light fixture will leave you in the dark. A small flashlight or headlamp can make the job a lot easier and a lot safer.
We suggest that every homeowner’s tool kit include one other gadget. This tool is an electrical probe and is available at any big box home improvement stores, hardware stores, or tool centers. The probe can safely be inserted into the slot on electrical outlets and poke around inside electrical boxes and wiring. If the probe gets close to an energized wire, it will beep or buzz.
Step 2: Be Safe and Avoid Accidents
Under no circumstances should you ever try to install a new light fixture in an energized circuit. Even if you turn off the light switch, there may be wires in the electrical box that remain hot. The safest way to work on an electrical circuit is to turn off the power at the circuit breaker.
Before you disconnect any wires, use your electrical probe or your circuit tester to check the condition of the circuit. You may often find that turning a circuit breaker off does not affect the circuit you thought.
It is also a good idea to wear safety glasses. Working over your head into the ceiling may rain insulation, dust, and other debris down. A good pair of safety glasses will protect your eyes from possibly harmful material.
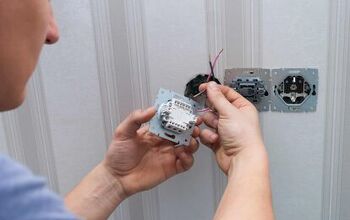
Step 3: Examine the Wiring on the Old Fixture
If the old light fixture was working properly, the best roadmap you can get for installing a new fixture is the old fixture. Examine the old fixture wiring before you remove the wires and take the old fixture down.
In this age of modern technology, we suggest that you use your cell phone to snap several pictures of the old fixture and its wiring at this point. The pictures give you a ready reference if something takes your attention away from your project.
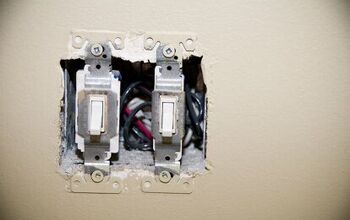
Step 4: Remove the Old Fixture
The installation method on the old light fixture determines how you should remove it. The wires may have been twisted or crimped together in many older homes and then wrapped in electrical tape. In this instance, the best way to remove the old light fixture is to cut the wires behind the connection. Be sure that there is enough wire left after you cut to make the new connections.
If the old light fixture connections use wire nuts, loosen the wire nuts by turning them counterclockwise and then untwist the wires. You may still need to trim the wires to have fresh, straight connections for the new light fixture.
Step 5: Wire the New Light Fixture
In most cases, you should wire the new light fixture in the same way as the old light fixture. If you have forgotten, refer to the photos you took earlier. In general, you will:
- Connect the white wire to the white wire in the junction box.
- Connect the black wire on the new fixture to either the black wire in the junction box or the red wire. If there is a red wire present, this is usually the wire to the light switch and should is the one you should use.
These steps are the typical method of wiring a light fixture where a red wire is present. However, in some cases, the wiring may be different. If there is any question about what is correct, you should find a licensed electrician to determine the proper wiring for your new light fixture.
When Things Get More Complicated
Several situations can complicate how to wire a light fixture when a red wire is present. In most of these situations, it is prudent to hire a licensed electrician to perform the installation. These special circumstances can include:
- Three-way or even Four-way switches in the circuit
- Multiple light fixtures on one circuit
- Light fixtures with dimmers or other controls in the circuit
- Electrical circuits intended for a ceiling fan installation
These types of circuits can get much more complicated. If you have any questions about installing the light fixture, contact your electrician and ask his advice or make an appointment for the job.
Do You Need to Hire an Electrician?
Get free, zero-commitment quotes from pro contractors near you.
Getting the Lights Back On
The goal is to get the lights back on safely and efficiently. In most situations, installing a new light fixture is within the capabilities of most homeowners. It takes a little knowledge and some effort but can be satisfying and economical.
We hope this article gives you the insight and confidence to install your new light fixture with white, black, and red wires in the ceiling box. The old fixture can give you a roadmap, while a little knowledge of electrical circuits gives you confidence. We are sure you will soon have the lights shining brightly.

Dennis is a retired firefighter with an extensive background in construction, home improvement, and remodeling. He worked in the trades part-time while serving as an active firefighter. On his retirement, he started a remodeling and home repair business, which he ran for several years.
More by Dennis Howard


![How Much Weight Can a 4×4 Support Horizontally? [It Depends!]](https://cdn-fastly.upgradedhome.com/media/2023/07/31/9070333/how-much-weight-can-a-44-support-horizontally-it-depends.jpg?size=350x220)


