How To Remove A Ceiling Fan (Quickly & Easily!)
Ceiling fans are great for providing comforting and efficient cooling. They are especially useful in smaller homes since they don’t have to take up additional space near the floor. Add a ceiling fan to your home and it can be a useful fixture for years to come.
After some time though, the ceiling fan in your living room may start to experience some mechanical issues. It may also become a poor match with the rest of your evolving home design. Busted and/or outdated ceiling fans need to be removed.
The method of removal varies slightly depending on whether you have a ball-in-socket style ceiling fan or a flush-mounted model. Ball-in-socket fans can be removed in one piece after the wire nuts and wires have been detached. Flush mounted models must be disassembled starting with the lights, blades, and wires before the body is detached from the ceiling.
The process of removing an old ceiling fan is a job many homeowners can handle. Find out how to do that job properly by checking out the information included in this article.
Do You Need Ceiling Fan Repair Services?
Get free, zero-commitment quotes from pro contractors near you.

Safety Tips to Follow Before Removing a Ceiling Fan
Broken ceiling fans have no place inside a home. You may be more tolerant of a ceiling fan that features an outdated design. After a while though, you may still get the urge to take it down.
Don’t rush to take down the ceiling fan just yet. Before starting that process, take a moment to follow some safety measures and protect yourself from any potential accidents.
Shut Off the Power to the Ceiling Fan
Shutting off the power is always a must whenever you’re working on a fixture that uses electricity. Look for the circuit breaker that controls the power to the ceiling fan and shut that off. If you cannot remember which circuit breaker leads to the ceiling fan, shut off the main breaker instead.
It’s also a good idea to check if the power is truly out. Use a voltage tester if you have one to see if there is any electricity flowing to the ceiling fan. Don’t start removing the ceiling fan until the electricity is completely gone.
Wear Protective Gear
You can never be too safe when you’re handling something that uses electricity. With that in mind, consider picking up some protective gear before you get to work. Rubber gloves and boots are highly recommended for this job.
Ask a Friend to Help
Removing the ceiling fan can be difficult if you’re working alone. The ceiling fan is heavy and you may lose your balance while trying to remove it. Ask a friend to offer some assistance and make the process of removing the ceiling fan safer and easier.
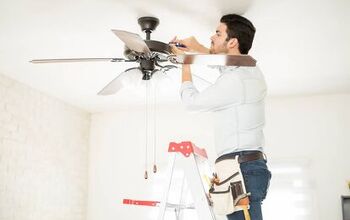
How to Remove a Ball-In-Socket Style Ceiling Fan
You’ll likely be dealing with either a ball-in-socket style ceiling fan or a flush-mounted model. For this section, let’s focus first on the ball-in-socket fans.
Step 1: Prepare the Items Needed for Ceiling Fan Removal
The two items you’ll need to remove your ceiling fan are a ladder and a screwdriver. A standard screwdriver will do. The ladder has to be fully capable of supporting your weight.
Don’t forget about the safety gear we talked about earlier. Now is the time when you should wear those items.
Step 2: Remove the Metal Canopy
Assuming you’ve already turned off the electricity, you can now climb the ladder and approach the ceiling fan. Start by removing the metal canopy that is covering the fan’s mounting bracket. Remove the canopy by unfastening the screws at its sides.
Lower the canopy next and just leave it on top of the fan. We can now move to the next step.
Step 3: Expose the Electrical Connections
With the canopy out of the way, you can now remove the ball from its position as well. Upon removing the ball, the electrical connections will be exposed.
Step 4: Unscrew the Wire Nuts
This is the most hazardous part of the removal process. You should consider wearing your protective gear now if you haven’t done so already.
At this point, you should now pull slightly on the exposed wires. Doing so will expose the wire nuts. You can now unscrew those wire nuts. Removing the wire nuts will allow you to detach the fan’s wires from the ceiling. With the fan’s wires taken out, you can place the wire nuts back on the ceiling wires.
Step 5: Detach the Ceiling Fan
Place one hand under the ceiling fan and the other on the ball. Start moving the ball up the fan pole until you can slide it out at the top. The ceiling fan should be detached at this time. You can now lower it gently and hand it off to your friend.
Step 6: Take Out the Mounting Bracket
The last step involves removing the mounting bracket of your old ceiling fan. Unscrew the mounting bracket and detach it from the electrical box. Finish up by returning the screws to the electrical box.
How to Remove a Flush-Mounted Ceiling Fan
Compared to taking down a ball-in-socket style ceiling fan, removing a flush-mounted model will take a bit more work. That’s because flush-mounted models have to be removed piece-by-piece. Follow the steps below to remove the flush-mounted ceiling fan.
Step 1: Get Your Tools Ready
Just like earlier, we need to start by preparing the equipment. Put on your safety gear, fetch your ladder, and take out your screwdriver as well.
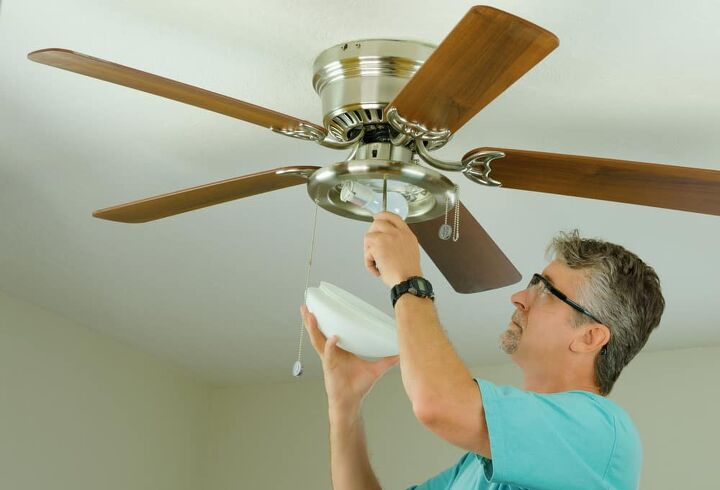
Step 2: Unscrew the Light Bulbs
Many flush-mounted ceiling fans come with light bulbs included. You’ll have to remove those light bulbs first before you can work on the rest of the fixture. Check if there’s a cover protecting the lights and set that aside first. Once the cover is removed, you should be able to unscrew the light bulbs by hand.
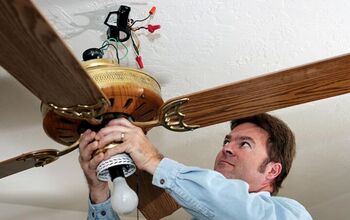
Step 3: Detach the Light Kit from the Ceiling Fan
Removing the light bulbs will give you more access to the light kit. Open the light kit up and you’ll see the wires and wire nuts in there. You need to unscrew those wire nuts.
The light kit can be detached from the rest of the ceiling fan once the wires and wire nuts are removed. Don’t set the screws of the wire nuts back in place just yet though as we have more work to do.
Step 4: Disconnect the Fan Brackets
Look closer at your flush-mounted ceiling fan and you’ll see that the blades are attached to brackets. Those brackets are then attached to the body of the ceiling fan. Your goal now is to remove those fan brackets.
Simply unscrew the fan brackets to detach them and the blades at the same time. Hand down the blades with the brackets attached to your friend.
Step 5: Let the Ceiling Fan Hang from One Hinge
To completely remove the flush-mounted ceiling fan, you will have to remove the wires. You’ll need to access the interior of the ceiling fan to do that. Start by supporting the ceiling fan with one hand and then find the screws that connect the body to the bracket. Remove those screws while still supporting the ceiling fan to keep it from falling.
You should now look for the screws on the mounting bracket that are found on the opposite side of a hinge. Remove those screws and allow the ceiling fan to hang from the hinge.
Step 6: Remove the Wire Nuts
Move the wires out of the way and look for the wire nuts. Unscrew those wire nuts to free the ceiling fan. Remember to place the wire nuts back in place after removing the ceiling fan.
Step 7: Slip the Ceiling Fan Off the Hinge
Grab the ceiling fan next and start slipping it out of the hinge it’s hanging from. You may also have to remove a safety chain before you can slip the ceiling fan out of the hinge. Hand the ceiling fan over to your friend after removing it.
Step 8: Take Out the Mounting Bracket
Finish up by removing the mounting bracket that the ceiling fan used. The mounting bracket can be detached from the ceiling fan by simply removing some screws.
Do You Need Ceiling Fan Repair Services?
Get free, zero-commitment quotes from pro contractors near you.
Related Questions
What Should You Do about Flickering Ceiling Fan Lights?
Flickering ceiling fan lights are fairly common. More often than not, the lights are malfunctioning because they need to be replaced. There are also times when the bulbs may come loose. To address the problem, use a ladder to access the lights and either replace them or screw them in tighter. It’s also possible that you installed the wrong bulbs so you may have to purchase appropriate replacements.If those fixes don’t work, the problem could be related to the ceiling fan itself or possibly even your wiring. Bigger repairs are needed to address those issues.
How Long Can You Expect Your Ceiling Fan to Last?
It may be a while before you’ll have to worry about removing your ceiling fan. Most ceiling fans can remain in good working condition for up to eight years and some even last up to 10. Remain diligent with ceiling fan maintenance if you want it to remain a fixture inside your home for many years.
Related Guide

We are a team of passionate homeowners, home improvement pros, and DIY enthusiasts who enjoy sharing home improvement, housekeeping, decorating, and more with other homeowners! Whether you're looking for a step-by-step guide on fixing an appliance or the cost of installing a fence, we've here to help.
More by Upgraded Home Team