Is It Safe to Remove Wattage Limiter in Ceiling Fans?
Interestingly, the first ceiling fans were made from palm leaves hung on the ceiling. Electric ceiling fans have been around since 1882. Philip Diehl used a sewing machine motor to power a fan he attached to the ceiling.
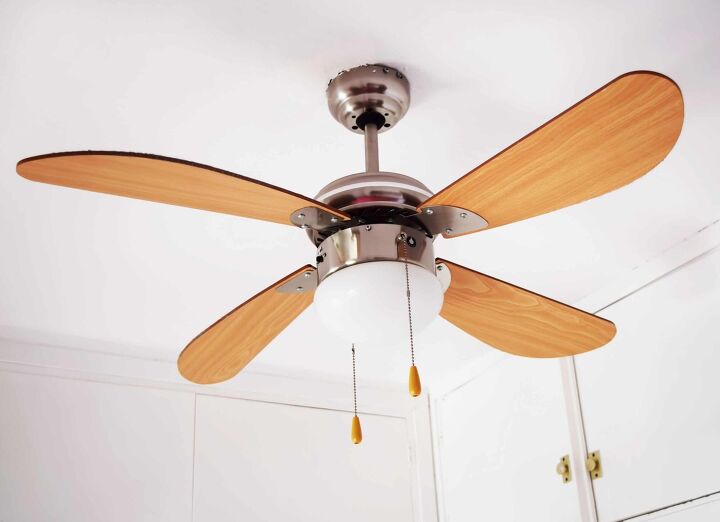
Now you can find a ceiling fan in almost every room of any house. The wattage limiter was developed by the Department of Energy (DOE) to conserve energy by limiting the watts your fan can use.
It is okay to remove a wattage limiter from a ceiling fan as this action does not pose a significant danger or threat to the home. Although, the Department of Energy does not recommend you do this. It is advised that you seek the advice of an Electrician before doing this.
Do You Need Ceiling Fan Installers?
Get free, zero-commitment quotes from pro contractors near you.

Ask An Electrician
If you ask two electricians about wattage limiters, you will probably get two very different answers. One of them may say that they are a safety feature to prevent the fan from overheating. But others will tell you that it limits the number of watts you can use, causing lights to not work if you go over a certain amount.
What’s Up with the Watts?
Reading the instructions that come with your ceiling fan, you will find a maximum wattage for the bulbs you can use in the light sockets. If you go over the maximum wattage of 190 watts, the wattage limiter is supposed to shut down the lights. However, in many cases, the wattage limiter is shutting down the lights no matter how many watts you are using.
The Revised Energy Policy Act of 2005
Reading the revised Energy Policy Act of 2005 report from the DOE, the light kits for any ceiling fan manufactured on or after 2007 has to have:
- Separate fan speed controls
- Adjustable speed controls
- Reversible fan action
- Be packaged with a bulb for each socket
- Meet the Energy Star Program Requirements
But after 2009, the lighting kit has to be set to not be capable of working with bulbs that add up to more than 190 watts. In addition, there was no more mention of the wattage limiter after the revision of the act in 2007. So, that means yes, you can remove that annoying wattage limiter in your ceiling fan.
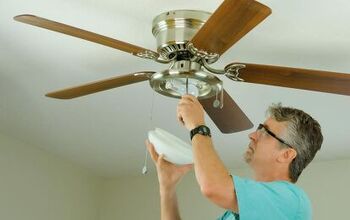
How to Remove the Wattage Limiter
First of all, whenever you do any kind of electrical work, make sure the electricity to that circuit is shut off. Whether that be to turn off the electricity completely or to just switch off the circuit breaker to the fan, you must do that before doing anything else.
Step One: Turn Off the Electrical Current to Your Fan
As stated above, make sure there is no electrical current going to your fan. This should always be step number one in any electrical job.
Step Two: Gather Your Tools
You will need a Philips head screwdriver and a pair of needle-nose pliers for this job.
Step Three: Take Off the Wiring Box
Use the Philips head screwdriver to remove the screws to open the wiring box of the lighting unit.
Step Four: Detach the Wires
Open the caps on the red and blue wires. Instead of wire caps, some fans have screw caps on the wiring. Go ahead and remove whatever caps are on the red and blue wires to detach the wattage limiter.
Step Five: Open the Limiter
The wattage limiter is the black or gray box that is attached to the red and blue wires. Open the limiter by using your screwdriver to pop open the tabs on the box and remove the black wire.
Step Six: Strip the Black Wire
Using your needlenose pliers, strip the casing from the black wire.
Step Seven: Reattach the Wires
Twist the black wire and blue wire together. With the screw cap or whatever cap you removed from the wires earlier, attach the black wire to the blue wire.
Step Eight: Clamp the Cap
Use the inside of the pliers to clamp the cap shut if you have a clamping cap. Otherwise, just twist the cap onto the two wires. Make sure there are no bare wires showing.
Step Nine: Make Sure Everything is Capped
Attach the white wire to the other white wires in the same way. Be sure that all of the wires are capped and that there are no bare wires showing anywhere.
Step Ten: Put the Wiring Box Back Together
Go ahead and put the housing back on the wiring box and replace the screws. Make sure they are tight. You can now turn your power back on to test the lights.
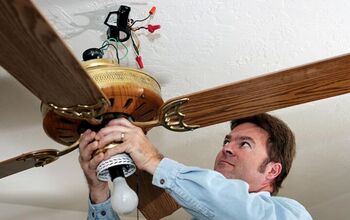
How to Remove a Ceiling Fan
Although fans are effective at circulating cool air throughout a room and can save you quite a bit of money on your energy bills, not everyone wants one in their home. Perhaps your ceiling fan has run its course or it simply doesn’t fit into your interior design. Whatever your reason is for wanting to remove a ceiling fan, here’s the steps you should follow to get it done:
- Turn off the circuit breaker connected to the ceiling fan motor. Once you’ve done this, make sure that the fan is completely off by checking the switch. If it turns on, make sure that you turned off the right breaker.
- Remove any attachments such as lightbulbs and lampshades. Removing both of these will reduce the weight of the fan, making it easier to lift off of the ceiling and prevent possible broken glass.
- Take off the ceiling fan blades. To do this, simply use a screwdriver to disconnect the hardware located hear the blade irons. This will make the rest of the removal process much simpler. Be sure to keep all of the screws in a safe place should you decide to reinstall the unit somewhere else.
- Remove the fan housing. First, take off the canopy trim right at the top of the unit. Some ceiling fans do not have this. At this point, remove all of the screws on the base unit and this should allow you to free the fan unit from the base plate.
- Disconnect the base plate. If you plan on installing a new ceiling fan, it may not fit the existing base plate. Whether you’re installing a new fan or not, you should disconnect the base plate. Simply use a screwdriver to unscrew the mounting screws and free the base plate from the ceiling.
- If needed, disconnect the electrical wires. Once you reach this step, you may need to disconnect three or four wires. To do this, take off the wire nuts and unhook those that are attached to the electrical system.
When working with electricity, always proceed with caution. If you ever feel uncomfortable in your abilities contact a professional.
Do You Need Ceiling Fan Installers?
Get free, zero-commitment quotes from pro contractors near you.
Related Questions
Why Would I Want to Remove My Wattage Limiter?
In many cases, the reason to remove the wattage limiter in your ceiling fan is that it is making the lights stop working. Other times it just makes the lights flicker. This can be due to a faulty wattage limiter or it could be that the wattage limiter is set for a lower wattage than it should be.Whatever the reason, the wattage limiter is no longer needed since ceiling fans are protected by a circuit or fuse that will stop the lights from working if you use too many watts.For example, if you use 60-watt bulbs in a ceiling fan light kit that has four or more bulbs, the lights will not work even without the wattage limiter. That is because ceiling fans are set to not work if you use over 190 watts.
With Air Conditioning, Why Have a Ceiling Fan at All?
Ceiling fans do more than just cool the air. In fact, ceiling fans are used all year long to circulate the warm air in the winter too. That is why they have a switch on the fan that lets you reverse the blade from clockwise to counterclockwise.
- In the summertime, having the blades move counterclockwise moves the air down so you get the cool air on your skin. This can make you feel up to 10 degrees cooler under the fan. Then you can turn your A/C down and save money.
- During the winter, having the blades move clockwise will pull the cooler air up and push the warm air down. You can save up to 15% on your heating bills with this feature because the redistribution of the warm air makes the room feel warmer.
Quick Tip: During the summer, the ceiling fan should be set to counterclockwise and in the winter, set it to clockwise.
How Many Blades Should a Ceiling Fan Have?Most ceiling fans have three to five blades. In a cooler room, the fewer blades the better because the rotation is harder in cooler weather. But it is more about the type of the blade than how many you have that makes the difference.
The position of the blades is also important since the angle is what helps the efficiency. An angle between 12 and 15 degrees is best. However, this may change depending on the size of the room and the height of the fan.
For home use, fans with four and five blades are the best because they are more balanced. This means they will push more air making less noise. Some fans have up to seven blades, but they use more power, making them less efficient.
Related Guides

I am a DIYer who loves writing about anything home-related. When I am not writing, you can find me studying for my PhD in Psychology, photographing nature, and swimming at the lake with my grandkids.
More by Patricia Oelze


![The 5 Best Angle Grinders – [2022 Reviews & Buyer's Guide]](https://cdn-fastly.upgradedhome.com/media/2023/07/31/9071326/the-5-best-angle-grinders-2022-reviews-buyer-s-guide.jpg?size=350x220)
![10 Best Zero Turn Mowers – [2022 Reviews & Ultimate Buyer's Guide]](https://cdn-fastly.upgradedhome.com/media/2023/07/31/9070522/10-best-zero-turn-mowers-2022-reviews-ultimate-buyer-s-guide.jpg?size=350x220)