


How To Take Down A Ceiling Fan (Quickly & Easily!)
If people knew how easy it was to take down a ceiling fan, those old-fashioned, gaudy ceiling fans from the 80s wouldn’t stand a chance. The truth is that you don’t have to be a DIY expert to replace your ceiling fan at home. You can march right up to the counter, buy the fan of your dreams, and install it yourself before the rest of the family even gets home.
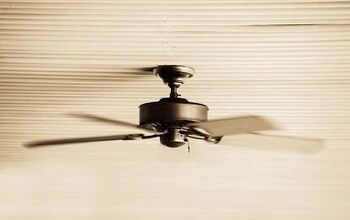
Ceiling fans have been a popular household appliance for over 100 years. While ceiling fans do not lower the temperature of a room, they can make it feel several degrees cooler. Room size and ceiling height are important factors when choosing the ceiling fan that is right for you. But style is also a factor– the evolution of interior decor may prompt some to replace old appliances.
To take down your ceiling fan, first make sure that the power is off. Remove any glass or light fixtures to reveal the light housing. Unscrew the light housing, then unscrew each fan blade. Once the ceiling fan is only connected to the ceiling by wires, remove the wire nuts. Separate the exposed wires, remove the ceiling fan, and replace all wire nuts so that there are no open wires.
Do You Need Ceiling Fan Repair Services?
Get free, zero-commitment quotes from pro contractors near you.

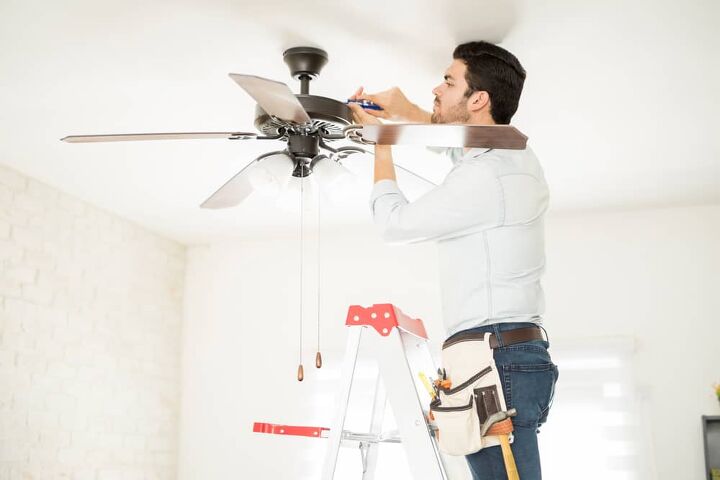
Taking Down a Ceiling Fan
There are many reasons to take down a ceiling fan. Whether your ceiling fan is broken or whether you want to remove it for aesthetic purposes, learning how to take down a ceiling fan could save you hundreds of dollars in the long run. While every fan is different, most follow a basic structure and allow for easy upkeep.
Tools Needed
- Battery-powered drill with Phillips head OR a Phillips screwdriver
- Voltage tester (optional)
- Extra pair of hands (optional)
Step One: Power Off
The most important step in removing your ceiling fan is to cut off power to that room. Turn off the switches in the room. If you have access to the circuit breaker, flip the switch off.
Make sure that the breaker you are turning off connects to the room you are working in. Do not assume that things are labeled correctly, especially if you did not label them yourself. Flip the circuit breaker as someone else stays in the room to confirm that you are flipping the correct switch.
For an added precaution, have a voltage tester handy to check for live wires once they are exposed. If you follow these safety precautions, taking down a ceiling fan is as easy (and risk-free) as baking a cake.
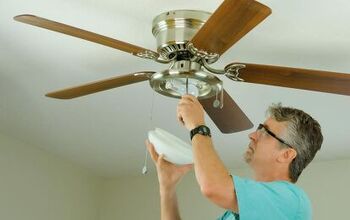
Step Two: Remove External Hardware
Once the power is off, remove any external hardware such as glass fixtures or light bulbs. Use one hand to support the fixture and the other hand to unscrew it.
Pro Tip: As you remove light fixtures, fasten each screw back into the mounting plate to make sure they don’t get lost.
Step Three: Unscrew the Light Housing
Remove the light housing from the ceiling fan by unscrewing the three screws around the housing base. Support the light housing with your free hand. Now’s the time to grab a friend for support– holding your arms up for that long can be tiring.
Step Four: Remove the Fans Blades and Canopy
Depending on the type of fan, you may have to remove each fan blade separately. Unscrew the fan blades and canopy to remove the entire fan body. Be ready to support the ceiling fan manually as it will be connected to the ceiling by only wires once you remove the mounting plate.
To remove the mounting plate or fan canopy, unscrew any screws and support the mounting plate as you push up and twist. With some guidance, the mounting plate should release, separating the last of the ceiling fan from the ceiling.
Step Five: Disconnect the Light Kit
Now that the wires are visible, check for live currents with your voltage tester. If you can confirm that the power is off, you can begin disconnecting the light kit.
Remove the wire nuts connecting the wires in your ceiling fan to the wires in your ceiling. Separate the conjoined wires from each other by twisting them counterclockwise. Replace any wire nuts on the remaining open wires.
Step Six: Check for Open Wires
After taking down the ceiling fan, the only thing left should be a hole in the ceiling. Make sure all wires are closed and covered by wire nuts. Tuck up into the ceiling until ready to install your new ceiling fan or light fixture.
What Can I Do After I Take Down My Ceiling Fan?
Install a Light Fixture
You can easily install a light fixture where your ceiling fan once was. Unwrap your new light fixture and take the wire nuts off the wires in the ceiling. Using wire cutters, strip the wires back on the light fixture so that ½” of wire is exposed.
Connect the wires accordingly— black connected to black, white connected to white, and any bare copper wires connected to the same. Cover paired wires with wire nuts and twist clockwise to tighten. Once all wires have been connected or closed, lift the fixture to the ceiling and secure it with screws.
Install a Replacement Fan
If you’re taking down your ceiling fan with the intention of replacing it with a newer one, check all your options first to ensure you are picking the right ceiling fan for your space. A good rule of thumb is to position the fan 7 feet from the floor. Make sure the blades have at least 30 inches of clearance on each side.
All ceiling fans need to be supported by the correct electrical box, joists, or brackets. Additionally, all ceiling fans must be grounded or be equipped with a grounding wire. Once all these requirements have been met, attach the mounting bracket to the electrical box. Thread the wires through the electrical box so that they are readily accessible.
On the replacement fan, clip the wires and wire covers so that ½” of wire is exposed. According to the manufacturer’s instructions, connect the wires from the ceiling fan to the wires in the ceiling. Secure with wire nuts and lift the canopy into place—screw to fasten.
Fill in the Hole
Once you take down your ceiling fan, you may decide that you prefer the way your room looks without one. If that’s the case, you’ll need to fill in the hole left from your ceiling fan.
Cut a square around the hole in the ceiling. Cut two scraps of wood so that they reach across the hole once inserted. Once the wood scraps are flush with the ceiling, screw them into place for your backing plate. With the new drywall piece, fill the hole by screwing the new plasterboard into the backing plate. Fill cracks with joint compound and mesh tape, smoothing down as you go. Sand and repeat until ready to paint.
Types of Ceiling Fans
Downrod Ceiling Fan
A downrod ceiling fan ensures proper airflow by putting several inches between the ceiling fan and the ceiling. For safety reasons, a downrod ceiling fan should always have at least 7 feet of space between the ceiling fan and the floor.
Downrod ceiling fans are popular in homes with high ceilings. As a general rule, fans should hang 7 to 9 feet above the floor, regardless of how high the ceilings are. Don’t forget to take the fan body into consideration since they’re about a foot high.
Flush-Mounted Ceiling Fan
A flush-mounted ceiling fan is mounted flush with the ceiling, without a downrod. Flush-mounted ceiling fans are ideal since they take up less space and add to the appearance of a bigger room. They have become more popular in recent years due to their minimal aesthetic.
The downside is that due to the fan’s proximity to the ceiling, flush-mounted ceiling fans have less efficient airflow than downrod ceiling fans. But if you have lower ceilings, a flush-mounted ceiling fan could be the right choice for you.
Helpful Considerations
Voltage Tester
Voltage testers check for live wires. They are important because even if you’ve switched the breaker off, another could be on unknowingly. A voltage tester works by detecting current or voltage when touched by a conductor or outlet. If the voltage tester beeps or glows red, you know that the wire is live.
It’s good to check your voltage tester against an outlet that you know is on. This way, you know it’s working properly before checking the wires in your ceiling fan.
Wire Nut
Wire nuts are small plastic connectors that can be placed over the ends of open wires and twisted to secure a tight connection. Take the two wires you would like to connect and hold them side by side. With your other hand, twist the wire cap clockwise to tighten. Wire nuts are completely safe, and they’re even reversible, making them a popular choice in DIY home repair.
Canopy
The canopy is the part of the fan that holds it flush to the ceiling. It acts as the fan base and will be the last part you remove from the ceiling.
Do You Need Ceiling Fan Repair Services?
Get free, zero-commitment quotes from pro contractors near you.
Related Questions
Can you convert a downrod ceiling fan into a flush-mounted ceiling fan?
Most downrod ceiling fans will allow you to convert to a flush-mounted ceiling attachment but check that all the screw placements match up. If the light kit doesn’t allow for easy removal, you may be better off buying a ready-to-install flush-mounted ceiling fan.
Are ceiling fans in style?
Ceiling fans have been around for a long time, and for a good reason. Ceiling fans are an efficient and cheap way to cool your home. Although ceiling fans have gone through several style evolutions, ceiling fans will remain a popular household appliance for now.

We are a team of passionate homeowners, home improvement pros, and DIY enthusiasts who enjoy sharing home improvement, housekeeping, decorating, and more with other homeowners! Whether you're looking for a step-by-step guide on fixing an appliance or the cost of installing a fence, we've here to help.
More by Upgraded Home Team


![10 Best Cordless Leaf Blowers – [2022 Reviews & Ultimate Guide]](https://cdn-fastly.upgradedhome.com/media/2023/07/31/9070789/10-best-cordless-leaf-blowers-2022-reviews-ultimate-guide.jpg?size=350x220)


