How To Paint A Tree On A Wall (A Step-By-Step Guide)
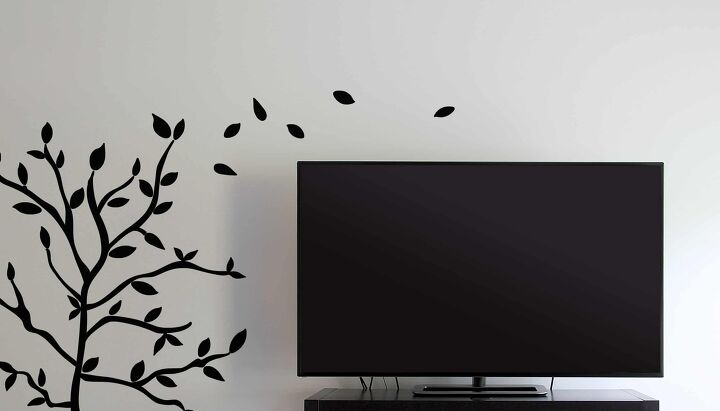
Are you thinking of painting a tree on your wall? You’ll instantly add interest to the design of any room in your home. Best of all, this simple project can be completed in a weekend. No special skills are needed, so why not give it a try?
There are only a few steps you need to take for this project:
- Assemble your tools
- Prepare your wall
- Draw your tree outline
- Paint your tree
- Add some leaves and any other decorations
If this will be your first time, don’t worry! In this article, we will explain, step by step, how you paint a tree on your wall with outstanding results.
Step-By-Step Instructions
Step 1: Assemble Your Tools
Before starting to paint, make sure you have everything you need available, including:
- A variety of paint brushes
- Paint
- Primer
- Sandpaper
- Pencil
- Chalk
- Painters tape (interior grade)
- Hobby knife
- Wallpaper edge roller
- Water and soap (to clean brushes)
- Clean water (to remove smudges)
- A drop cloth to protect your floor from drips and spills
- A stepladder (depending on the height of your tree)
Make sure all your tools and equipment are within easy reach. That way, you can relax and enjoy the fun part!
Step 2: Prepare The Wall
It’s essential to paint on a clean surface, so the first thing you want to do is wash your wall. A mild soapy solution will remove any traces of mold, dirt, oil, or grease. Let the surface dry thoroughly. Afterward, you’ll want to apply your primer.
Once you’ve applied the primer, let it dry before starting to paint your tree. Within 30 minutes to an hour, it may feel dry to the touch. However, it will probably need 3 hours to dry completely. In high humidity and cold weather, it may take a while longer.
Step 3: Outlining Your Tree
Before you start, stand back from your wall, and visualize the final painting. First, sketch out on paper how you want your tree to look. You can also use a different drawing or a photo of a tree. Once you’re ready, use a pencil to outline the trunk and main branches.
If the base color of your wall is dark, it may be better to use chalk. Don’t worry if your lines are a bit shaky – in nature, trees tend to be uneven.
Step 4: Tape Your Outline
To achieve clean and sharp edges, with no ‘bleeding,’ use painters’ tape or masking tape to create a stencil. Cover the outline of your trunk with tape, one section at a time. Each time you place a section of tape, re-draw the outline onto the tape.
Make sure the tape is stuck down well, so it’s closely attached to the wall. Running over it with a wallpaper edge roller can help.
Now, using your hobby knife, cut along the outline you’ve drawn on the masking tape. Carefully peel away the interior part, and the shape of the trunk and is revealed!
Step 5: Painting The Tree
The only limit to the colors you can use is your imagination. You can fill in the trunk and branches with a single color, or you can add depth and richness to your painting by using a combination. The best way is to start with the base color and add touches of secondary colors when dry.
The most typical choice of colors is:
- Brown
- Black
- Green
- Orange
- Yellow
You can even add notes of blue or gold—or any color which matches your rooms’ color scheme! Once you’ve filled in the trunk and main branches, let the paint dry completely before removing the painter’s tape.
Step 6: Add Your Leaves
There are several fun ways you can add leaves:
- Stencils: buy these or make your own, with paper and scissors
- Sponge: dab the paint onto the wall for an informal effect
- Freehand: take your inspiration from nature -no need for perfect shapes
You can cut leaves out of colored paper and stick them onto the wall. This is an ideal choice for a child’s room. As the seasons change, they can change the colors of the leaves. Or if you want it more lifelike, sponge dabbing is an excellent option.
Step 7: Let Your Tree Dry
A thin coat of acrylic paint will be touch-dry in about 30 minutes, but a thick layer will take longer. Let it air-dry thoroughly, being careful not to smudge or damage it. Keep kids, dogs, and other creatures away from the area!
Once dry, you have the option to seal your artwork. A clear, matte, or satin finish, non-yellowing varnish gives the best results. Apply a thin layer, spreading it about ½” past the outline of your tree.
Mistakes To Avoid When Painting Your Tree
- Leaves come in a variety of colors! Avoid using only one shade of green for your leaves.
- Trees are unique in the way they’re shaped. The branches aren’t supposed to be symmetrical, although this is your project. Do with it as you wish!
- It would look silly to have branches that are thicker than the trunk. When painting, this can happen accidentally. Make sure your outline is up to standard before painting to avoid this mistake.
- Shadows are what will make the tree lifelike. If you’re aiming for a naturalistic painting, be sure to include the shadows.
How To Make Your Mural Last Longer
If you want your mural to last longer, consider using an acrylic primer. This helps the paint stick to the wall more efficiently, and the results will be more permanent. Before applying the primer, it’s useful to sand the wall, but this is optional.
Also, apply thin coats of paint. Many people apply thick coats, which eventually chip away within a year or two. If you gradually add thin, multiple layers, each layer will adhere to the other. This creates a strong bond between the paint and the wall.
Additional Tips
Use finer brushes as you continue painting smaller branches. Let them become more and more delicate as you progress. Remember, you’ll be adding leaves, which will seem to cover them, so there’s no need to include too much detail.
Also, when you remove the painter’s tape, you should do so after the paint has completely dried. If you remove it too early, especially with acrylic, the paint will peel off along with the tape. This way, your hard work won’t be destroyed.
Related Questions
Which paint is best for wall painting?
To paint the larger areas, use interior household paint, which is the most economical choice. You could then use the artist’s acrylic paint for the details (and waterproof properties), but it’s an expensive option to use for the entire tree. Also, an eggshell sheen finish works best for murals. The eggshell sheen helps the tree blend into your wall better.
Can I paint a tree in the corner of my wall?
Yes, you can paint a tree in the corner of your wall. Just follow the same steps precisely, as outlined above. Make sure you step back from time to time to check that your outline works well in the space.The only difference is you will need a fine paintbrush on hand. Make sure you get into the cracks and crevices, so each part of the tree is painted.
Finishing Up
Once you’ve finished painting your tree, you can add all sorts of things like flowers, birds, animals, and even text! Use stencils (bought or home-made) or try freehand as you gain confidence and expand your design!
Enjoy yourself – go ahead and let your creativity flow. Take pride in the unique artwork you have created for your home. It will bring pleasure to you, your family, and friends for years to come!

Heather is a passionate writer who loves anything DIY. Growing up, she learned everything from home repairs to design, and wants to share her tips with you. When she's not writing, she's usually hiking or searching for her next DIY project.
More by Heather Robbins