


How to Level The Ground For a Pool Without Digging
Most people dream of having a pool in their backyard. It would be nice to go out your back door to swim, instead of going to a crowded public pool or lake. Except, there’s only one issue: You don’t want to dig up your yard. That’s okay! We have a way around that.
There are several steps to take for you to level a ground pool without digging. Those steps include:
- Ensure that your ground has less than a 2-inch difference between the shallow end and the deep end.
- Measure the difference between the unleveled area and the ground.
- Use sand to level the ground and compact it down.
- Mark 6-inches out from the radius of where you want to put your pool.
- Spread and seal crushed limestone for extra support.
As you can see, you can level the ground in just five easy steps. In this article, we will explain these steps in full. That way, you’re not left with any unanswered questions.
Before you do anything, you need to check your local building codes and ordinances. Usually, there will be a required distance between the center of your pool and your home. Also, certain states require a fence or safety barrier around your pool.
Knowing this information will help to ensure you’re leveling the right area of your backyard.
Do You Need Minor Grading or Resloping Services?
Get free, zero-commitment quotes from pro contractors near you.

Tools You Will Need to Complete Your Leveling Project
Here is a list of tools you will need to get the job done:
- Screw gun
- 3-inch screws
- 2″ x 4″ planks (length will depend on the size of your pool
- 1″ x 6″ plank (length depends on the size of your pool)
- A 2-inch square wooden stake
- Tape measure
- Sand (The amount depends on how much leveling you need)
- Tamper
- Water
- Metal Stake
- A string (6-inches longer than the radius of your pool)
- Sod cutter (If you have grass that needs removing)
- Spray Paint
- Hammer
- 4-inch nail
- Crushed limestone (Amount depends on the size of your work area)
- Shovel
- Rake
- Wheelbarrow
The shovel, rake, and wheelbarrow are for the clean-up phase of your project.
Step One: Measure the Difference Between the Shallow End and Deep End of Your Pool
First, you’re going to need to check how unlevel the ground is where your pool will sit. To do this, you need to screw two 2″ x 4″ boards together, lengthwise. Think of when close a hotdog bun; your boards should be screwed together just like that.
Although, your boards should be at least 1 to 2 feet longer than the diameter of your pool. Some people are very experienced in this type of work. If you find that this is too overwhelming or hard, look into hiring someone. It takes less than an hour to do and will cost around $15 to $20 to hire someone.
Step Two: Leveling
Place these boards on the ground where you will install your pool. Next, you will need to place a level on the boards to measure the difference from one end to the other.
You can purchase a level at Lowes or Home Depot for under $20 if you don’t already have one. Grab the end that is closest to the ground according to your instrument’s calculations. Lift it until your measurement tool says that the boards are level.
Now, measure the distance between the end of the plank and the ground.
Step Three: Use Sand to Level Your Ground for Pool Installation
Before you pour the sand, you will need to secure the boards to the ground. Drill a hole that is 3/8inch through the center point of your boards. Next, drive a metal stake through the hole into the land, securing the boards.
Now it’s time to pour your sand over the area. You will want to pour the sand at the point where you lifted your board to measure. The reason for pouring it here is to raise the ground until it is level.
You will know that it’s level when you rotate your boards, and they do so smoothly across both the sand and ground. Now that your ground is level, you will want to seal your sand. You can do this by wetting your sand and using a tamper. The tamper will compact your sand.
Do this around the entire circle of sand that you poured. You will know when the sand is ready when you walk on it, and there are no shoe impressions on the surface.
Step Four: Measuring Six Inches Out from the Radius of Your Pool
The next step is to take a metal stake and drive it into the ground. This stake should match up to where the very center of your pool will sit.
Now you will need to check the radius of your pool to make sure there’s nothing else in the way. You will need some string. Ensure that it is at least six inches longer than the radius of the pool.
Tie the string to the metal stake. Take the loose end of the line and walk it out as far as it will reach. The point the line reaches will need to be marked with some spray paint. Do this around the entire area.
While you are walking, though, make sure the string at the center is moving with you. You don’t want the middle to wrap around the stake. If it wraps around the metal rod, your measurement will not be accurate.
If there is grass within the marked radius, you will need to remove it. You can remove it with a sod cutter.
Now it’s time to clean up your workspace.
Step Five: Assemble Your Wooden Plank Level
Take a 1″ by 6″ plank of wood. Make sure the length is at least 6-inches longer than your pool’s radius. Center a 4’foot level one of the 1-inch sides of for your planks. You can use duct tape to secure it onto that point.
Drive a 4-inch nail halfway through the opposite 1″ side of your plank. The nail and level should be on the opposite ends. Replace the metal stake in the ground with a 2-inch square wooden stake. The top of the stake should be level with the territory.
Next, line the nail in your plank up with the wooden stake. Drive the nail into the middle of the wooden stake. This way, your plank can move around the area where your pool will sit.
Step Six: Level the Rest of Your Pool’s Radius
Now you need to find the lowest point of the pool again. Start the leveling process by pivoting the plank around the area. You need to bring the rest of the area down to the same level as the lowest point. Also, you may need to cut more grass or remove rocks.
You will know it is level when your board pivots without getting stuck. It’s important to note that you should not use soil during the leveling process. The soil cannot take the weight of your pool. Eventually, the ground will become unlevel, and you will have to fix the problem.
Step Seven: Add Limestone as Extra Support
Now you can add crushed limestone over the area in which your pool will sit. Spread the crushed limestone around your workspace. Next, wet it down, and tamp it down with your tamper. Ensure that your limestone is level with your sand base.
Once the limestone has hardened, you can add soil and extra limestone over it. Make sure that it’s flush with the rest of your ground. Congratulations! The space is now ready for your pool!
Other Options to Level Ground for a Pool
While the above method is comprehensive, affordable, and will result in a fully leveled space for your new above-ground pool, you can use something other than sand to level your pool without digging. Here is a list of a few alternatives:
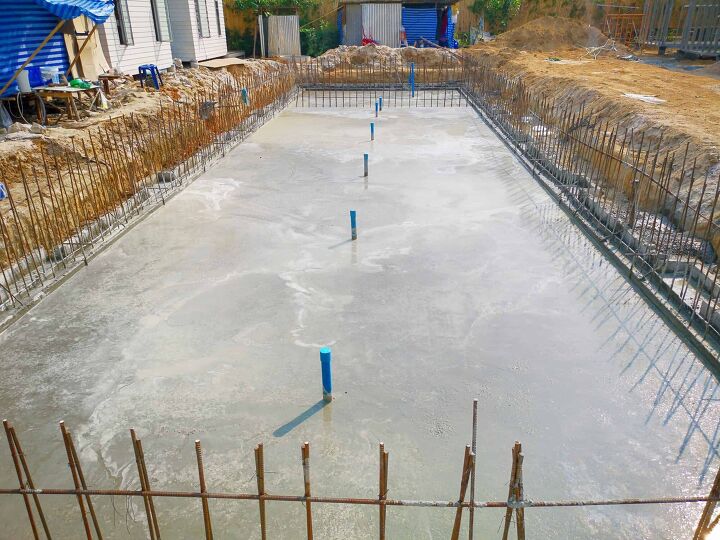
- Pour a concrete slab. Creating a smooth and level surface can be easily achieved with concrete. As an added bonus, the rough texture of concrete will ensure that your above-ground pool stays in place while it’s being used. Keep in mind, though, that you’ll need to use another layer between the concrete and the pool to prevent abrasions and pool leaks.
- Install solid foam. Placing foam directly on top of grass can create a level surface for an above-ground pool. These foam materials are generally made of polystyrene or polyurethane and are found in varying thicknesses.
- Use a rolling tamper on your ground. While this option can be effective, it does not entirely eliminate digging. There will be some digging required to clear grass and sod from the area.
- Use pavers. Pavers and patio blocks are often used for leveling. They are the ideal choice because of their durability.
- Install crushed stone. Crushed stone is often considered a better alternative to sand for level the ground below a swimming pool. It is much easier to use and reduces the risk of critters. However, crushed stone must be installed properly to avoid tears in your pool’s exterior.
These are the most common alternatives to sand for leveling your ground.
Related Questions
What Happens if the Ground is Not Level for a Pool?
It is extremely dangerous to put a pool on a ground that is not level. Not to mention, it won’t look very good.The extra weight onto the one side of the pool will cause it to collapse eventually. Anyone who is in the pool when this happens may get severely injured, if not killed. The good news is you don’t have to drain the pool in order to level it!
Can you install an above ground pool directly on grass?
While it can be done, it is not recommended to set up an above ground pool on a natural grass lawn. It is an especially bad idea if you intend to take down the pool during off-season, as the pool is going to kill your grass.
Do You Need Minor Grading or Resloping Services?
Get free, zero-commitment quotes from pro contractors near you.
Take Your Time to Level Your Ground Correctly
You’re probably excited to take a dip in your pool. Save yourself the hassle of re-leveling by taking your time. Ensuring you do the job right the first time will allow you to enjoy your pool for much longer!

Heather is a passionate writer who loves anything DIY. Growing up, she learned everything from home repairs to design, and wants to share her tips with you. When she's not writing, she's usually hiking or searching for her next DIY project.
More by Heather Robbins


![Finishing Basement Without Permit [Is It Really Illegal?]](https://cdn-fastly.upgradedhome.com/media/2023/07/31/9070078/finishing-basement-without-permit-is-it-really-illegal.jpg?size=350x220)


