How To Run A Propane Line From The Tank To The House (Do This!)

Appliances such as cooktops, furnaces, and water heaters can be powered with propane. If you want to reduce your electricity usage while continuing to use those appliances, securing a supply of propane is crucial.
Getting a propane tank and installing that on your property is a first step. After that, you can focus on running the propane lines into your home.
Take the fittings on the ends of the pipes you’ll use and connect them to the opening of the tank. Next, guide the pipe through a hole you made so it can reach the appliance that needs the propane. Secure the connection with the help of a flaring tool and a pipe nipple then test to see if it works.
Conveniently use more appliances inside your home by connecting them to your propane tank. Learn more about how to use those connections and the propane tank properly by reading on.
Related Content: How Long Does A 500-Gallon Propane Tank Last? | Is It Cheaper To Heat A Home With Propane Or Electricity? | How Much Propane Does It Take To Heat A 2000 Square Foot Home? | How To Hook Up A Propane Tank To A Wall Heater
Do You Need Gas Line Installation or Repair?
Get free, zero-commitment quotes from pro contractors near you.

Choosing Your Propane Tank
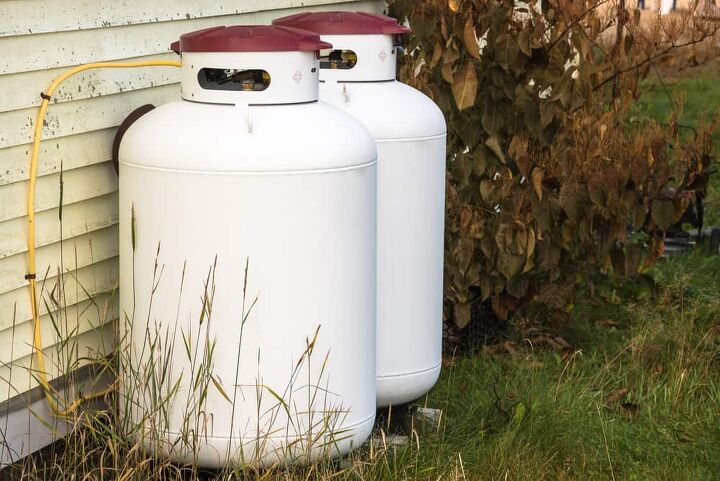
Before you start worrying about running propane lines into your home, you have to get your tank first. There are different options for you to choose from including 100-pound, 100-gallon, and 500-gallon tanks.
100-pound tanks are good for cooking and minor home heating, but that’s about it. The 100-gallon tanks can power more appliances although they may not suffice for daily usage of a furnace. If you’ll be using propane daily for heating and cooking, the 500-gallon tanks are best for you.
Regardless of which tank you settle on, you must now find room for it on your property. Remember that propane tanks cannot just be placed anywhere. Homeowners planning to get a 500-gallon tank installed need to keep it at least 10 feet away from a building opening. It has to stay the same amount of distance away from any source of ignition.
100-gallon propane tanks must be kept at least 10 feet away from a source of ignition. They should also be kept at least five feet away from the opening of a building. The 100-pound tanks should remain five feet away from an ignition source and three feet away from a building opening.
Prepare Your Property for the Propane Tank
After selecting your propane tank, you can now make preparations for its arrival. Get those preparations underway by finding a suitable spot for the tank. Keep the placement restrictions we already talked about in mind when figuring out where to put the tank.
Once you have the spot picked out, you have to decide how the propane tank will be installed. It can either be installed above ground or underground.
Installing the tank underground is safer, but it’s also more expensive because a trench will have to be created. If you’re planning to keep the tank above ground, laying down some cement may be needed so it doesn’t move around. The professionals will be the ones in charge of installing the tank whether you decide to go above ground or underground.
With the plans made, you can now secure the permit for the project. Typically, securing the permit is something that the professionals will be able to help with as well. The permit for installation is not the only one you’ll need. You should also get the permit to run the propane lines into your property.
Video: How to Run a Propane Line to Your House
How to Run the Lines from the Propane Tank into Your Home
Assuming that the tank has been installed and that you have the necessary permits, you can now work on the lines. You may have to do some shopping first though.
Step 1: Find the Right Pipes
Prior to creating the connections, you must first get your hands on the right pipes. Different kinds of pipes are used for gas connections including brass, copper, steel, and corrugated stainless steel.
Before you make any purchase, check with your local ordinances. Some areas place restrictions on which materials can be used as gas pipes. For instance, many places outlaw the use of copper pipes for gas connections.
The one quality you should prioritize while shopping for pipes is malleability. You may have to navigate some corners to connect the appliance to the tank. It would be helpful if the pipes you purchased can be bent to some degree.
Step 2: Prepare the Rest of the Necessary Tools
Now that you have the pipes, you should prepare the other tools you’ll need for this job. You’ll need a drill, a drill bit big enough to bore through a wall, a flaring tool, and a pipe nipple. A brush, a container, some soap, and water will also be needed later to perform a simple test.
Step 3: Connect the Pipes to Propane Tank
Get the pipe now. Find where the fitting is on your pipe and screw that on to the opening of the tank. Make sure that you screw the fitting tightly to secure the connection between the tank and the pipe.
Step 4: Drill a Hole in Your Wall
The next step involves drilling a hole through your wall. Find a portion of the wall close to the outside that you can also drill through safely. Start working through the wall with the suitably large drill bit. Remember to make the hole big enough for the pipe to fit. After creating the hole, clear it out so there’s no debris that could damage the pipe.
Step 5: Pass the Pipe through the Opening
You can now move the pipe through the opening you created. Check to see if the pipe will reach the spot where the connection has to be made. Adjusting the pipe is often required if it has to reach a lower spot. That may be necessary if you’re connecting the tank to a furnace in your basement for instance.
Step 6: Connect the Pipe to the Appliance
Bust out your pipe flaring tool and use it to tweak the form of the pipe. You need to make it compatible with the part of your appliance that will receive the fuel. After working with the flaring tool, the pipe should now fit into the opening properly. Use the pipe nipple to lock the connection in place.
Step 7: Test the Connection
The last step is to check the connection between the propane tank and the appliance. You can test it with the help of some soap and water. Mix the soap and water into a container and make sure that there are equal parts of both substances. Next, dip your brush into the soap and water mixture.
Turn off the appliance now, but open up the propane tank to allow the fuel through. You can now brush all the joints and connections with the soap and water mixture.
Look at the solution and check if bubbles start to emerge. If bubbles emerge, that means the propane is leaking. You’ll have to tighten the connection or swap out the pipe to resolve that problem.
Do You Need Gas Line Installation or Repair?
Get free, zero-commitment quotes from pro contractors near you.

Related Questions
Do You Have to Run the Pipes from the Propane Tank to Your Home Yourself?
No, you don’t have to connect the pipes from the propane tank to your appliances on your own. This is a kind of job you can entrust to the professionals if you so choose. Sometimes, the company that installed your propane tank may be able to create the connections too. Ask about that ahead of time if you want to use your propane-powered appliances as soon as possible.If the company does not handle that kind of job, that means you’ll probably need to hire a plumber. The plumber you hire may also provide the tools needed to complete the connections.
Why Is the Smell of Propane Lingering in My Home?
Is the smell of propane hanging around your home even though your appliances are turned off? That’s not a good thing because the lingering smell is a likely indicator that you have a leak.Perform the test from earlier again to confirm if you have a leak. After confirming that there is indeed a leak, work on tightening the connections right away. If the leak is caused by a damaged pipe or appliance, shut off the propane tank for now. Wait until you’ve made the necessary repairs or purchased the suitable replacements before using the propane again.
Related Guides

Gary Evans is passionate about home improvement. He loves finding out how to make improvements in the easiest, most practical, and most affordable ways. Upgrading his home kitchen is one of his ongoing hobbies. Gary is also a long-time content creator and enjoys spending his free time tending to his hydroponic vegetable garden.
More by Gary Evans




![How Much Weight Can a 4×4 Support Horizontally? [It Depends!]](https://cdn-fastly.upgradedhome.com/media/2023/07/31/9070333/how-much-weight-can-a-44-support-horizontally-it-depends.jpg?size=350x220)
![The 10 Best Table Saws - [2022 Reviews & Buyer's Guide]](https://cdn-fastly.upgradedhome.com/media/2023/07/31/9070645/the-10-best-table-saws-2022-reviews-buyer-s-guide.jpg?size=350x220)
![10 Best Scroll Saws for 2022 [Ultimate Reviews & Buyer's Guide]](https://cdn-fastly.upgradedhome.com/media/2023/07/31/9070684/10-best-scroll-saws-for-2022-ultimate-reviews-buyer-s-guide.jpg?size=350x220)

