


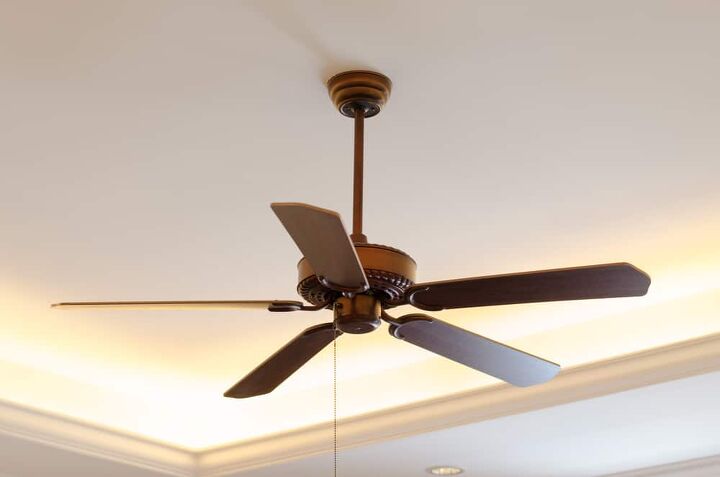
Is Your Ceiling Fan Humming? (5 Major Reasons Why & Fixes)
During the hot summer months, there’s nothing better than a cool airflow from your ceiling fan. While ceiling fans are known for being an excellent addition to circulate air, they may also cause a bit of stress. One constant issue with them is that they produce a barely audible humming sound that can drive you insane.
Ceiling fans hum when the junction box and down rod screws are loose, and you can tighten them to fix this. Inspect the motor housing mount for damage and debris and clean it with tweezers and cloth. Lubricate your ceiling fan motor with WD-40 if it continues to hum.
However, there are multiple types of problems that can cause a low humming sound. To eliminate the problem, you’ll need to identify the problem and fix it. Here is what we’ve found are the top five ceiling fan humming sounds;
Do You Need Ceiling Fan Repair Services?
Get free, zero-commitment quotes from pro contractors near you.

Are There Different Types of Humming Sounds?
Yes, sometimes humming noises can be drowned out by daily noise. However, once the house goes quiet at night, you may start to hear a low humming. What you need to ask yourself are these following questions;
- Do you hear a rhythmic humming or pulsing sound?
- Do you hear any grinding or clicking noises?
- If so, how frequent are the sounds apart from each other?
To determine the problem, you’ll need to identify the frequency and noise of the humming. The reason for this is because it can help you identify the problem. Once you understand what is wrong with the ceiling fan, you can then fix it. If the noise persists, then you may need to try another option to fix the fan.
Is it Normal To Head Ceiling Fans Humming?
Ceiling fans can produce a low humming noise when they are turned to their max settings. A humming noise isn’t common when the ceiling fan makes the noise at medium or slow settings. If this is your fan, then the sound is a huge red flag that something is wrong.
Luckily, you won’t have to trash the whole ceiling fan or replace it. There are plenty of fixes that you can do at home with minimal effort. Most of these fixes don’t include more than a few tools and are beginner-friendly fixes.
Five Major Reasons Ceiling Fans Produce Humming Noises
Investigating the noise and identifying the problem should only take a few minutes. Once you’ve taken note of what’s wrong, then you can begin to fix the ceiling fan.
Before you start, we highly suggest that you cut off the electricity to the room. The reason for this is because you may have to disassemble the fan. Touching any electrical currents can lead to shocks. To avoid this, shut the power off completely using your electrical control panel.
After you’ve shut off the power, you’ll need to take out some tools. Commonly used tools are a step ladder, screwdriver with multiple heads, and an angled screwdriver. In some instances, you may also need machine oil.
1. How to Fix Loose Screws
A rattling sound or low hum may be audible if there are a few loose screws. It’s not uncommon for screws to loosen over time. Hence, you’ll start to hear noises over a few months or years.
Step 1: Identify Loose Screws
To identify if the screws are the problem, you will need to tighten them. All screws should be around the junction box or canopy of the ceiling fan. Once you identify the area, you can start fixing it.
Step 2: Tighten Screws Around the Junction Box
Use your screwdriver and find the right screw head size. From there, you will need to twist the screwdriver clockwise to tighten the screws. Go around the junction box and make sure to tighten every screw.
Step 3: Tighten Screws Around the Down Rod
Make sure when tightening screws that you don’t forget the ones around the down rod. These are usually hard to spot if you aren’t up close. If these screws are loose, then they could be what’s producing some noise.
Step 4: Tighten Screws Around Motor Housing Base
Other areas to check are the ones near the lock slot or the motor housing base. These areas tend to cause the whole fan to rattle and vibrate. This is what produces a humming sound.
2. How to Fix Loose Wire Connections
When the ceiling fan is installed, an electrician will attach wires to the wing nut connector. The wing nut connector is located inside the upper bracket inside the junction box. A humming noise can be produced if the wires become loose or are not tightly in place.
Step 1: Open Junction Box
To fix this issue, you’re going to need to open the junction box and check the wires. Using a screwdriver, remove the opening of the junction box.
Step 2: Check For Loose Wiring
From there, gently tug on the cables and see if any are loose. Sometimes the wires end up creating noise because they aren’t aligned properly in the down rod.
Step 3: Organize Wiring
If this is the problem, you’ll want to gently pull the wires close together until they are neatly organized. To ensure they don’t create a rattling or humming sound, make sure they aren’t touching the edges of the junction box or down rod.
Step 4: Check Space Between Wires and Rod
Once you’ve realigned the wires, you can check to see if they are in place by running your finger against the outside of the rod. If there are no vibrations, then the wires were successfully aligned. However, vibrations mean that some of the wires may need to be moved again.
Step 5: Secure Wiring With Tape if Necessary
If the humming sound persists, then you may need to use electrical tape to secure the wires together. Also, check the wires located in the motor housing, as these may also produce noise.
3. How to Fix the Motor Housing Mount
The motor housing unit has the potential of creating a humming sound if any debris has fallen inside. This usually happens over time and can produce a slight humming noise.
Step 1: Remove Lid
To fix this issue, you’ll need to remove the motor housing mount’s lid. It can be a tedious process due to having to remove the entire fan. However, it’s the only way to assess the problem accurately.
Step 2: Check For Debris
Once you have the fan down and remove the lid cover, you can check the components. It’s normal for plastic bits or debris to fall off and get trapped inside the motor housing.
Step 3: Clean Out Debris
If you notice anything, you’ll need to clear out the area using tweezers and a dry cloth. Once you’ve cleaned out the motor housing, then you’ll need to put the ceiling fan back together.
4. How to Lubricate the Motor
All machinery will eventually need you to apply some oil to help the gears move efficiently. Over time, the ball bearings and motor pins will heat up. This, in turn, causes the motor to accumulate dust as it cools down.
Step 1: Gather Tools
To fix this issue, you’ll need to get a few tools; paper towels and WD-40. Spray a light coating of WD-40 onto the paper towels.
Step 2: Wipe Down Motor Components
Use the soaked towel to wipe down the motor components. If the towel doesn’t reach into all the crevasses then you can alternatively use a q-tip. Just be sure to not damage any of the components.
Step 3: Apply WD-40
Don’t apply WD-40 directly onto the surface. The reason is that it may oversaturate the device. If that happens, then the unit could end up making more noise and won’t work correctly.
Step 4: Test
To confirm if this worked or not, test the motor spin. If there’s no noise after you’ve applied the WD-40 and wiped it down, then you’ve fixed the problem. Additionally, to ensure this problem doesn’t occur again, wipe the motor down every three months.
5. How to Fix Warped Fan Blades
If you’re living in a humid climate, then chances are your ceiling fans may start to warp. Bathroom and ceiling fans made of wood are known to warp with repeat exposure to moisture. When this happens, it’s tough to notice because the blades may only be warped by a centimeter or two.
Step 1: Measure
To fix a bent or broken blade, you’ll need to use a measuring tape. Measure the distance between each of the blades. If the distance doesn’t match, then you’ll need to balance out the blades again.
Step 2: Balance Out Blades
Use a few pennies and electrical tape. Each blade that has been warped will need weight on the opposite side to balance the blade. Attach either one or two pennies on the top of the blade and secure with tape.
Step 3: Test
If the sound persists, then you may have a more complex issue at hand.
Do You Need Ceiling Fan Repair Services?
Get free, zero-commitment quotes from pro contractors near you.
Related Questions
Can a ceiling fan light make a buzzing noise?
Sometimes a humming or buzzing noise can be heard, but it’s not coming from the fan. If you’ve already checked the fan and attempted to fix it, then you may also want to check the light.Some light bulbs tend to produce a low buzzing noise. This can be mistaken for humming if you’re not up close to hear it.
The ceiling fan is still making noise, why?
If you’ve already tried the above fixes and the problem persists, then it could be how the fan is mounted. A mounted ceiling fan that’s tilted could end up causing a low humming noise. To fix this, you may have to unmount and reinstall the ceiling fan and make sure it’s leveled.
What do I do if the blades are warped?
If the blades of the fan are too warped, then you will have to replace the unit. Sadly, blades will need to be replaced after so many years of use. The humming sound will persist if the fan is too warped out of shape.

We are a team of passionate homeowners, home improvement pros, and DIY enthusiasts who enjoy sharing home improvement, housekeeping, decorating, and more with other homeowners! Whether you're looking for a step-by-step guide on fixing an appliance or the cost of installing a fence, we've here to help.
More by Upgraded Home Team


![The 5 Best Angle Grinders – [2022 Reviews & Buyer's Guide]](https://cdn-fastly.upgradedhome.com/media/2023/07/31/9071326/the-5-best-angle-grinders-2022-reviews-buyer-s-guide.jpg?size=350x220)


![12 Washing Machine Brands to Avoid [with Recall Data]](https://cdn-fastly.upgradedhome.com/media/2023/07/31/9075781/12-washing-machine-brands-to-avoid-with-recall-data.jpg?size=350x220)


