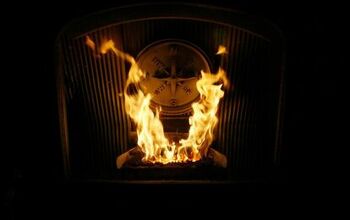
How To Install A Pellet Stove (Step-by-Step Guide)
Pellet stoves tend to be the more preferred version of a heating system. They’re energy-efficient, and they do a great job of keeping your space nice and warm. Not to mention, there’s just something about the smell of a pellet stove that adds some character to your home. The best thing about a pellet stove is that you don’t need to hire a professional to install it. You can do it yourself.
To install a pellet stove on your own, you will need to complete quite a few steps, including:
- Attaching a vent pipe
- Cutting a hole in your wall
- Positioning the pellet stove correctly.
- Securing the stove in place
This job is simple, but it’s not easy. Make sure you read the instructions thoroughly and take your time.
This article will provide you with everything you need to know to install your pellet stove. Moreover, we’ll discuss the do’s and don’ts of the project and give you step by step instructions to follow.
Do You Need Gas, Pellet, or Wood Stove Installation?
Get free, zero-commitment quotes from pro contractors near you.

Can I Install A Pellet Stove Myself?
While installing a pellet stove does need some DIY experience, you can do most, if not all, of this project yourself. It would help if you had carpentry skills to make vent holes in the housing. However, if you’re a DIY beginner, it is advisable to use a professional contractor along the way to do the more challenging aspects of the job.
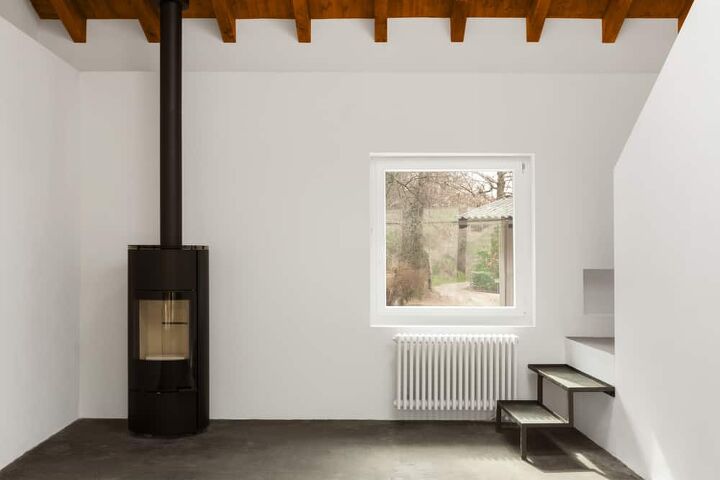
The Best Place For Installation
When you’ve purchased a new stove, it’s natural to want to use it as soon as possible and reduce your heating costs. However, you need to know where the best place to install the pellet stove. The location you place it is essential for safety and also efficient operation.
Next To An Exterior Wall
An exterior wall is a good choice because it will avoid the cost of installing ventilation. Typically, the stove will be installed approximately 1-3 inches away from the wall (check the manufacturer’s guidelines). This creates a vent area from the back of the stove to the wall behind it.
Next To A Staircase
Placing it next to a staircase is also a great option as a location for your stove. The unit will heat the entire property as heat will rise from it. The open space around the staircase permits heat to travel easily. However, it will need a blower feature and some type of warm-air ducted heating system.
Inside A Well-Insulated Basement
Another great place is inside a well-insulated basement. As with the staircase, the heat will rise and be distributed as the stove burns. It is something to consider if your basement is heavily used for laundry, DIY, or games.
In the same way, as if you locate it by a stairway, you’ll need to purchase a blower feature and create some type of warm-air ducted heating system.
Where Shouldn’t You Install A Pellet Stove?
The worst absolute choice for the location of your pellet burning stove would be a bedroom. This applies to any stove or burner. The reason? To start with, most local building regulations do not permit it. Even if they do, pellet stoves make quite a bit of noise when they’re operation fully, so it’s not convenient if you want a peaceful night’s rest.
Not to mention, if the pellet stove were to catch the bedroom on fire, your insurance policy most likely wouldn’t cover it. That’s because pellet stoves aren’t supposed to be in bedrooms. The room is too small for that amount of heat, and there’s no guarantee you can keep it as far away from other objects as is required.
Equipment & Tools Required For Installation
If you’re planning to install the pellet burner yourself, ensure you have all the correct equipment and tools you’ll need.
To install the pellet stove, you’ll require the following supplies:
- Construction adhesive
- Grinder with a diamond cutter
- Cordless drill with drill bits
- Utility knife
- Jig-saw
- Stud finder
- Stepladder
You may also need to purchase moving equipment if the stove is exceptionally heavy or bulky. Obviously, this will add to your installation cost if you don’t already have many of these items. Ensure you have enough help when lifting it as the last thing you need is a severe back injury.
Manufacturer Requirements
Before you take this on as a DIY project, check the warranty. Sometimes pellet stove warranties are void upon DIY installation. Therefore, you will have no choice but to hire a professional.
Steps To Install Your Pellet Stove
- Set your fireproof mat. Place the fireproof mat on the floor where you’re going to place the pellet stove. Position the pellet stove on the mat. Ensure that you maintain correct clearance from any combustible items or surfaces.
- Drill a ⅜-inch pilot hole through the house’s outside house wall. Temporarily connect the vent pipe and the stove, make sure the hole is aligned with the edge of the vent pipe.
- Mark the outline of the vent pipe on the wall. After you mark the outline, you can detach the pipe from the stove.
- Mark the diameter of the interior wall thimble. You’ll want to do this onto the wall, with dividers. Position the divider in the middle of the vent-pipe outline, then draw a circle on the wall.
- Cut the large outer circle with a saw. Repeat Steps 5 and 6, cutting an identical hole through the house wall.
- Make slats into the siding. Holding the exterior wall thimble steady, mark the spot where it contacts the house siding. Use a reciprocating saw to make slats into the siding at each location marked.
- Wrap the pipe in fireproof insulation. Use fireproof insulation to wrap the pipe, which passes through the thimble. Press the outside wall thimble against the wall, ensure it fits into the slots cut in the siding, and screw the thimble to it.
- Attach the elbow. The elbow and screen should connect to the end of the vent pipe.
- Cut a hole that is 2 ½ inches in the house wall. This will be the fresh air intake vent. Make sure the hole is at least 12 inches from the exhaust vent pipe. Make an identical 2½-inch hole through the inside wall.
- Insert the aluminum intake vent. Thread a 2-inch-diameter flexible aluminum intake vent through the outside hole and into your room. Attach the mounting flange on the adjustable vent to the siding
- Caulk the vent. Place a drop of silicone caulk around the 2-inch vent, just where it passes through the interior wall.
- Secure the mounting plate. Ensure that it is flush against the wall, using four screws.
- Caulk all vent connections. Use high-temperature silicone caulk to seal all connections to the vent pipe. Attach the exhaust pipe to the back of the stove.
- Attach the intake vent to the back of the stove. Use a nut driver to secure the hose-clamp connection.
- Secure an elbow to the end of the exhaust vent. Attach it to the interior wall thimble. Screw the elbow tightly to the vent pipe.
- Attach the stove to the electricity supply. Load up the hopper with wood pellets and ensure that the stove is operating correctly.
Related Questions
Do you need a chimney with a pellet stove?
Pellet stoves do not need a chimney. They can be vented by cutting a hole through the sidewall, allowing more flexibility in the installation process. Also, this will reduce the cost of installation overall.
Can a pellet stove be vented out a window?
You can install a pellet vent through a wall, but you have to use a vent wall fitting. This will help to give the clearances it needs from the plywood to the pipe. You can also sandwich plywood with insulation or another sheet of plywood.
What is the lifespan of a pellet stove?
Pellet stoves last between 15 and 20 years as long as it’s cared for properly.
Do You Need Gas, Pellet, or Wood Stove Installation?
Get free, zero-commitment quotes from pro contractors near you.
Double-Check Your Warranty
Perhaps the most crucial step in installing a pellet stove is checking your warranty. Sometimes manufacturers will require that a professional establish your pellet stove. If not, the contract will be void, and you will have to pay out of pocket to repair any malfunctions, even if it stems from faulty equipment.
Other than that, this process is very involved. Ideally, you should have some DIY experience. Although, if you don’t, that’s okay! Just make sure you take your time and read the instructions that came with your pellet stove. Your instructions, coupled with ours, will cover all the bases you need to do this job successfully!

Heather is a passionate writer who loves anything DIY. Growing up, she learned everything from home repairs to design, and wants to share her tips with you. When she's not writing, she's usually hiking or searching for her next DIY project.
More by Heather Robbins